

Soft and Tangy Lemon Rolls That’ll Make Your Kitchen Smell Like Heaven
I’ll never forget the first time I made lemon rolls. It was one of those rainy Saturday mornings when I was craving something sweet but didn’t want to leave the house. I had a bag of lemons sitting on my counter that were about to go bad, and I thought, “Why not turn these into something magical?” Three hours later, my kitchen smelled like a citrus dream, and I had a pan of the most incredible soft, pillowy lemon rolls that disappeared faster than I could say “second batch.”
That was five years ago, and I’ve been perfecting this lemon rolls recipe ever since. I’ve tried different dough techniques, experimented with various lemon fillings, and even attempted shortcuts that didn’t work out so well (more on that later). What I’ve landed on is a recipe that gives you bakery-quality homemade lemon rolls that are tender, tangy, and absolutely irresistible.
These aren’t your typical cinnamon rolls with a twist – they’re something entirely their own. The dough is enriched with a touch of lemon zest, the filling is a bright, buttery lemon mixture that doesn’t get soggy during baking, and the glaze? Well, let’s just say it’s the kind of lemon glaze that makes you want to lick the bowl clean.
Table of Contents

Why You’ll Love These Lemon Rolls
Trust me when I say these lemon rolls will become your new obsession. The dough itself is incredibly soft and pillowy – I use a combination of milk and butter that creates this amazing tender texture. But what really sets them apart is how the lemon flavor builds in layers. You get that subtle hint from the zest in the dough, then the bright burst from the filling, and finally that sweet-tart finish from the glaze.
I’ve served these at brunches, brought them to potlucks, and made them for lazy Sunday mornings when my family needs a little extra sunshine. Every single time, people ask for the recipe. My neighbor actually knocked on my door last month because she could smell them baking and needed to know what I was making.
The best part? They’re way easier than you might think. Sure, there’s some rising time involved, but the actual hands-on work is pretty minimal. And unlike some yeast breads that can be temperamental, this dough is super forgiving.
What You’ll Need
Let me walk you through the ingredients – most of these you probably already have in your kitchen.
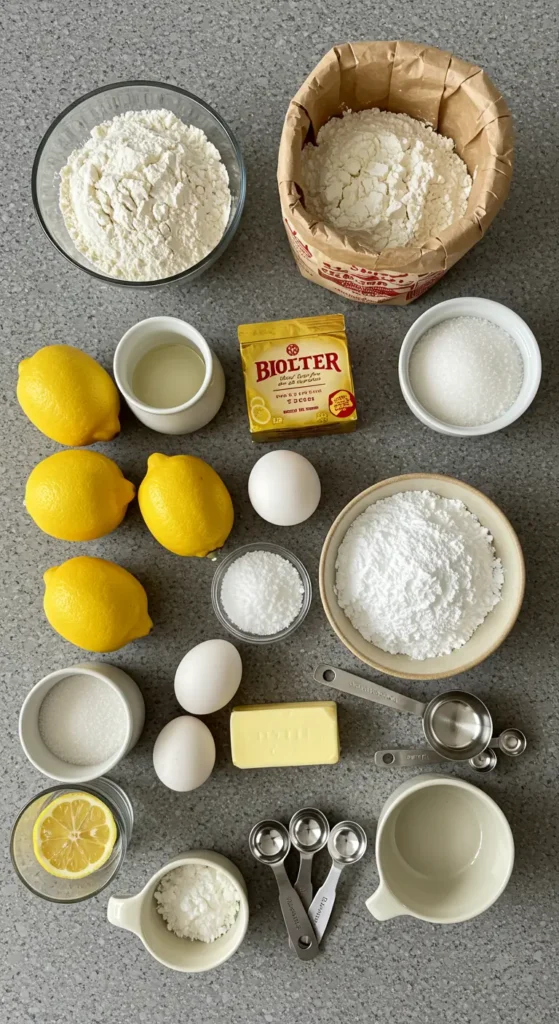
For the Dough:
- All-purpose flour (about 3½ cups): I’ve tried bread flour, but honestly, all-purpose gives you the perfect texture here
- Active dry yeast (one packet): Make sure it’s fresh – I learned this the hard way when my rolls didn’t rise
- Warm milk (1 cup): Not hot, just comfortably warm. Think baby bottle temperature
- Sugar (¼ cup): Feeds the yeast and adds a touch of sweetness
- Butter (6 tablespoons, melted): This is what makes the dough so tender
- Egg (1 large): Helps bind everything and gives that beautiful golden color
- Salt (1 teaspoon): Don’t skip this – it balances all the flavors
- Fresh lemon zest (from 1 large lemon): This is where the magic starts
For the Lemon Filling:
- Butter (6 tablespoons, softened): Needs to be spreadable but not melted
- Powdered sugar (¾ cup): Creates that perfect sweet-tart balance
- Fresh lemon zest (from 2 lemons): Go generous here
- Fresh lemon juice (3 tablespoons): Use the lemons you just zested
- Cornstarch (1 tablespoon): This prevents the filling from getting too runny
For the Lemon Glaze:
- Powdered sugar (1½ cups): Sifted, for the smoothest glaze
- Fresh lemon juice (3-4 tablespoons): Start with 3 and add more as needed
- Lemon zest (from ½ lemon): Because we can never have too much lemon
- Vanilla extract (½ teaspoon): Just a hint to round out the flavor
Let’s Make These Beauties
I’m going to walk you through this step by step, just like I’m standing right there in your kitchen with you.

Getting the Dough Ready
Start by warming your milk to about 110°F. I usually just pop it in the microwave for about 45 seconds, but you can do it on the stovetop if you prefer. Sprinkle the yeast over the warm milk along with a teaspoon of the sugar, give it a gentle stir, and let it sit for about 5 minutes. You’ll know it’s ready when it gets all foamy and bubbly – that means your yeast is alive and happy.
While that’s happening, grab a large mixing bowl and combine your flour, the remaining sugar, and salt. Create a little well in the center – kind of like you’re making a flour volcano. Pour in your yeast mixture, the melted butter, beaten egg, and lemon zest.
Now here’s where I made my biggest mistake the first few times: I tried to add all the flour at once and mixed too aggressively. Don’t do that. Start mixing with a wooden spoon, gradually incorporating the flour until you have a shaggy dough. It’ll look messy at this point, and that’s perfectly fine.
Turn the dough out onto a lightly floured surface and knead for about 8-10 minutes. I know it seems like a long time, but this is where the magic happens. The dough will transform from sticky and rough to smooth and elastic. You’ll know it’s ready when you can stretch a small piece thin enough to see through without it tearing.
Place the dough in a greased bowl, cover with a damp kitchen towel, and let it rise in a warm spot for about an hour. I usually turn my oven to 200°F for just a minute, then turn it off and stick the bowl in there. The dough should double in size.
Creating the Perfect Lemon Filling
While your dough is rising, make the filling. This is where I had to experiment a bit because my first attempts were either too runny or too thick. The secret is that tablespoon of cornstarch – it helps everything stay put during baking.
Beat the softened butter until it’s light and fluffy, then gradually add the powdered sugar. Mix in the lemon zest, lemon juice, and cornstarch until you have a smooth, spreadable mixture. It should be thick enough to stay put when you spread it but not so thick that it tears the dough.
Rolling and Filling
Once your dough has doubled, punch it down gently and turn it out onto a floured surface. Roll it into a rectangle about 12×18 inches. Don’t worry about making it perfect – rustic is totally fine here.
Spread the lemon filling evenly over the dough, leaving about a half-inch border on one of the long sides. This is your sealing edge. Starting from the opposite long side, roll the dough up tightly but gently. You don’t want to squeeze all the filling out, but you want it snug enough that it won’t unravel.
Using a sharp knife or unflavored dental floss (I know it sounds weird, but it works amazingly well), cut the log into 12 even pieces. Place them cut-side up in a greased 9×13 pan, leaving a little space between each roll for expansion.
Cover with a kitchen towel and let them rise again for about 30-45 minutes. They should look puffy and almost touch each other.
Baking to Golden Perfection
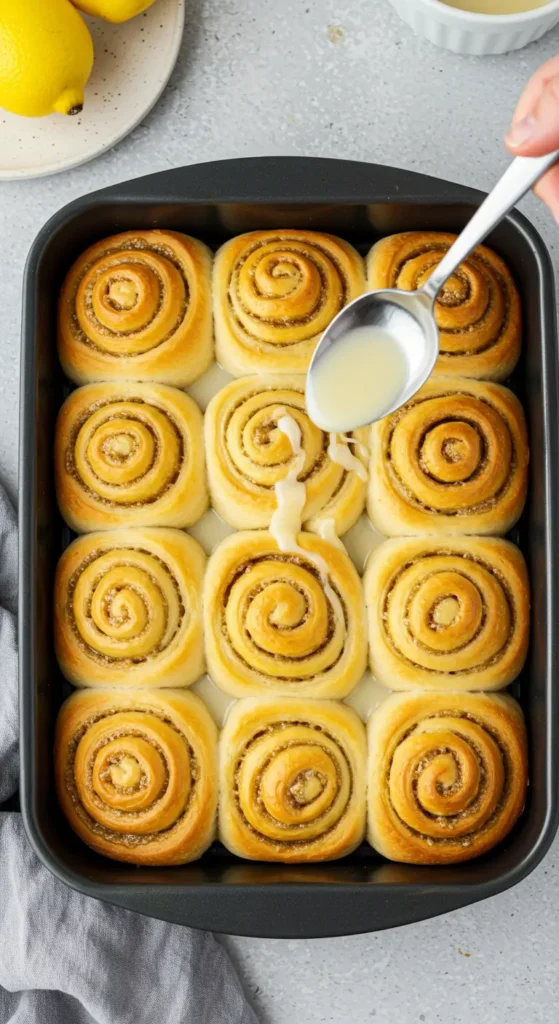
Preheat your oven to 350°F. Bake the rolls for 25-30 minutes, until they’re golden brown on top and sound hollow when you tap them. The smell alone will drive you crazy – in the best possible way.
While they’re baking, whisk together your glaze ingredients. Start with 3 tablespoons of lemon juice and add more if you want it thinner. I like mine thick enough to coat the back of a spoon but thin enough to drizzle nicely.
Tips from My Kitchen
Let me share some hard-earned wisdom from my lemon roll adventures:
Don’t rush the rising time. I know it’s tempting, especially when your kitchen smells amazing, but proper rising is what gives you those perfectly soft, fluffy rolls. Cold kitchen? Stick them in the oven with just the light on.
Fresh lemons are non-negotiable. I tried using bottled lemon juice once when I was out of fresh lemons, and it just wasn’t the same. The brightness and complexity you get from fresh juice and zest is worth the extra effort.
Room temperature ingredients are your friend. Take your eggs and butter out about an hour before you start baking. Everything incorporates so much better when it’s all at the same temperature.
The dental floss trick really works. If you don’t have unflavored floss, use a very sharp knife and gently saw through the dough rather than pressing down. This prevents squishing.
Serving Suggestions
These lemon rolls are incredible on their own, but I’ve discovered some fantastic ways to serve them. For a special brunch, I like to serve them alongside fresh berries and maybe some crispy bacon for that sweet-salty contrast. They’re also amazing with a cup of Earl Grey tea – something about the bergamot plays beautifully with the lemon.
If you want to get fancy, try serving them with a dollop of mascarpone or cream cheese that’s been whipped with a little honey. And for the ultimate indulgence, warm them slightly and serve with vanilla ice cream for dessert.
Storage and Reheating
These keep beautifully for up to three days covered at room temperature, though honestly, they never last that long in my house. If you want to freeze them, wrap individual rolls tightly in plastic wrap and freeze for up to three months.
To reheat, just pop them in a 300°F oven for about 10 minutes if they’re thawed, or 15 minutes if they’re frozen. They’ll taste like you just made them.
I’ve also discovered that these make fantastic French toast if you happen to have any left over. Just slice them thick, dip in your usual French toast batter, and cook as normal. The lemon flavor becomes even more concentrated and delicious.
These lemon rolls have become one of my signature recipes, the kind of thing people specifically request when they’re coming over. There’s something so satisfying about pulling that golden pan out of the oven and watching everyone’s faces light up. The combination of that tender, buttery dough with the bright, tangy filling is pure sunshine in baked form.
Whether you’re making them for a special occasion or just because you need a little extra brightness in your day, I promise these lemon rolls will not disappoint. They’re the kind of recipe that turns an ordinary morning into something memorable.