
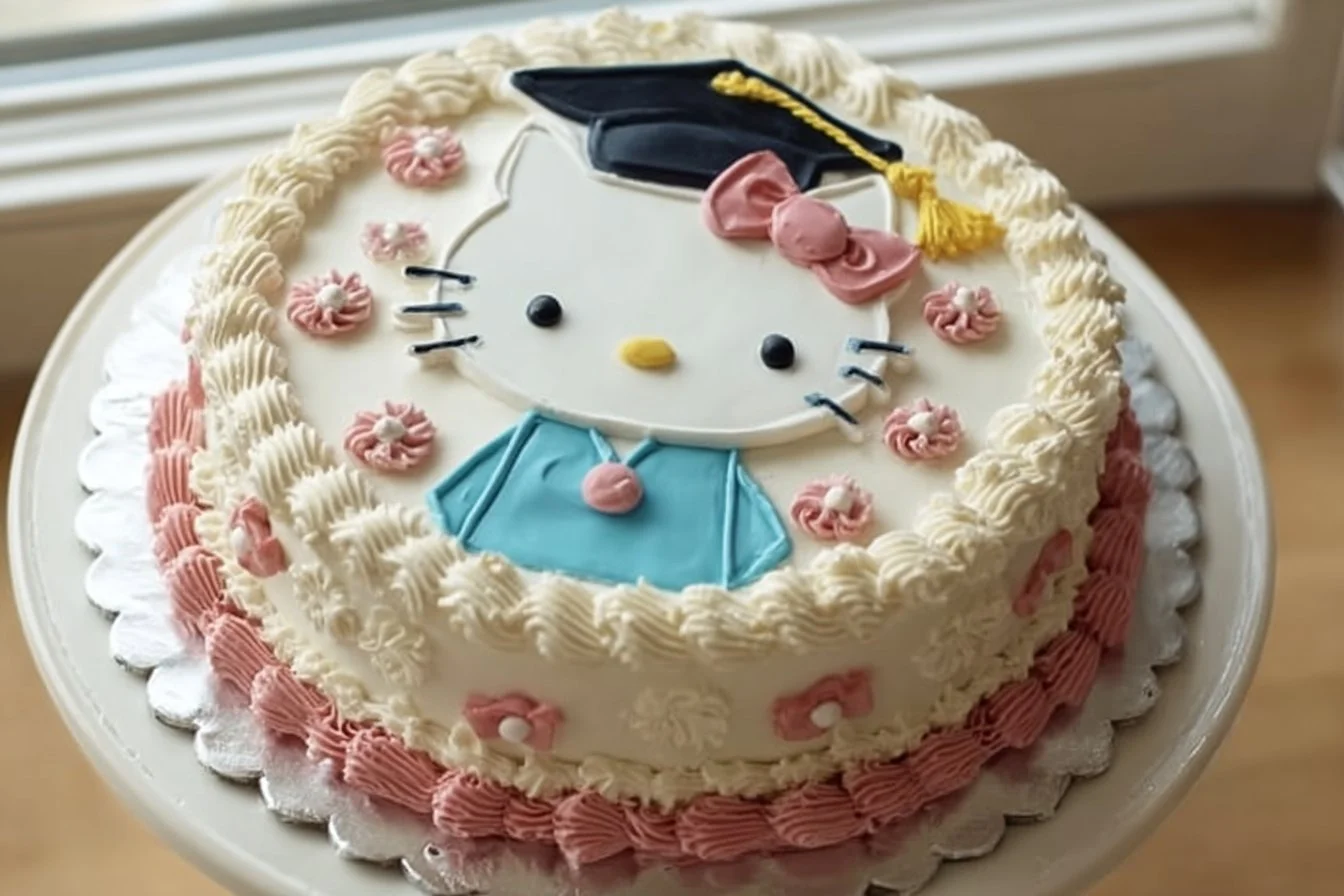
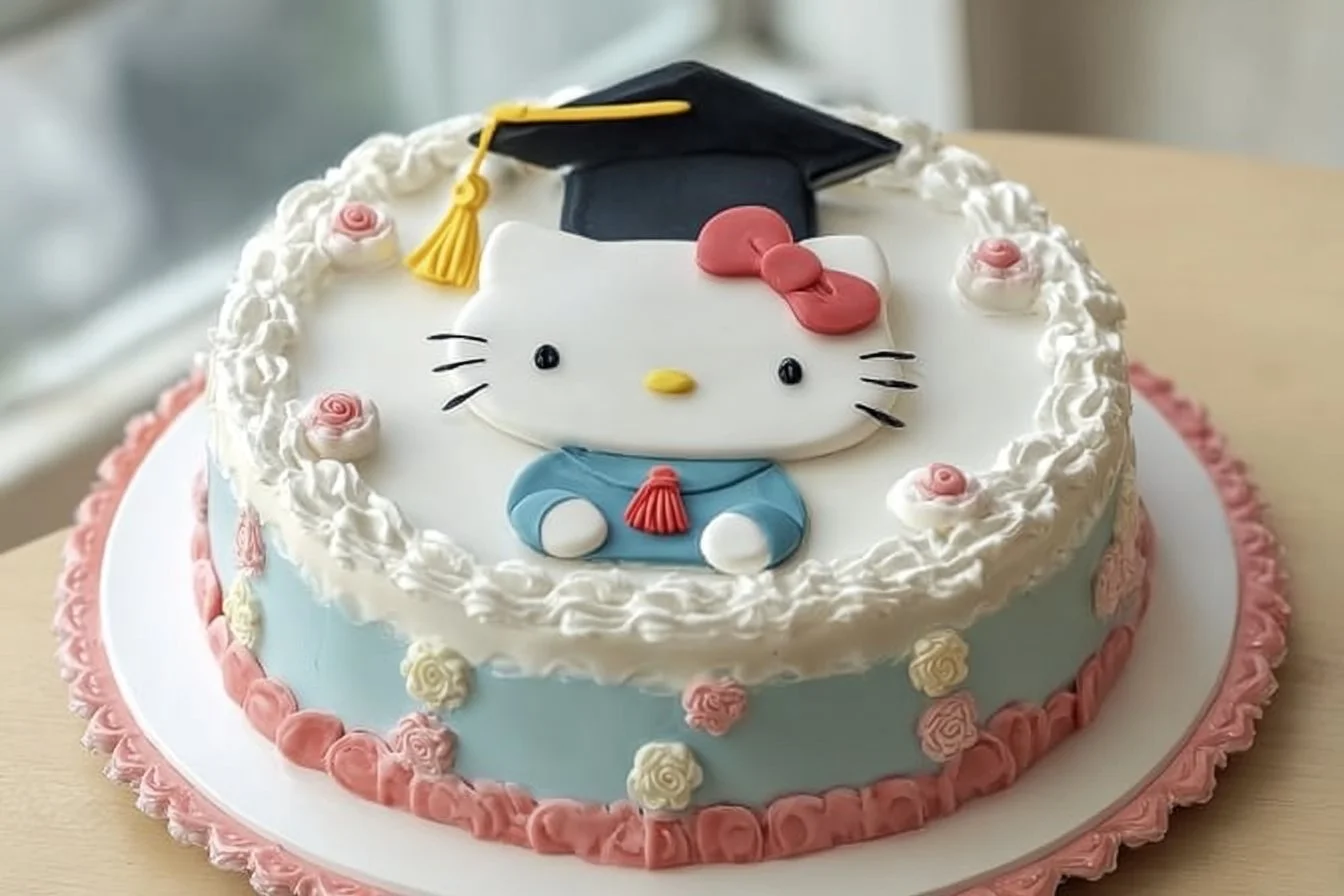
Hello Kitty Graduation Cake: A Sweet Celebration
You know what’s tricky? Finding the perfect recipe for a Hello Kitty graduation cake. I mean, there are thousands of cute cake ideas out there, but truly nailing the adorable theme while keeping it delicious? That’s the challenge. Let me share my experience of baking this whimsical cake for my niece’s graduation—you might want to grab a snack first because it gets a bit messy!
Ingredients for the Hello Kitty Graduation Cake**
Here’s the lineup. Gather up:
- 2 cups all-purpose flour (I usually go with whatever I have on hand, but I think cake flour makes it fluffier)
- 1 ½ cups sugar (I promise, less isn’t an option here)
- ½ cup unsalted butter (softened) (Trust me, it needs to be room temperature, not cold. I learned this the hard way!)
- 1 cup whole milk (Or whatever you’ve got. Oat milk turned out surprisingly well for my latest try.)
- 3 ½ tsp baking powder (yes, be precise here, okay?)
- 1 tsp vanilla extract (I love good ol’ McCormick’s, but use the fancy stuff if you want)
- ½ tsp salt (sea salt if you’re fancy, regular salt if you’re normal like me)
- 3 large eggs (Really hope these are good. Check the date!)
- White frosting (I totally cheat and buy it from the store—don’t judge!)
- Pink food coloring (Because Hello Kitty, duh!)
- Black edible marker (You’ll need this for those big eyes!)
- Graduation-themed decorations (like mini caps, which I love and I’m a sucker for)
Now, a little side note: I had to hunt for those mini graduation caps. The store near my house? Nothing. So, I took a trip to a party supply store, and wow, what a wonderland! Just be prepared to get lost in a sea of balloons and streamers.
Instructions for Crafting Your Cake**
Preheat that oven! The key is—oh wait, I forgot to mention—you need to preheat your oven first to 350°F (175°C). This step? So crucial.
Mix the dry ingredients. In a bowl, combine the flour, sugar, baking powder, and salt. Just whisk it together. But—wait for it—don’t just toss it in and hope for the best! You want those leavening agents evenly mixed.
Cream the butter. In a separate bowl, beat the softened butter with a mixer until it’s light and fluffy. I used to skip this step, thinking it didn’t matter—and my cakes suffered. Don’t do what I did!
Add the eggs. Beat in the eggs one at a time. Seriously, one at a time. It’s kinda fun too, like a cooking show moment.
Pour in the milk and vanilla. Alternate adding in the milk and dry mixture. You want a smooth batter. If it looks lumpy, just give it some extra love with the whisk.
Time to bake! Pour the batter into two greased round cake pans and bake for about 30 minutes, or until a toothpick comes out clean. Peek in when it’s about 25 minutes in—I kind of panicked because I thought they were burning. Nope! Just needed a few more.
Cool down. Let the cakes cool in the pans for about 10 minutes, then flip them onto wire racks. Always, always let them cool completely before frosting, or you’ll end up with a melty mess (like that time when my friend Lisa tried frosting a hot red velvet cake. Disaster. Complete disaster.)
Now for the fun part! Once cool, it’s frosting time! Layer that white frosting between the cakes and cover the top and sides—don’t be shy! Add a couple of drops of pink food coloring to the frosting and mix until it’s that perfect Hello Kitty shade.
Face time. Using the black edible marker, draw on Hello Kitty’s face. It doesn’t need to be perfect—just think of it like her sweet little smile, and then sprinkle on some edible glitter if you’re feeling extra.
Decorate. Finally, place those graduation-themed decorations on the top and sides as you like.
And there you have it! A Hello Kitty graduation cake that’s sure to impress and, you know, actually taste good.
Personal Tips and Chaotic Wisdom**
So, here’s my two cents—this cake gets rave reviews only if you actually chill out with the frosting. Too much can be overwhelming. Speaking of overwhelming, when I first tried this recipe, I used those little cupcakes instead—you’d think they’d be cute, right? But they ended up looking like a Hello Kitty animal shelter.
A good kitchen tool is a turntable for frosting—makes it so much easier, and you can show off your skills. Seriously, it’s worth every penny!
Oh, and another thing: Delicious cakes don’t have to be pretty. My 8-year-old nephew refuses to eat anything green, but somehow loves this, so maybe it’s all about how you present it? Or sugar?
Anyway, if you ever try making this, let me know how yours turns out!
You totally got this! 😄 The excitement of cake decorating is like a small thrill ride every time. Just remember, it’s supposed to be fun, not stressful.
Happy baking and have a great time celebrating! 🎉

Hello Kitty Graduation Cake
Ingredients
Method
- Preheat the oven to 350°F (175°C).
- In a bowl, combine the flour, sugar, baking powder, and salt. Whisk together.
- In a separate bowl, beat the softened butter until light and fluffy.
- Add the eggs one at a time, beating well after each addition.
- Alternate adding the milk and dry mixture until smooth.
- Pour the batter into two greased round cake pans.
- Bake for about 30 minutes, or until a toothpick comes out clean.
- Let the cakes cool in the pans for about 10 minutes, then flip onto wire racks.
- Once cooled, layer white frosting between the cakes and cover the top and sides.
- Mix a few drops of pink food coloring into the frosting and then frost the cake.
- Draw Hello Kitty's face using the black edible marker.
- Add graduation-themed decorations as desired.