
Okay, so I messed this up three times before getting it right. Like, spectacularly messed up. I’m talking smoothie soup, frozen chunks that could break teeth, and one time I somehow made it taste like grass. But hey, fourth time’s the charm, right?
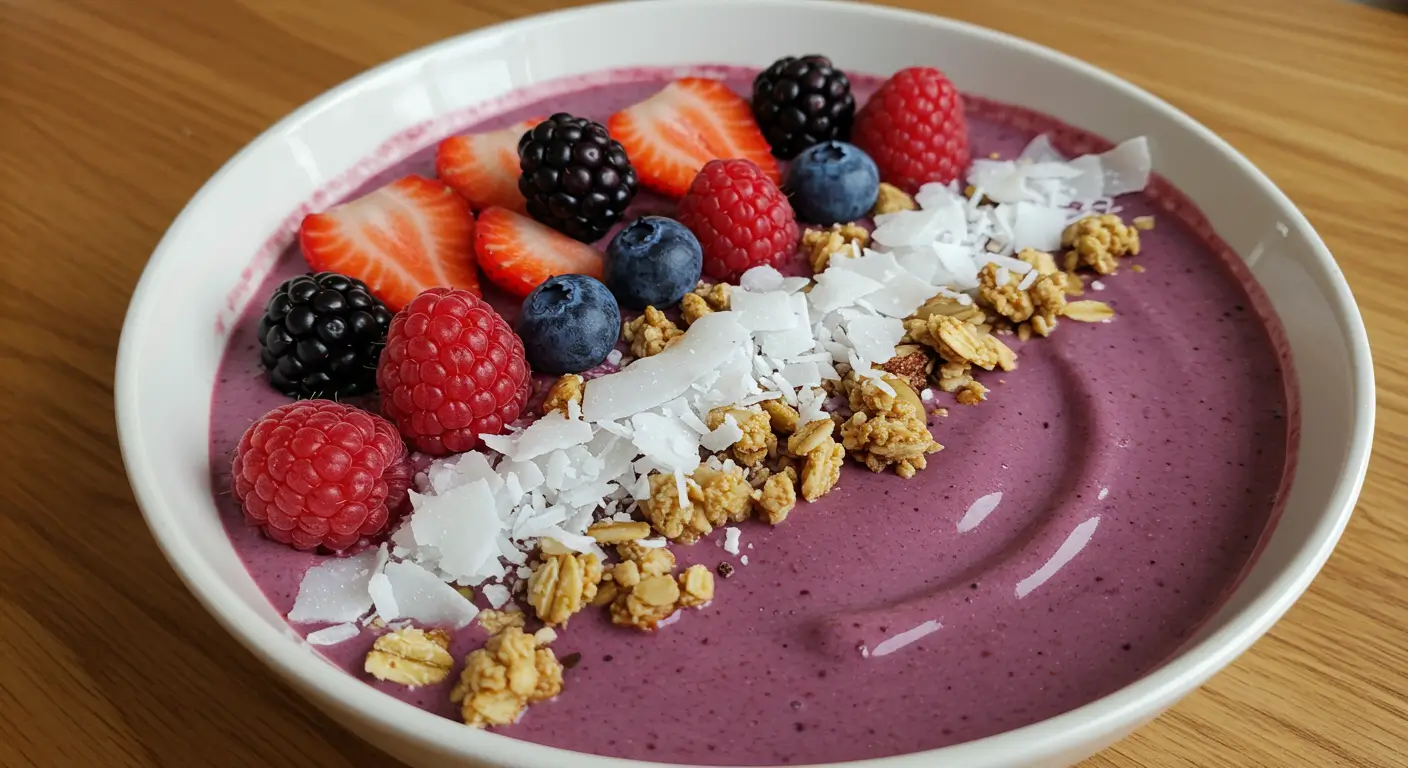
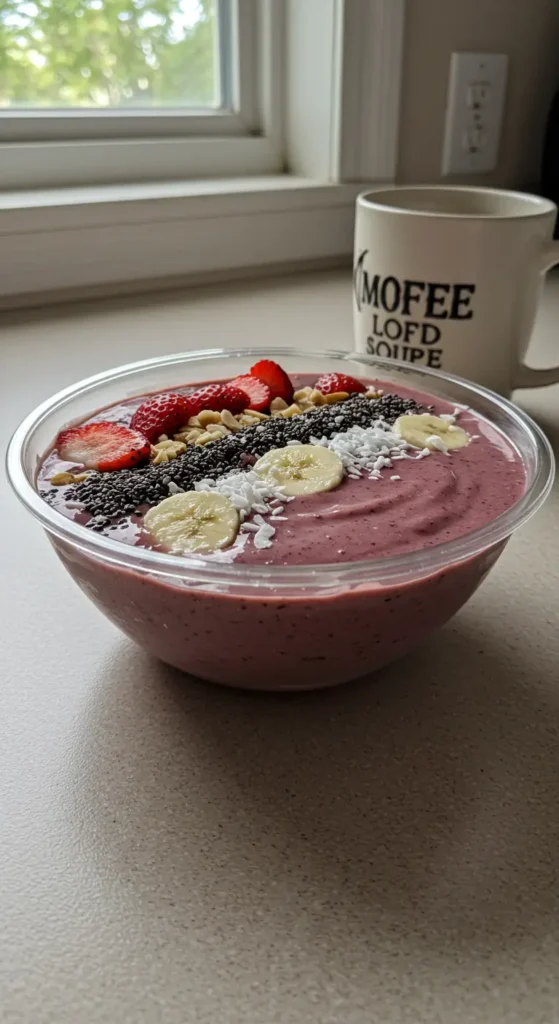
Everyone keeps asking for this recipe after I posted that photo on Instagram last month. You know the one—perfectly swirled purple and pink smoothie with all those fancy toppings arranged like I actually know what I’m doing. Plot twist: I totally don’t. But I figured out how to make it look and taste amazing anyway.
Table of Contents :
Why I Started Making Smoothie Bowls :
So here’s the thing. I didn’t start making smoothie bowls because I’m some health guru or Instagram influencer. Nope. My 8-year-old refuses to eat anything green, but somehow decided that smoothie bowls were “ice cream for breakfast” and I wasn’t about to correct him. Whatever gets vegetables into that kid, right?
Plus, my neighbor Sarah kept posting these gorgeous smoothie bowl photos that made me equal parts inspired and jealous. Like, how does someone make fruit look that pretty at 7 AM? Turns out, it’s way harder than it looks. Trust me on this one.
My Smoothie Bowl Disasters :
Before we get to the good stuff, let me save you from my mistakes:
Disaster #1: Used regular frozen fruit from the bag. Ended up with smoothie soup because I didn’t know you need SUPER frozen fruit. Like, frozen solid for at least 4 hours. Not the stuff that’s been sitting in your freezer door getting frost-bitten.
Disaster #2: Added too much liquid. WAY too much liquid. I thought more almond milk would make it creamier. Wrong. It made it drinkable, which defeats the entire point of a bowl situation.
Disaster #3: This one still haunts me. I tried to make it healthy by adding spinach (secretly, for my veggie-hating kid) but used fresh spinach instead of frozen. The texture was… chunky. Imagine trying to eat a smoothie with little green confetti bits. My son took one look and said, “Mom, this looks like throw-up.” Charming kid, right?
But wait, there’s more! I also learned the hard way that you can’t just throw everything in the blender at once. The frozen fruit needs to be on the bottom, liquid on top, and you need patience. Something I don’t have at 6:30 AM when everyone’s asking for breakfast.
The Smoothie Bowl That Finally Worked :
After all those failures, I figured out the secret. It’s all about the ratio and the technique. And maybe a little bit of luck.
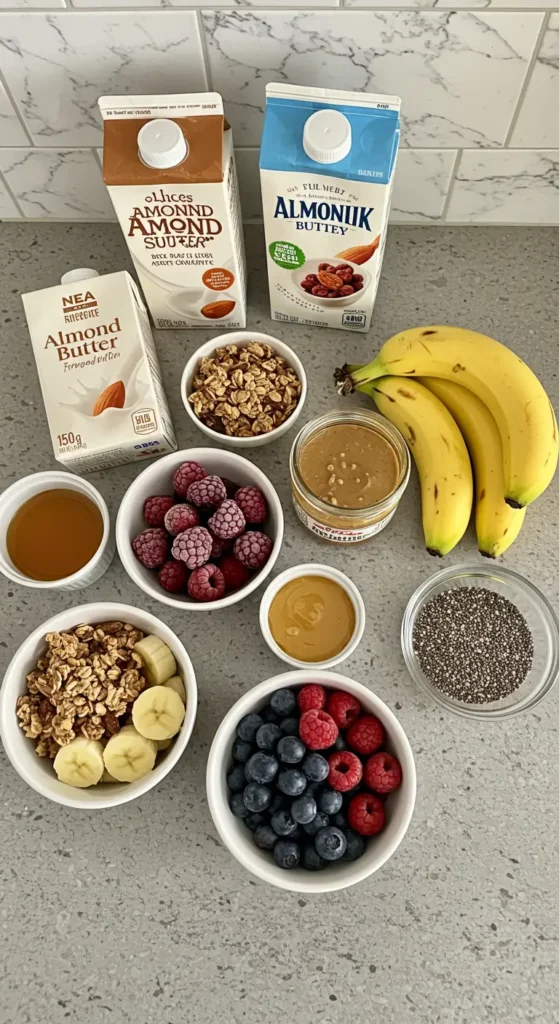
Ingredients (Don’t Skip Anything) :
For the Base:
- 1 frozen banana (not fresh, FROZEN—this is crucial)
- 1/2 cup frozen mixed berries (I use Trader Joe’s because it’s cheap and good)
- 1/4 cup frozen mango chunks
- 2-3 tablespoons almond milk (start with 2, trust me)
- 1 tablespoon almond butter (or peanut butter if you’re normal like me)
- 1 teaspoon honey (optional, but my kid demands it)
For Toppings (This is Where You Get Creative):
- Fresh berries (blueberries, strawberries, whatever’s not moldy in your fridge)
- Sliced banana
- Granola (I buy the expensive stuff from Whole Foods because I’m fancy like that)
- Coconut flakes
- Chia seeds (if you’re into that sort of thing)
- More almond butter (because why not?)
Now, here’s what I learned about shopping for this stuff. Don’t buy pre-cut frozen fruit if you can help it. It’s like three times more expensive and usually has ice crystals all over it. Just buy whole fruit and freeze it yourself. Takes planning, but your wallet will thank you.
Oh, and about the almond milk—I’ve tried oat milk, coconut milk, regular milk, even water once (don’t ask). Almond milk is the winner. It’s neutral enough not to overpower the fruit but creamy enough to make everything blend nicely.
The Method (Finally!) :
Okay, here’s where the magic happens. And by magic, I mean following very specific steps because apparently smoothie bowls are divas.
Step 1: Get Your Blender Ready
Use a high-speed blender if you have one. If not, a regular blender works, but you’ll need patience. Like, a lot of patience. I have a Vitamix that I got on sale (still cost more than my first car), but I’ve made this work with my old Hamilton Beach too.
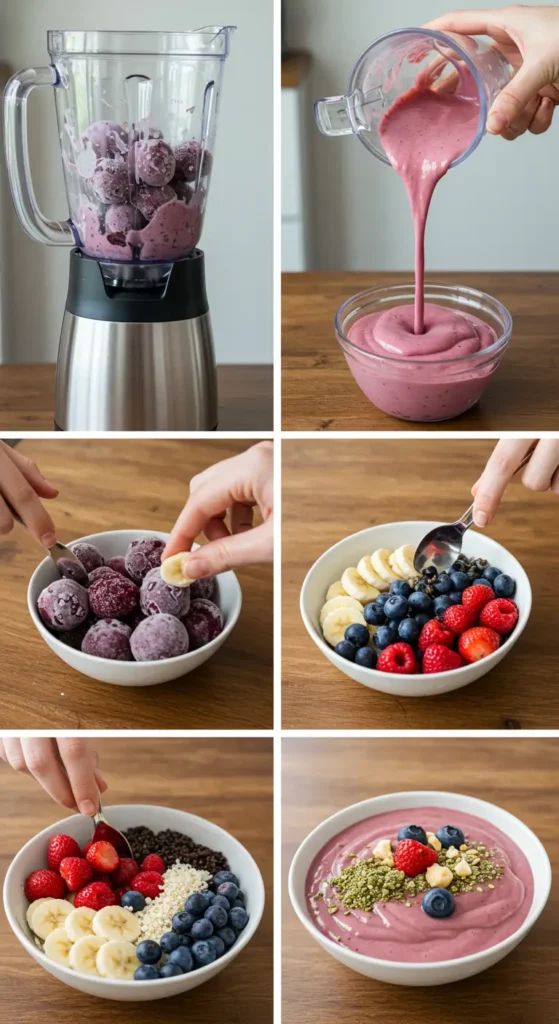
Step 2: Layer Like You Mean It
Put the frozen fruit in first. Always. Liquid goes on top. I don’t care what anyone else tells you, this is the only way that works without having to stop and scrape down the sides seventeen times.
Step 3: Blend with Attitude
Start on low speed. This is important—high speed right away will just spin the fruit around without actually blending anything. Gradually increase speed, and use the tamper if your blender came with one. If not, stop every 30 seconds to scrape down the sides.
The key is—oh wait, I forgot to mention—you want it thick. Like, spoon-stands-up-in-it thick. If you can drink it through a straw, you’ve added too much liquid. Been there.
Step 4: Taste and Adjust
This is where you fix any disasters. Too tart? Add more honey or banana. Too sweet? Squeeze in some lemon juice. Not flavorful enough? More fruit. It’s not rocket science, but it took me forever to figure this out.
Step 5: The Instagram-Worthy Pour
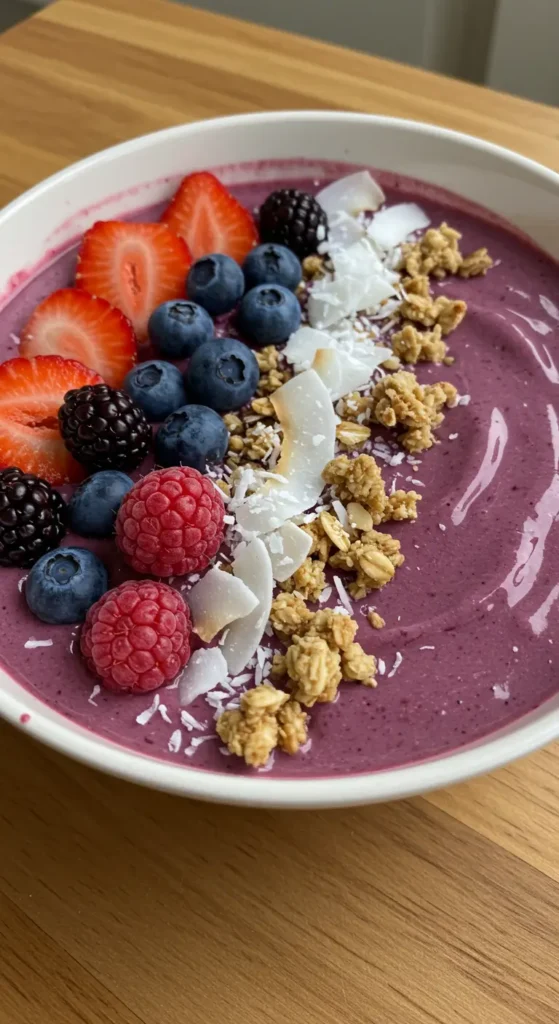
Pour your smoothie into a bowl—use a wide, shallow bowl, not a deep one. This was game-changer discovery #47. Deep bowls make your toppings sink to the bottom and look sad.
Step 6: Topping Time
This is the fun part. I arrange mine in little sections because it looks fancy, but honestly, my kids just dump everything on top and it still tastes amazing. Don’t stress about making it look perfect unless you’re posting it online.
What I Wish Someone Had Told Me :
The fruit matters. Like, really matters. Overripe bananas that are brown and spotty? Perfect for this. Those perfect yellow bananas? Save them for eating. You want the super sweet, almost too-ripe ones.
Temperature is everything. Your fruit needs to be frozen solid, but your bowl should be chilled too. I stick mine in the freezer for 10 minutes before serving. Learned this trick from a café that charges $15 for smoothie bowls. (Fifteen dollars! For fruit!)
Don’t make it too pretty. I mean, make it pretty if you want, but remember you’re going to eat it. I spent 20 minutes arranging toppings perfectly once, then felt bad about messing it up when I ate it. Life’s too short for that kind of stress.
Actually, you know what? Sometimes I just dump all the toppings in a pile and call it “rustic.” Works every time.
My Current Obsession Variations :
Since I’ve gotten the basic recipe down, I’ve been experimenting. Some winners:
Chocolate Berry Bowl: Add a tablespoon of cocoa powder to the base. Tastes like healthy ice cream. My husband doesn’t believe it’s good for him.
Tropical Vibes: Use coconut milk instead of almond milk, add frozen pineapple. Top with toasted coconut and macadamia nuts if you’re feeling fancy.
Green Goddess: This is where I finally figured out the spinach situation. Use frozen spinach (just a handful), extra frozen mango to mask the color, and a splash of orange juice. Looks like a sunset, tastes like tropical vacation.
The Real Talk Section :
Look, I’m gonna be honest with you. This isn’t a quick breakfast. It takes at least 15 minutes from start to finish, and that’s if everything goes smoothly. Which it won’t, especially the first few times.
Also, it’s messy. Your blender will be covered in frozen fruit chunks, your counter will have mysterious purple stains, and you’ll find chia seeds in weird places for days. Just accept it.
But here’s why I keep making them: my kids eat fruit voluntarily. My husband stops grabbing donuts on his way to work. And I actually feel good about what I’m eating for breakfast instead of stress-eating whatever’s left from dinner prep.
Plus, they’re actually filling. Not like those smoothies that leave you hungry again in an hour. The thickness and the toppings make it feel like a real meal.
Troubleshooting Your Disasters :
Too liquidy? Add more frozen fruit or stick it in the freezer for 10 minutes.
Too thick? Add liquid one teaspoon at a time. Seriously, one teaspoon. I’ve ruined too many by dumping in too much at once.
Tastes bland? More fruit, honey, or a pinch of vanilla extract works wonders.
Looks gross? Sometimes berries make everything turn an unappetizing brown color. Add some frozen mango or pineapple to brighten it up.
Kids won’t eat it? Let them choose their own toppings. My daughter will eat anything if she gets to arrange the berries herself.
The Bottom Line :
Is this the healthiest breakfast ever? Probably not. Is it better than the Pop-Tarts my kids were eating before? Definitely. Is it worth the cleanup and effort? Most days, yes.
The real win is that I figured out how to make something that looks fancy but uses ingredients I can actually pronounce. And my kids think I’m some sort of breakfast wizard now, which I’m not correcting anytime soon.
Try this recipe, mess it up a few times like I did, then make it your own. Add weird ingredients, change the ratios, make it green if you want. The best recipes are the ones you actually make, not the ones that sit perfectly untouched in your Pinterest board.
Let me know how yours turns out! And if you figure out any tricks that make it even better, seriously tell me. I’m always looking for ways to up my breakfast game without actually becoming a morning person.
Happy blending! (And may your smoothie bowls be thick and your kitchen not too destroyed) 🥣✨
The Ultimate Smoothie Bowl
A thick, creamy smoothie bowl recipe perfected after multiple failures. Learn the secrets to avoiding smoothie soup and creating Instagram-worthy bowls with simple ingredients and foolproof techniques.
Ingredients
- 1 frozen banana
- 1/2 cup frozen mixed berries
- 1/4 cup frozen mango chunks
- 2-3 tablespoons almond milk
- 1 tablespoon almond butter or peanut butter
- 1 teaspoon honey (optional)
- Fresh berries for topping
- Sliced banana for topping
- Granola for topping
- Coconut flakes for topping
- Chia seeds for topping
Instructions
-
Step 1Add frozen fruit to blender first, with liquid on top. Start with 2 tablespoons almond milk.
-
Step 2Add almond butter and honey if using.
-
Step 3Blend on low speed, gradually increasing to high. Use tamper if needed to help blending.
-
Step 4Stop and scrape sides every 30 seconds if needed. Blend until thick and creamy - should be spoon-thick, not drinkable.
-
Step 5Taste and adjust sweetness with more honey or fruit as needed.
-
Step 6Pour into chilled, wide shallow bowl.
-
Step 7Arrange toppings in sections or pile on top as desired.
-
Step 8Serve immediately while still thick and cold.