
Easy Strawberry Shortcake Bars Recipe (Perfect for Summer!)
Last weekend, I was staring at a flat of strawberries I’d bought with the best intentions – you know how it goes, they looked so perfect at the farmer’s market, but then life happened and there they sat, getting softer by the day. My daughter kept asking for strawberry shortcake, but honestly, the thought of making individual biscuits and whipping cream felt like too much work after a long week. That’s when I remembered these strawberry shortcake bars I’d made last summer – all the flavors of classic strawberry shortcake, but way easier to pull together.
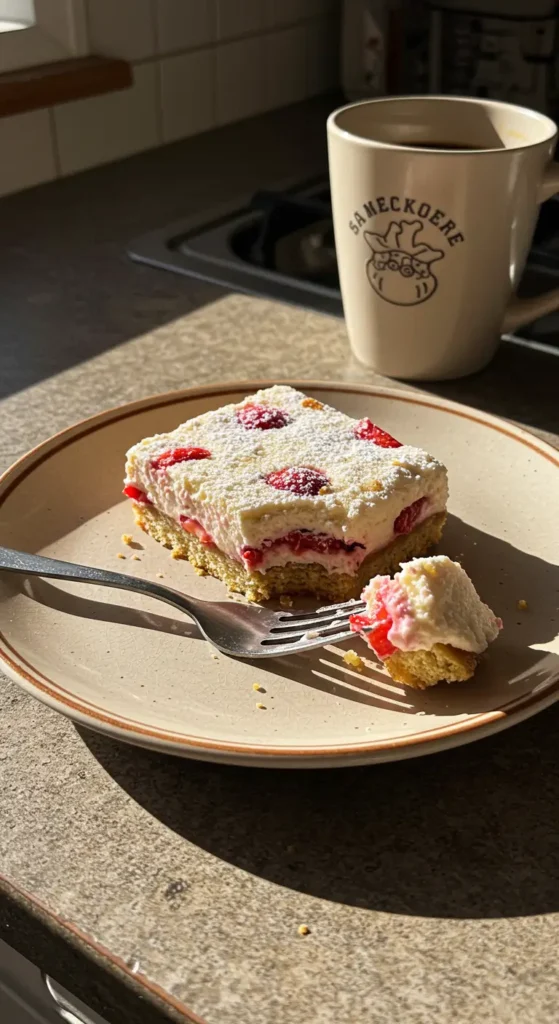
These bars have become my go-to dessert when I want something that feels special but doesn’t require a ton of fuss. The bottom layer is like a tender, buttery shortbread, the middle is packed with juicy strawberries, and the top has this amazing crumbly topping that’s basically the best parts of a biscuit and a streusel combined. Plus, you can make them ahead of time, which is a total win in my book.
Table of Contents
Why You’ll Love This Strawberry Shortcake Bars Recipe
I’ve served these bars at probably a dozen gatherings now, and they disappear every single time. Here’s what makes them so perfect: they’re portable (no messy assembly required), they actually taste better after sitting for a few hours, and they’re way more forgiving than traditional shortcake. If your strawberries are a little too ripe or not quite sweet enough, no problem – the bars work beautifully either way.
The texture is what really gets me though. That bottom crust stays perfectly tender, not soggy like some bar recipes can get. The strawberry layer has just the right amount of sweetness without being cloying, and that crumbly top gives you all those buttery, biscuit-like flavors you want from shortcake.
What You’ll Need
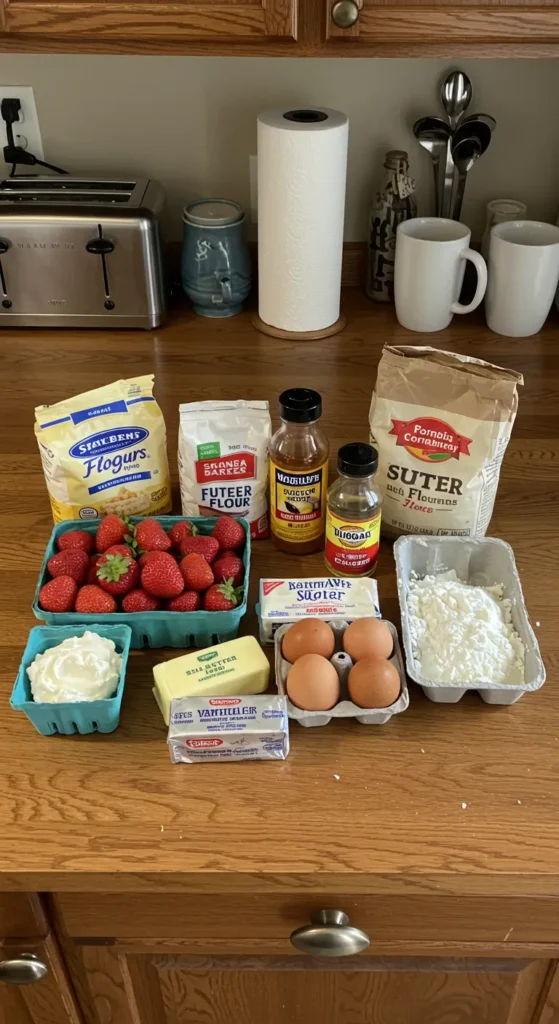
I love that most of these ingredients are pantry staples, with fresh strawberries being the star of the show.
For the crust and topping:
- 2 cups all-purpose flour
- 1/2 cup granulated sugar
- 1/2 teaspoon salt
- 1 cup cold unsalted butter, cubed
- 1 large egg yolk
- 1 teaspoon vanilla extract
For the strawberry filling:
- 4 cups fresh strawberries, hulled and sliced
- 1/3 cup granulated sugar
- 2 tablespoons cornstarch
- 1 tablespoon fresh lemon juice
- 1/2 teaspoon vanilla extract
- Pinch of salt
A few ingredient notes from my kitchen:
The butter needs to be properly cold – I actually keep mine in the freezer for about 15 minutes before using it. This makes all the difference in getting that perfect crumbly texture. Don’t skip the egg yolk in the crust; it’s what makes these bars so tender instead of tough.
For the strawberries, I’ve found that slightly underripe berries actually work better than super soft ones. They hold their shape better during baking and don’t make the bars soggy. If your strawberries aren’t very sweet, just add an extra tablespoon of sugar to the filling.
Let’s Make These Bars
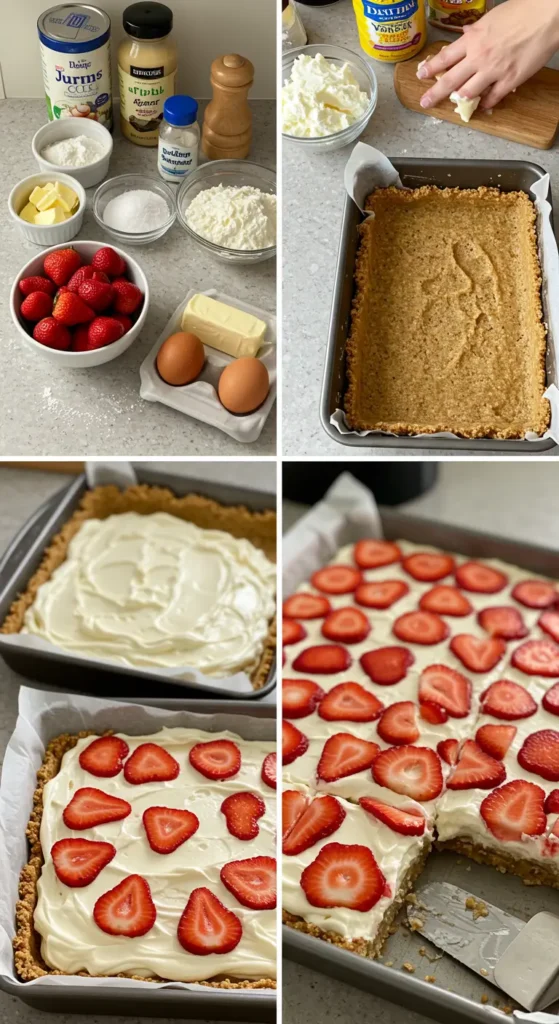
Prep the Pan and Oven
Preheat your oven to 375°F and line a 9×13 inch baking pan with parchment paper, leaving some overhang for easy removal. I learned this trick the hard way after trying to cut bars directly in the pan – trust me, the parchment paper is worth it.
Make the Crust Mixture
In a large bowl, whisk together the flour, sugar, and salt. Add the cold, cubed butter and use a pastry cutter or your hands to work it into the flour mixture until it looks like coarse crumbs with some pea-sized pieces of butter. This is where I usually get my kids involved – they love the hands-on part.
In a small bowl, whisk together the egg yolk and vanilla, then drizzle it over the flour mixture. Toss everything together with a fork until the dough just starts to come together. Don’t overwork it – you want it to look a bit shaggy.
Assemble the Bottom Layer
Take about two-thirds of your crumb mixture and press it firmly into the bottom of your prepared pan. I use the bottom of a measuring cup to get it really even and compact. This is your shortbread base, so you want it nice and solid.
Prepare the Strawberry Filling
While you’re working on the crust, toss your sliced strawberries with the sugar, cornstarch, lemon juice, vanilla, and salt in a medium bowl. Let this sit for about 10 minutes – the strawberries will start to release their juices and create a light syrup with the cornstarch. This step is crucial for preventing soggy bars.
Put It All Together
Spread the strawberry mixture evenly over your pressed crust. Then take the remaining crumb mixture and sprinkle it over the top. Don’t worry about making it perfectly even – those irregular peaks and valleys will give you the best texture.
Bake to Perfection
Bake for 35-40 minutes, until the top is golden brown and you can see the strawberry filling bubbling around the edges. The smell that fills your kitchen during those last 10 minutes is absolutely incredible.
Here’s the hard part: let them cool completely in the pan before cutting. I know it’s tempting, but hot bars will fall apart and be messy to serve. I usually make these in the morning and let them sit until afternoon, or even overnight.
Tips from My Kitchen
Don’t skip the cornstarch: I learned this one the hard way. Without it, the strawberry juices will make your bottom crust soggy. The cornstarch thickens those juices just enough to keep everything in balance.
Frozen strawberries work too: If you’re making these off-season, frozen strawberries are totally fine. Just thaw them completely and drain off any excess liquid before mixing with the other filling ingredients.
Make them ahead: These bars are actually better the next day. The flavors meld together and the texture gets even better. Store them covered at room temperature for up to 3 days.
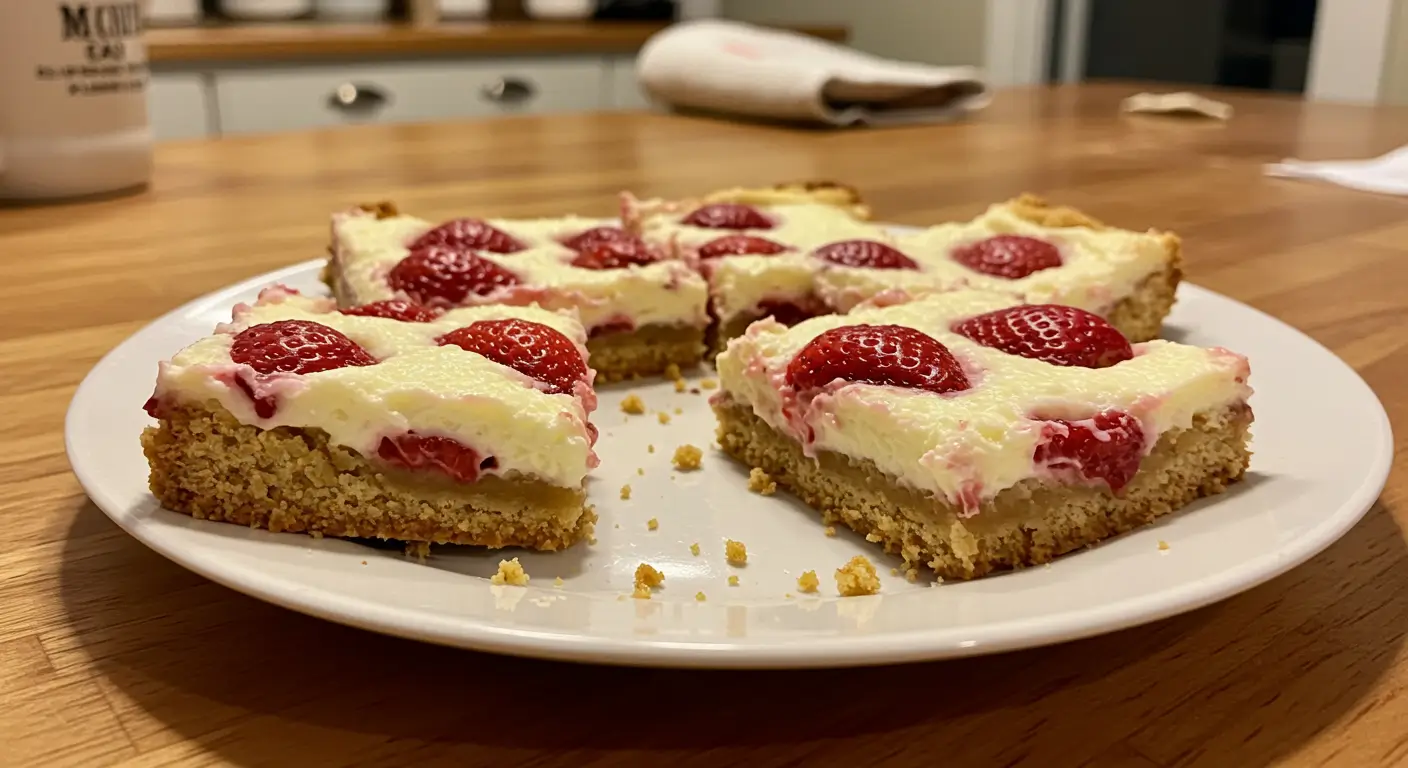
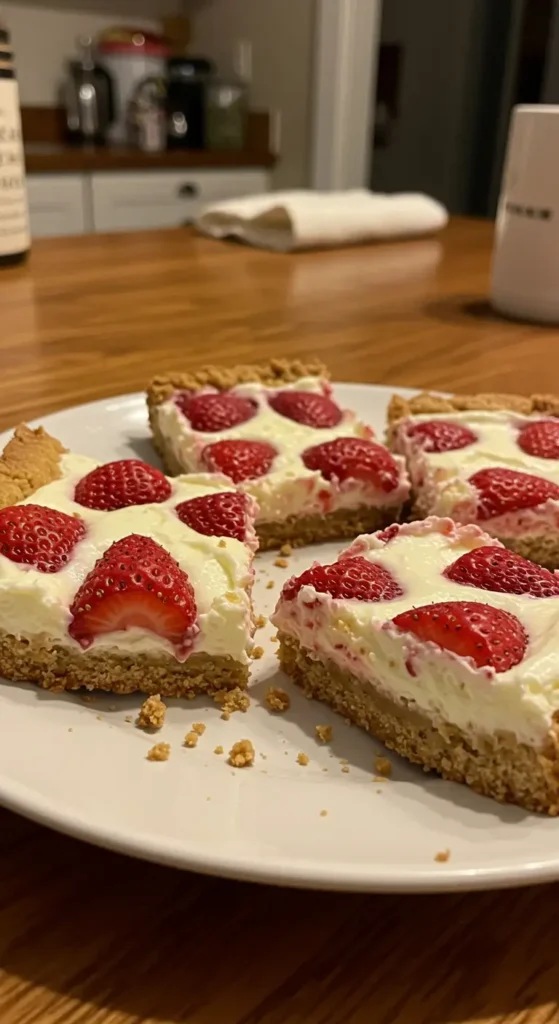
Cutting clean squares: Use a sharp knife and wipe it clean between cuts. I’ve found that running the knife under warm water and drying it helps get cleaner cuts through the crumbly topping.
Serving Suggestions
These bars are perfect on their own, but if you want to dress them up a bit, a dollop of freshly whipped cream or a scoop of vanilla ice cream never hurt anyone. I’ve also served them with a light dusting of powdered sugar, which looks really pretty for parties.
They’re fantastic for potlucks, picnics, or any time you need a dessert that travels well. I’ve brought them to everything from church gatherings to my book club, and there are never any leftovers.
Storage and Make-Ahead Tips
Store leftover bars in an airtight container at room temperature for up to 3 days. If you want to make them further ahead, you can freeze them for up to 3 months. Just wrap individual bars in plastic wrap and store in a freezer bag.
For the best texture, I don’t recommend refrigerating these bars unless it’s really hot outside. The cold tends to make the crumbly topping a bit hard.
These strawberry shortcake bars have become such a staple in my dessert rotation, especially during strawberry season. They capture all the nostalgic flavors of traditional strawberry shortcake but in a format that’s so much easier to make and serve. Whether you’re dealing with a flat of berries that need to be used up or just want a crowd-pleasing dessert, these bars deliver every single time.