
So… I saw this Strawberry Crunch Cheesecake Tacos on Instagram like three weeks ago and couldn’t get them out of my head. You know how it is when you see something so ridiculous yet so genius that you HAVE to try it? Yeah, that was me scrolling at 11 PM, suddenly wide awake and planning a grocery list.
My sister texted me a picture of them from some fancy bakery in LA asking if I thought I could recreate them. Challenge accepted. And honestly? After burning through two boxes of waffle cones and having what I can only describe as a “cheesecake filling explosion” in my kitchen, I think I’ve cracked the code.
But let me tell you about my first attempt. Picture this: waffle cone shells that were basically cardboard, cheesecake filling that wouldn’t set, and strawberry “crunch” that was more like strawberry dust. My husband took one bite and very diplomatically said, “It’s… interesting, honey.” That’s marriage speak for “this is terrible but I love you.”
Table of Contents :
What Are These Magical Things?
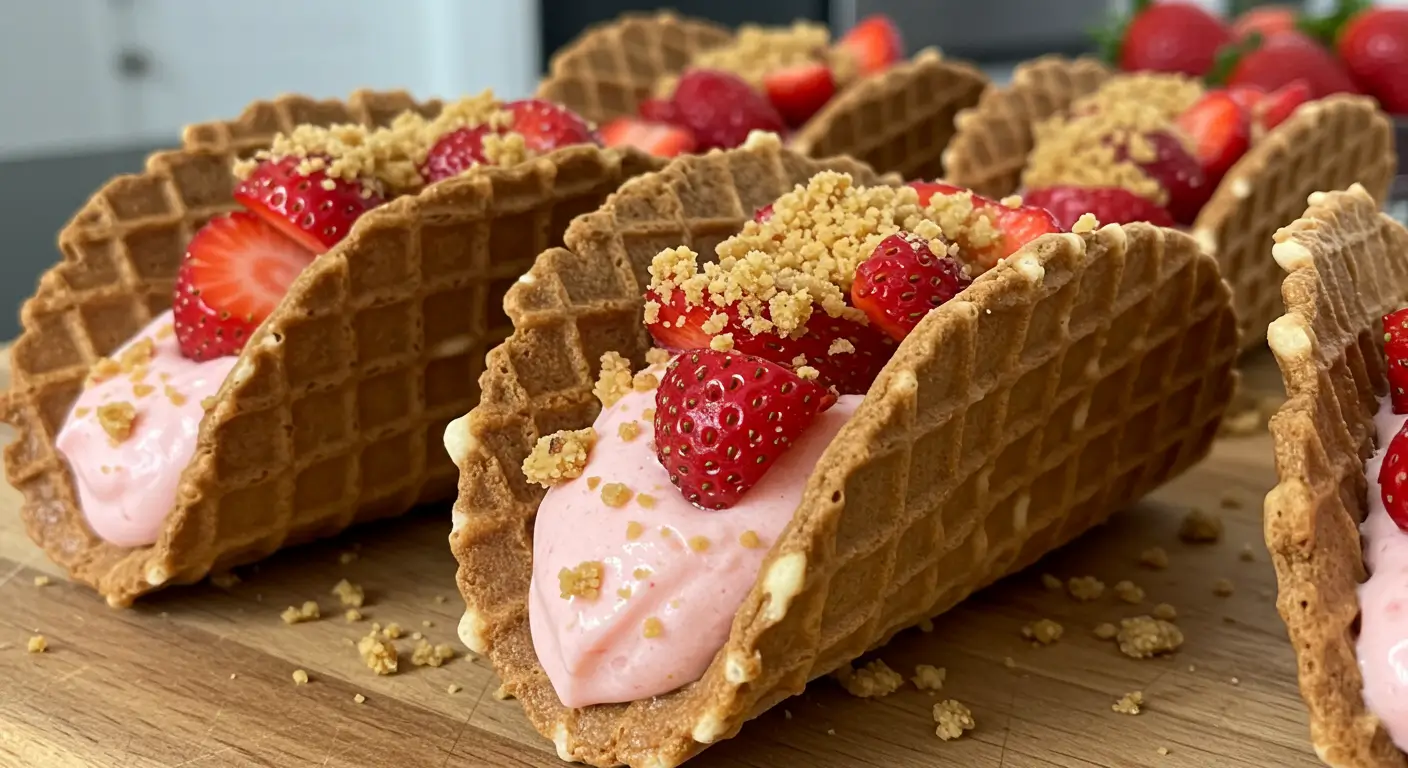
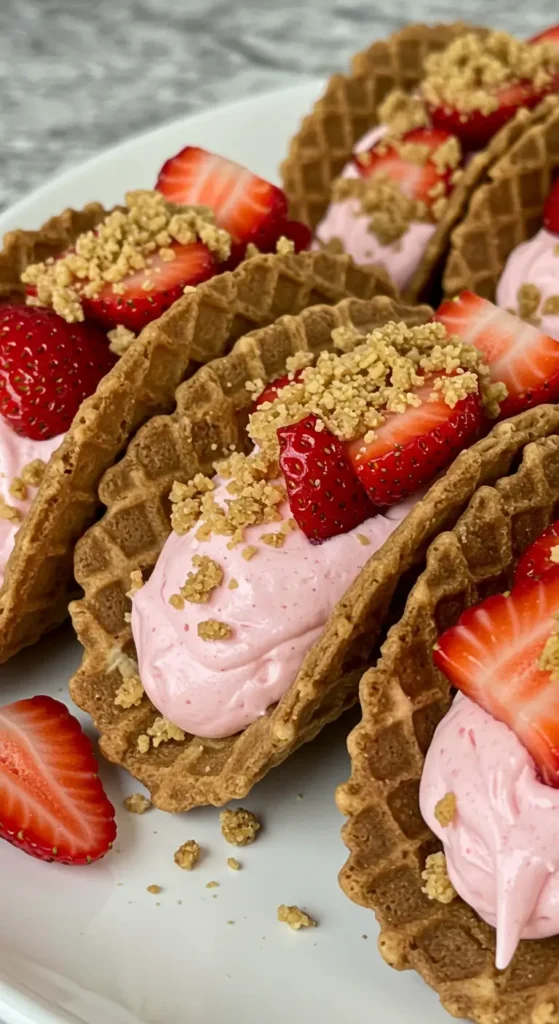
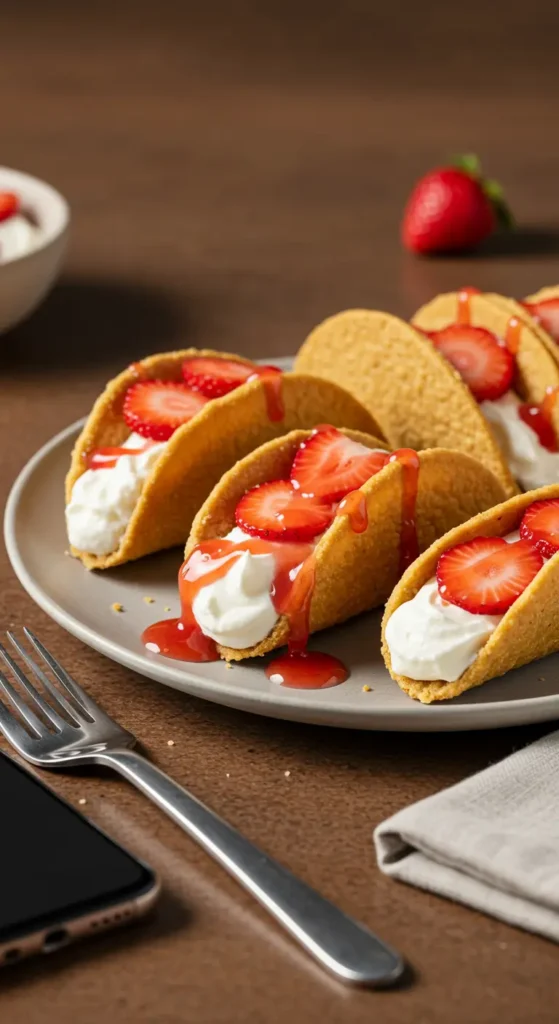
Basically, imagine if a cheesecake and a taco had the most delicious baby ever. You’ve got crispy cinnamon-sugar waffle cone “shells” filled with no-bake cheesecake filling, topped with fresh strawberries and that addictive crunch topping that tastes like childhood summer days.
The whole thing started because my 9-year-old asked why desserts couldn’t be shaped like tacos. Kids ask the real questions, you know? And apparently, some genius somewhere thought the same thing because here we are.
My Kitchen Disasters :
Attempt #1: Used regular waffle cones. They cracked. All of them. Turns out you need the flat bottom ones, not the pointy ice cream cones. Also learned that “gently shaping” waffle cones requires the patience of a saint, which I clearly don’t have.
Attempt #2: The cheesecake filling was way too runny because I got impatient and didn’t let the cream cheese come to room temperature. Three hours later, I’m staring at what basically looked like strawberry soup in a cone. The dog was happy though.
Attempt #3: Finally got the shells right, filling was perfect, but I made the crunch topping with those freeze-dried strawberries that cost like $8 for a tiny bag. Tasted great, but my wallet cried.
And then came attempt #4, which is what I’m sharing with you because it actually worked and didn’t require me to take out a second mortgage.
The Ingredients :
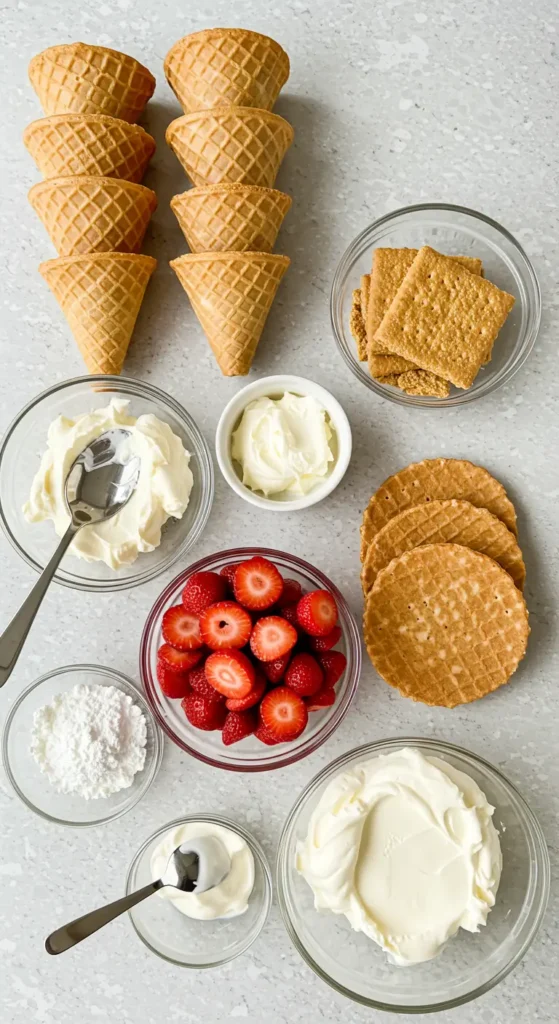
For the Taco Shells:
- 6 flat-bottom waffle cones (the kind they use for ice cream sundaes, not regular pointy ones)
- 3 tbsp melted butter
- 2 tbsp granulated sugar
- 1 tsp cinnamon
- Pinch of salt (trust me on this)
For the Cheesecake Filling:
- 8 oz cream cheese (room temperature – seriously, don’t skip this step)
- 1/2 cup powdered sugar
- 1 tsp vanilla extract
- 1 cup heavy whipping cream
- 2 tbsp strawberry jam (I use Smucker’s, nothing fancy)
For the Strawberry Crunch:
- 1 sleeve graham crackers (about 9 crackers)
- 1/2 cup freeze-dried strawberries (or 2 packets of strawberry Jell-O mix – cheaper option)
- 3 tbsp melted butter
- 2 tbsp sugar
For Assembly:
- 2 cups fresh strawberries, diced small
- Whipped cream for topping (Cool Whip works fine, don’t @ me)
- Extra crunch mixture for sprinkling
Okay, shopping tip: buy your waffle cones from an ice cream shop if your grocery store only has the tiny ones. I called ahead and they sold me a sleeve of the good ones for like three bucks. Way better than the sad little cones in the baking aisle.
The Method :
Step 1: Prep Those Shells
Preheat your oven to 350°F. This is important because we’re going to crisp these babies up.
Mix the melted butter, sugar, cinnamon, and salt in a small bowl. Brush the inside and outside of each waffle cone with this mixture. I use a pastry brush, but honestly, a paper towel works fine too.
Place the cones upside down on a baking sheet and bake for 5-7 minutes until they’re golden and smell like heaven. Watch them carefully because they go from perfect to burnt in about 30 seconds. Found that out the hard way.
Let them cool completely. And I mean completely. Hot cones + cold filling = soggy disaster.
Step 2: Make the Cheesecake Filling
This is where room temperature cream cheese becomes your best friend. If you forgot to take it out early (been there), you can soften it in the microwave for like 15 seconds at a time. Just don’t overdo it or you’ll have cream cheese soup.
Beat the cream cheese with an electric mixer until it’s smooth and fluffy, about 2 minutes. Add the powdered sugar, vanilla, and strawberry jam. Beat until combined.
In a separate bowl, whip the heavy cream until soft peaks form. Don’t overbeat or you’ll make butter. Also been there.
Gently fold the whipped cream into the cream cheese mixture. The key word here is “gently.” I attacked it with the mixer once and ended up with what looked like pink cottage cheese.
Step 3: The Crunch Factor
Crush the graham crackers in a food processor or just throw them in a plastic bag and beat them with a rolling pin. Therapy and baking combined.
If you’re using freeze-dried strawberries, crush those too. If you’re going the Jell-O route (no shame in the budget game), just mix it in as is.
Combine the crushed crackers, strawberry pieces/Jell-O, melted butter, and sugar. Mix until it clumps together slightly but isn’t soggy. This should taste like the most addictive thing ever. If you’re not sneaking tastes, you’re doing it wrong.
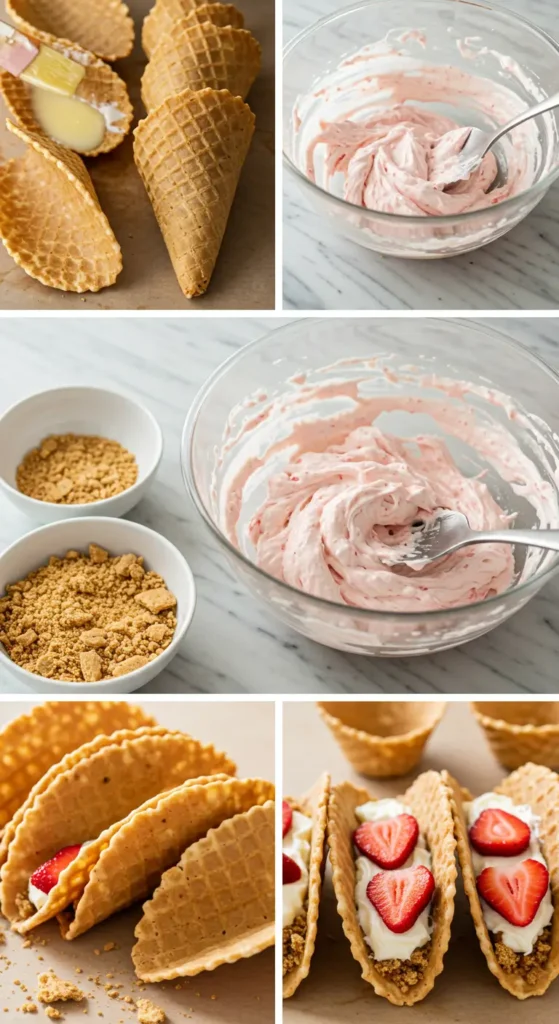
Step 4: Assembly Time
This is the fun part that made me feel like I was on a cooking show. Fill each cone with the cheesecake mixture – I use a piping bag because I’m fancy like that, but a ziplock bag with the corner cut off works just fine.
Top with diced strawberries, then sprinkle generously with the crunch mixture. Add a dollop of whipped cream if you’re feeling extra.
The Real Talk Section :
These are best eaten fresh, like within a few hours of making them. The cones will start to get soggy if you wait too long, and nobody wants a sad, soggy taco shell.
You can make the components ahead though. The cheesecake filling keeps for two days in the fridge, the crunch mixture stays good for a week in an airtight container, and the prepared shells last about three days if you store them properly.
My kids are absolutely obsessed with these. Like, asking-for-them-for-breakfast obsessed. I may have created monsters.
What I’d Do Differently :
Next time, I’m making mini versions using those little sugar cone cups. Same concept, but you could eat like six of them without feeling like you need to unbutton your pants.
Also discovered that adding a tiny bit of lemon juice to the cheesecake filling makes it taste more like actual cheesecake and less like sweetened cream cheese. Small detail, big difference.
The crunch topping is where you can get creative. I’ve tried it with crushed Nilla wafers (amazing), crushed Oreos for a cookies and cream version (my teenagers approved), and even crushed Cap’n Crunch cereal (don’t knock it till you try it).
Storage and Serving Tips :
If you absolutely have to store these, keep the components separate and assemble just before serving. The shells can be wrapped individually and stored at room temperature. The filling needs to stay cold, obviously.
For parties, I set up a little taco bar with all the toppings and let people build their own. Less work for me, more fun for everyone else. Win-win.
Pro tip: make extra crunch topping. People will want to add more, and you’ll want to eat it by the spoonful. I’m not judging.
Final Thoughts :
Are these completely over the top? Absolutely. Are they worth the effort and the inevitable sugar crash? 100% yes.
I brought these to my book club last week and now I’m apparently “the dessert person” in our group. There are worse reputations to have, I guess.
If you make these, take pictures because they’re almost too pretty to eat. Almost. Then definitely eat them because life’s too short for dessert FOMO.
Let me know how yours turn out! And if you come up with any flavor variations, I’m always looking for new ways to justify buying more waffle cones.
Now I’m definitely making these again this weekend. My diet can wait. 🍓
Strawberry Crunch Cheesecake Tacos
Fun and delicious dessert tacos made with cinnamon-sugar waffle cone shells, no-bake strawberry cheesecake filling, fresh strawberries, and crunchy graham cracker topping.
Ingredients
- 6 flat-bottom waffle cones
- 3 tablespoons melted butter (for shells)
- 2 tablespoons granulated sugar
- 1 teaspoon cinnamon
- Pinch of salt
- 8 oz cream cheese, room temperature
- 1/2 cup powdered sugar
- 1 teaspoon vanilla extract
- 1 cup heavy whipping cream
- 2 tablespoons strawberry jam
- 1 sleeve graham crackers (9 crackers)
- 1/2 cup freeze-dried strawberries or 2 packets strawberry Jell-O
- 3 tablespoons melted butter (for crunch)
- 2 tablespoons sugar (for crunch)
- 2 cups fresh strawberries, diced
- Whipped cream for topping
Instructions
- Step 1Preheat oven to 350°F. Mix melted butter, sugar, cinnamon, and salt. Brush mixture inside and outside of waffle cones.
- Step 2Place cones upside down on baking sheet and bake 5-7 minutes until golden. Let cool completely.
- Step 3Beat room temperature cream cheese until smooth and fluffy, about 2 minutes.
- Step 4Add powdered sugar, vanilla, and strawberry jam to cream cheese. Beat until combined.
- Step 5In separate bowl, whip heavy cream to soft peaks. Gently fold into cream cheese mixture.
- Step 6Crush graham crackers and freeze-dried strawberries. Mix with melted butter and sugar for crunch topping.
- Step 7Fill each cooled cone with cheesecake mixture using piping bag or ziplock bag with corner cut off.
- Step 8Top with diced strawberries, sprinkle with crunch mixture, and add dollop of whipped cream.
- Step 9Serve immediately for best texture. Store components separately if making ahead.