
So here’s the thing – I was spending like $25 a week on pumpkin cream cheese muffins from the coffee shop down the street. Twenty-five dollars! On muffins! My husband kept giving me this look every time I came home with another little paper bag, and I finally decided enough was enough.
That was three weeks ago, and now I’m pretty sure I’ve perfected the most ridiculously good pumpkin cream cheese muffins that have ever existed. And they cost me like $6 to make a whole batch. Take that, overpriced coffee shop.
But let me tell you about my journey to muffin perfection, because it wasn’t pretty. My first attempt looked like orange cupcakes that had been in a fight with some cream cheese. The filling was basically soup, the muffins were dense as rocks, and my 10-year-old asked if I was trying to make doorstops.
Attempt number two was better, but the cream cheese filling kept sinking to the bottom, so I ended up with pumpkin muffins with a weird cream cheese pancake at the bottom of each one. Still edible, but definitely not Instagram-worthy.
Table of Contents :
Why Pumpkin Cream Cheese Muffins Are Different :
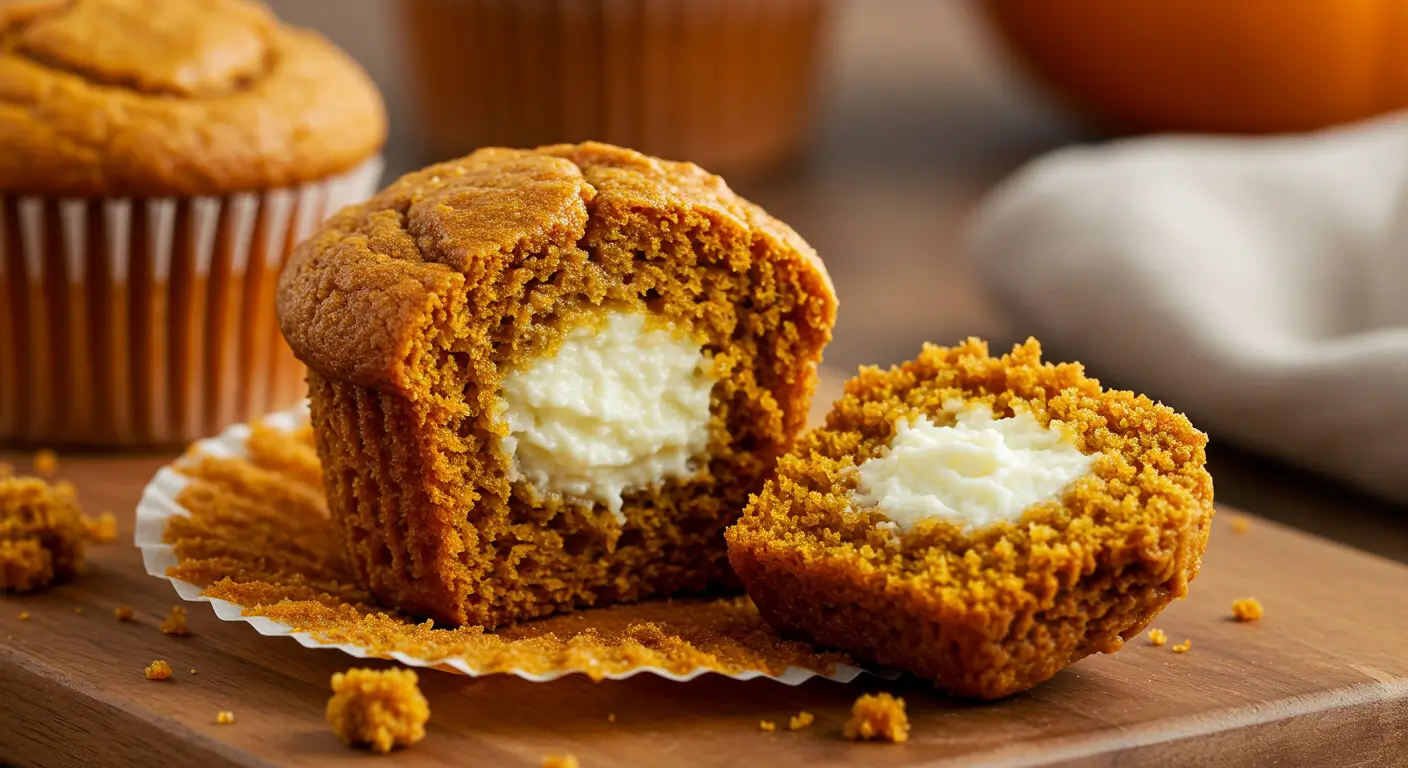
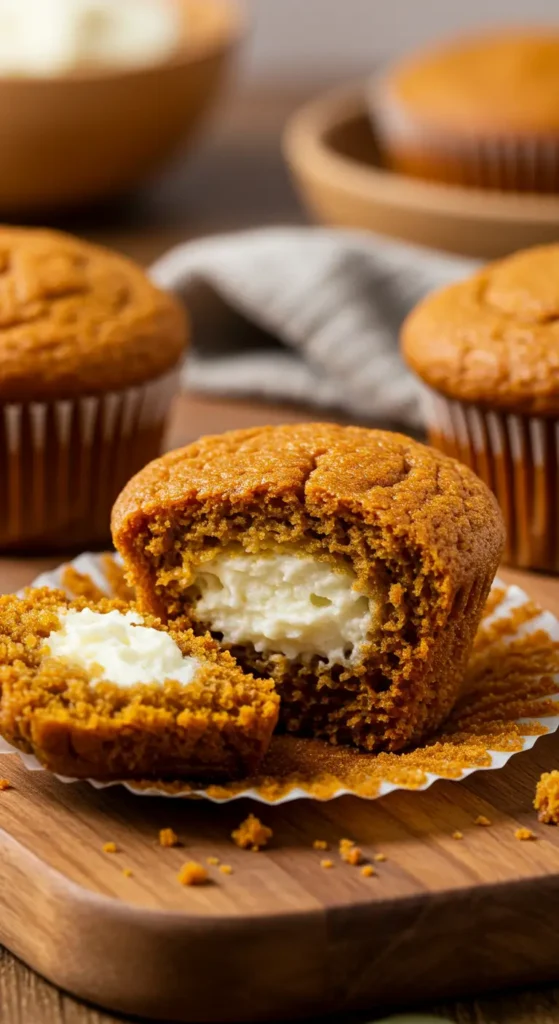
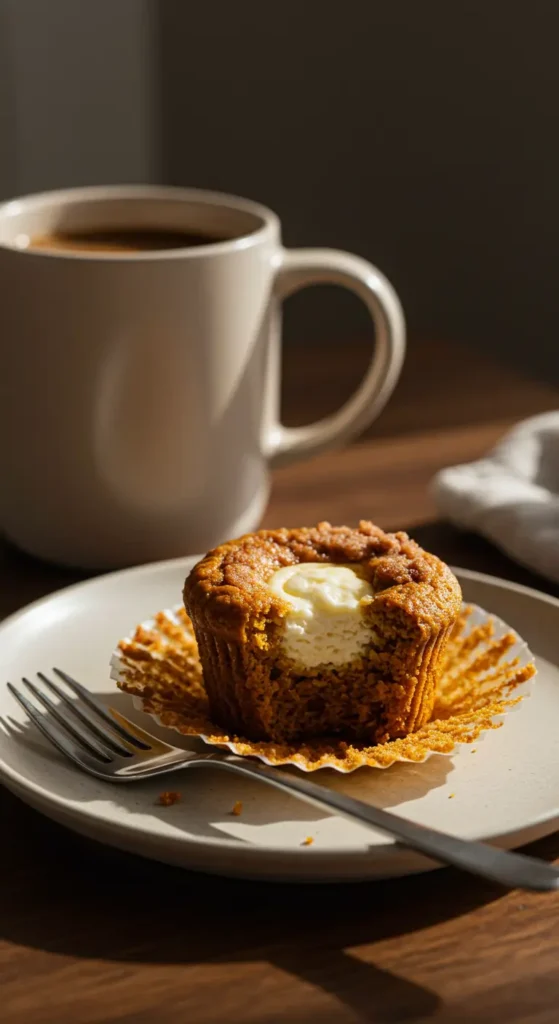
Most pumpkin muffins are just okay, you know? They taste like fall candles but don’t really have that “wow” factor. These babies have a surprise pocket of sweetened cream cheese right in the middle that stays put during baking (finally figured that out) and makes every bite feel like a special occasion.
Plus, they’re actually moist. I cannot stand dry muffins, and I feel like most pumpkin baked goods fall into that sad, crumbly category. These stay soft for days, assuming they last that long in your house.
My neighbor Sarah stopped by yesterday morning and ended up eating two while we were chatting over coffee. She literally asked if I was planning to start a bakery. That’s when you know you’ve got something good.
The Ingredients :
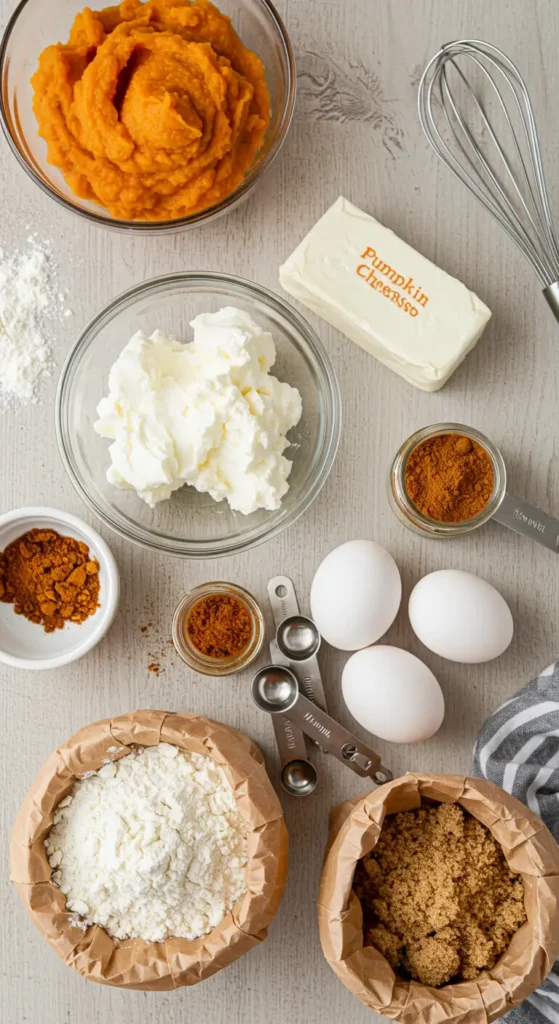
For the Muffins:
- 1 3/4 cups all-purpose flour
- 1 cup brown sugar, packed (trust me, brown sugar is better than white here)
- 1/2 tsp salt
- 1 tbsp baking powder
- 1 tsp cinnamon
- 1/2 tsp nutmeg
- 1/4 tsp ground ginger
- 1/4 tsp allspice (or just use more cinnamon if you don’t have it)
- 1/3 cup melted butter
- 2 large eggs
- 1 cup pumpkin puree (the plain stuff, not pie filling)
- 1/2 cup milk (whole milk works best, but 2% is fine)
- 1 tsp vanilla extract
For the Cream Cheese Filling:
- 8 oz cream cheese, softened (this is crucial – don’t skip the softening part)
- 1/4 cup granulated sugar
- 1 egg yolk (save the white for scrambled eggs later)
- 1/2 tsp vanilla extract
- 1 tbsp flour (this is the secret to keeping it from sinking!)
Optional Topping:
- 2 tbsp brown sugar mixed with 1 tsp cinnamon for sprinkling on top
Shopping tip: I always buy the block cream cheese, not the tub kind. The tub stuff has stabilizers that make it behave weird in baking. Learned that one the expensive way.
The Method :
Step 1: Prep Work
Preheat your oven to 375°F and line a 12-cup muffin tin. I use those parchment paper liners because regular ones sometimes stick, and there’s nothing more annoying than losing half your muffin to the wrapper.
Make sure your cream cheese is actually soft. Like, you should be able to easily press your finger into it. If it’s still cold and firm, microwave it for 10-15 seconds at a time until it’s soft. Don’t overdo it or you’ll have cream cheese soup.
Step 2: Make the Cream Cheese Filling
Beat the softened cream cheese with an electric mixer until it’s completely smooth – no lumps allowed. Add the sugar, egg yolk, vanilla, and that tablespoon of flour. Beat until combined.
That tablespoon of flour is the game-changer here. It helps the filling hold its shape during baking instead of just melting into the muffin batter. Took me three failed batches to figure this out.
Set this aside and try not to eat it with a spoon. It’s really good, but you need it for the muffins.
Step 3: The Muffin Batter
In a large bowl, whisk together all the dry ingredients. Make sure you get all the lumps out of the brown sugar – I usually use the back of a spoon to break them up.
In another bowl, whisk together the melted butter (let it cool slightly first so it doesn’t cook the eggs), eggs, pumpkin puree, milk, and vanilla. The mixture should be smooth and orange-y.
Pour the wet ingredients into the dry ingredients and stir just until combined. The batter will be thick, which is what you want. Don’t overmix or your muffins will be tough.
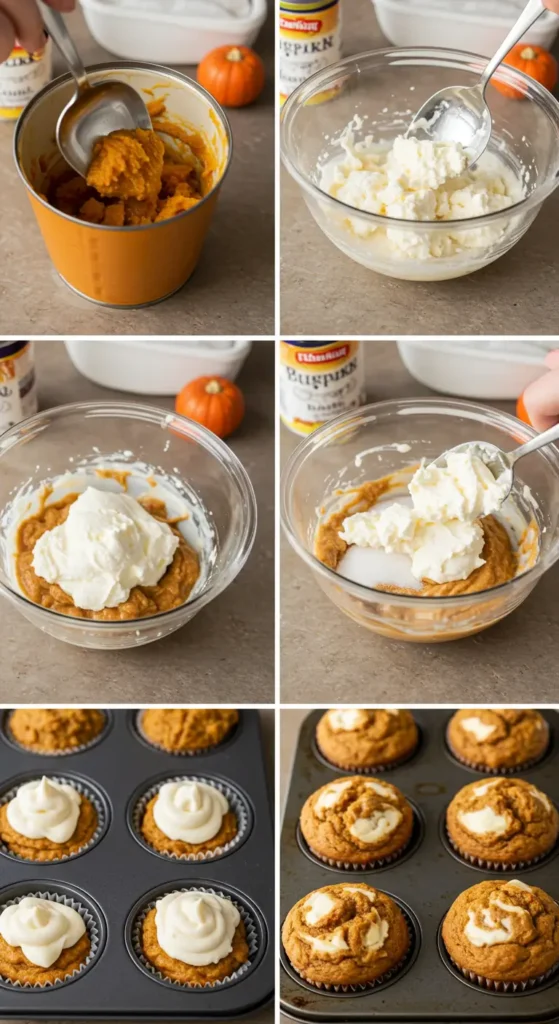
Step 4: Assembly (The Fun Part)
This is where it gets a little messy, but that’s half the fun, right?
Fill each muffin cup about 1/3 full with batter. Then add a spoonful of the cream cheese mixture right in the center – don’t worry about being perfect. Top with the remaining batter until the cups are about 3/4 full.
If you’re using the cinnamon-sugar topping, sprinkle it on now. It makes them look bakery-fancy.
Step 5: Bake These Beauties
Bake for 20-25 minutes, or until the tops spring back when lightly touched. Don’t overbake them! They’ll continue cooking a bit in the hot pan after you take them out.
Let them cool in the pan for about 10 minutes before transferring to a wire rack. This is torture because they smell incredible, but hot muffins fall apart if you try to move them too soon.
What I Wish I’d Known Earlier :
The cream cheese filling will puff up during baking and might crack the top of some muffins. This is totally normal and actually looks kind of rustic and homemade in a good way.
Room temperature ingredients really do make a difference. Cold eggs and milk don’t mix as well with the other ingredients, and you can end up with a lumpy batter.
Don’t fill the muffin cups too full, even though you’ll be tempted. I learned this when I had muffin explosion all over my oven. They need room to rise, especially with that cream cheese filling in the middle.
Storage (If They Last Long Enough) :
These need to be stored in the fridge because of the cream cheese. They’ll keep for about a week, but they’re honestly best within the first three days.
You can freeze them for up to three months. Just wrap them individually and defrost at room temperature. They’re almost as good as fresh.
Pro tip: warm them up for about 10 seconds in the microwave before eating. It makes the cream cheese center all soft and amazing again.
Variations I’ve Tried :
I’ve made these with mini chocolate chips mixed into the pumpkin batter, and they’re dangerous. The chocolate doesn’t really taste like fall, but sometimes you need chocolate, you know?
You can also add chopped pecans or walnuts to the batter for some crunch. My kids hate nuts in their muffins, so I usually skip this, but adults seem to love it.
For the cream cheese filling, I’ve tried adding a little maple syrup instead of some of the sugar, and it’s really good. Just reduce the granulated sugar to 2 tablespoons and add 1 tablespoon of real maple syrup.
The Real Talk :
Are these healthy? Absolutely not. Each muffin probably has more sugar than I should eat in a day, but sometimes you need something that tastes like a hug from fall itself.
I made these for my son’s teachers during parent conference week, and I got three requests for the recipe before I even left the school. That’s how you know they’re good.
The house smells like a pumpkin spice candle factory while these are baking, which is either amazing or overwhelming depending on your tolerance for fall vibes. My teenager complained that her clothes smelled like cinnamon after I made a batch, so maybe open a window if you’re making these before school or work.
Why I Love This Recipe :
These muffins hit that sweet spot between impressive and actually doable. They look fancy enough for company, but they’re easy enough that I can make them on a random Tuesday morning when I want something special for breakfast.
The cream cheese center is like a little surprise every time. Even though I know it’s there, I still get excited when I bite into it. It’s the simple pleasures, right?
And honestly, making these at home instead of buying them from the coffee shop makes me feel like I’m winning at adult life, which doesn’t happen often enough.
Final Thoughts :
If you’re on the fence about making these, just do it. The worst thing that happens is you end up with slightly imperfect muffins that still taste amazing. The best thing that happens is you become the person everyone asks to bring baked goods to events.
Let me know how yours turn out! And if you come up with any other filling variations, I’m always looking for new ways to justify buying cream cheese in bulk.
Now if you’ll excuse me, I need to go make another batch because writing about them has made me seriously crave one. Or three. 🎃
Pumpkin Cream Cheese Muffins
Moist and fluffy pumpkin spice muffins with a surprise cream cheese filling in the center. Better than store-bought and perfect for fall breakfast or snacks.
Ingredients
- 1 3/4 cups all-purpose flour
- 1 cup brown sugar, packed
- 1/2 teaspoon salt
- 1 tablespoon baking powder
- 1 teaspoon cinnamon
- 1/2 teaspoon nutmeg
- 1/4 teaspoon ground ginger
- 1/4 teaspoon allspice
- 1/3 cup melted butter
- 2 large eggs
- 1 cup pumpkin puree
- 1/2 cup milk
- 1 teaspoon vanilla extract
- 8 oz cream cheese, softened
- 1/4 cup granulated sugar
- 1 egg yolk
- 1/2 teaspoon vanilla extract (for filling)
- 1 tablespoon flour (for filling)
- 2 tablespoons brown sugar mixed with 1 teaspoon cinnamon (optional topping)
Instructions
- Step 1Preheat oven to 375°F. Line 12-cup muffin tin with parchment paper liners.
- Step 2Beat softened cream cheese until smooth. Add granulated sugar, egg yolk, vanilla, and flour. Mix until combined. Set aside.
- Step 3In large bowl, whisk together flour, brown sugar, salt, baking powder, and all spices.
- Step 4In separate bowl, whisk together melted butter, eggs, pumpkin puree, milk, and vanilla until smooth.
- Step 5Pour wet ingredients into dry ingredients and stir just until combined. Don't overmix.
- Step 6Fill muffin cups 1/3 full with batter. Add spoonful of cream cheese mixture to center of each.
- Step 7Top with remaining batter until cups are 3/4 full. Sprinkle with cinnamon-sugar if using.
- Step 8Bake 20-25 minutes until tops spring back when lightly touched.
- Step 9Cool in pan 10 minutes before transferring to wire rack.
- Step 10Store in refrigerator due to cream cheese filling. Best within 3 days.