
I burned my first batch of maple walnut granola so badly that my entire apartment smelled like burnt maple syrup for three days. Three. Days. My roommate was NOT happy with me and I ended up opening every window in October when it was freezing outside.
But once I figured out the right temperature and timing? This maple walnut granola became my obsession. I’ve made it probably 15 times in the past two months and I’m still not sick of it, which is saying something because I get bored with food really easily.
I think I originally wanted to make homemade granola because the store-bought stuff is SO expensive. Like $8 for a tiny bag that lasts maybe three days? No thanks. I can make a huge batch of this for less than $10 and it lasts for weeks (if I don’t eat it all in one sitting, which has happened more than once).
The first few attempts were… not great. Too sweet, not sweet enough, too clumpy, not clumpy enough. I’m pretty sure I tried like six different recipes before finally combining elements from each to create this version. Or maybe I just got lucky. Honestly can’t remember at this point.
Table of Contents :
Why This Maple Walnut Granola is Better Than Store-Bought :
Here’s the thing—homemade granola is just BETTER. You can control the sweetness, the cluster size, the amount of nuts, everything. Plus it doesn’t have all those weird preservatives and oils that store-bought granola has.
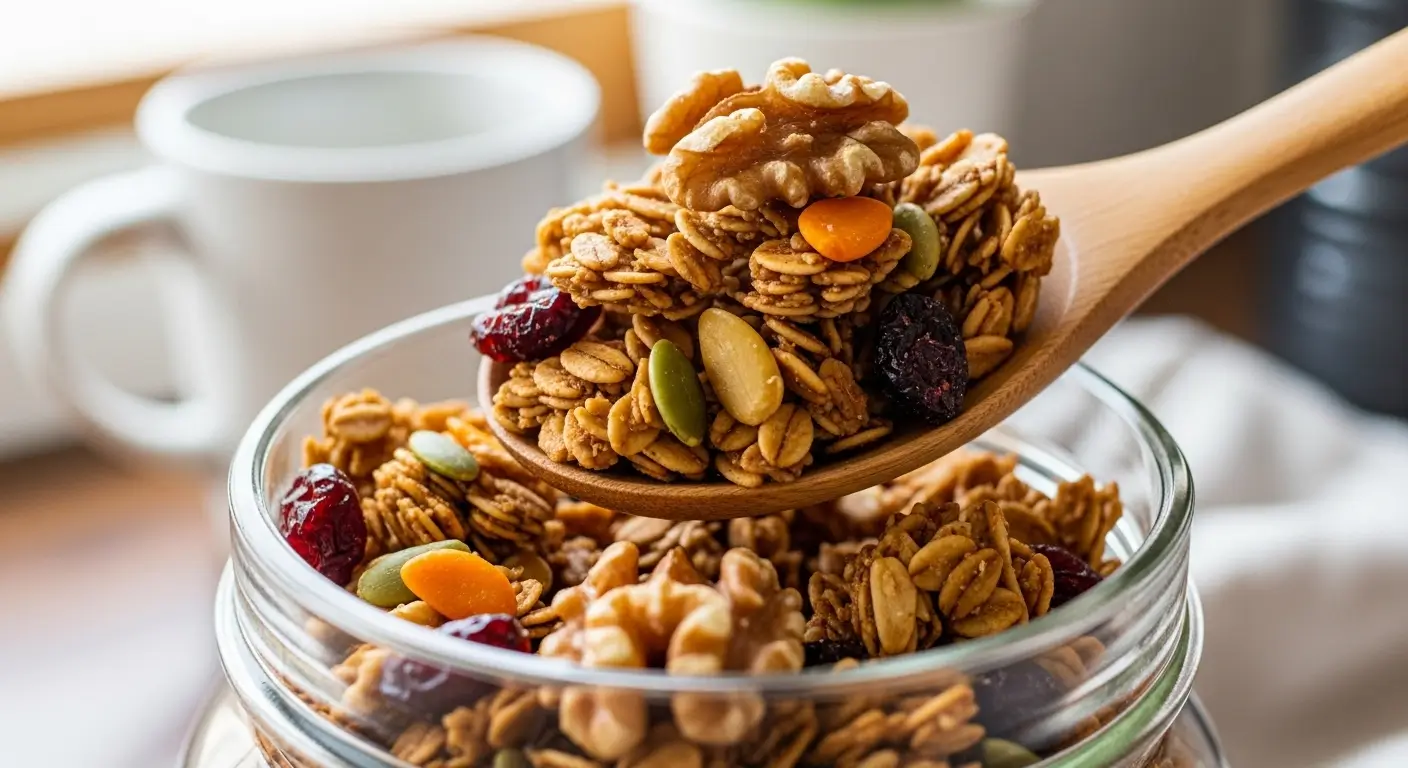
The maple syrup gives it this deep, caramel-y sweetness that’s not too intense, and the walnuts add this perfect crunch and richness. I’m obsessed with walnuts anyway so I probably use more than most people would, but that’s the beauty of making it yourself—you can adjust everything to your taste.
And the smell while it’s baking? Forget candles. Just bake granola. Your whole house will smell like autumn.
What Makes This Recipe Actually Work :
Look, I’m gonna be honest—the key to good granola is not overbaking it. That first burnt batch taught me that granola keeps cooking even after you take it out of the oven because the baking sheet is still hot. So you want to take it out when it’s ALMOST done but not quite, and let it finish cooking on the pan.
Also, stirring it halfway through is crucial. I forgot to stir my third batch and half of it was perfect while the other half was burnt. Not a fun discovery.
Easy Maple Walnut Granola Recipe :
Ingredients :
Okay, here’s what you need. I usually make a double batch because it goes so fast in my house.
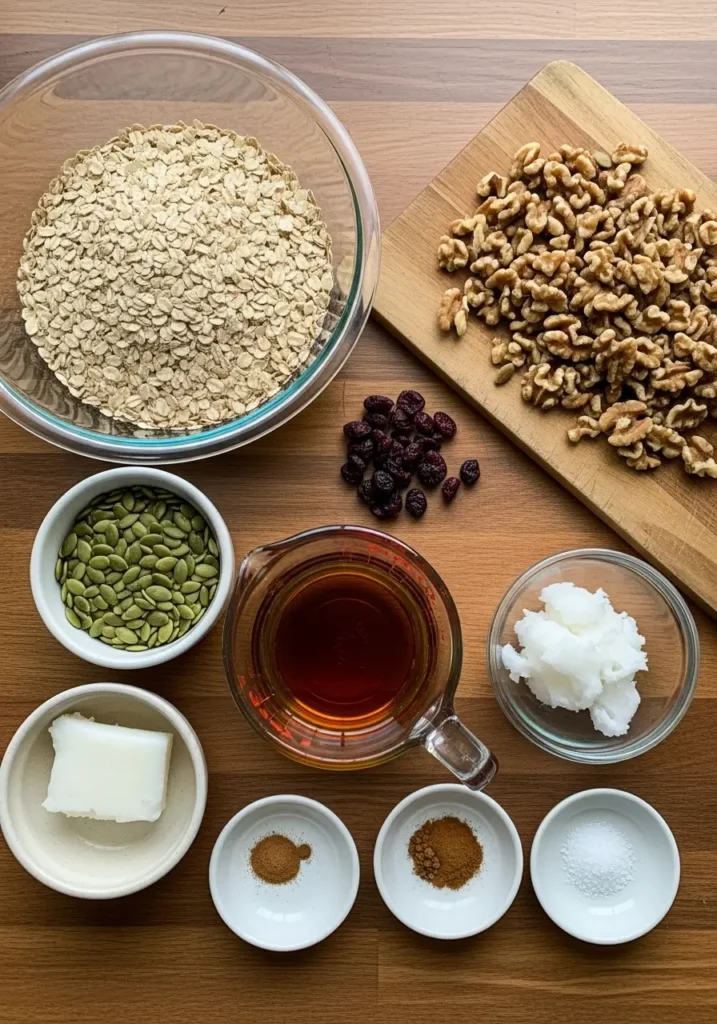
Dry Ingredients:
- 3 cups old-fashioned rolled oats (not instant—learned that the hard way)
- 1 1/2 cups walnuts, roughly chopped (I buy mine from Costco because they’re cheaper in bulk)
- 1/2 cup pumpkin seeds or sunflower seeds (or a mix of both)
- 1/3 cup coconut flakes (optional but adds nice texture)
- 1 teaspoon ground cinnamon
- 1/2 teaspoon salt (don’t skip this—it balances the sweetness)
- 1/4 teaspoon ground nutmeg (optional but very fall-appropriate)
Wet Ingredients:
- 1/2 cup pure maple syrup (use the real stuff, not pancake syrup—it matters)
- 1/4 cup coconut oil, melted (or olive oil if you don’t have coconut)
- 1 teaspoon vanilla extract
- 1/4 teaspoon maple extract (optional but takes it to the next level)
After Baking:
- 1/2 cup dried cranberries or raisins (I prefer cranberries because they’re tart)
- 1/3 cup chocolate chips (optional but highly recommended if you’re me)
Shopping tip: I get my maple syrup from Trader Joe’s because it’s way cheaper there than at regular grocery stores. And make sure you’re buying old-fashioned rolled oats, not quick oats or instant oats. The texture is completely different and it won’t work the same.
Also, chop your walnuts yourself instead of buying pre-chopped ones. They stay fresher and you can control the size. I like mine kind of chunky.
How To Make Perfect Maple Walnut Granola :
Step 1: Preheat Your Oven
Preheat to 300°F. Not 325, not 350—exactly 300°F. I know it seems low but trust me, this is the temperature that prevents burning while still getting everything crispy and golden.
Line a large baking sheet with parchment paper. Do NOT skip the parchment paper unless you enjoy scrubbing burnt granola off pans for 30 minutes (ask me how I know).
Step 2: Mix the Dry Ingredients
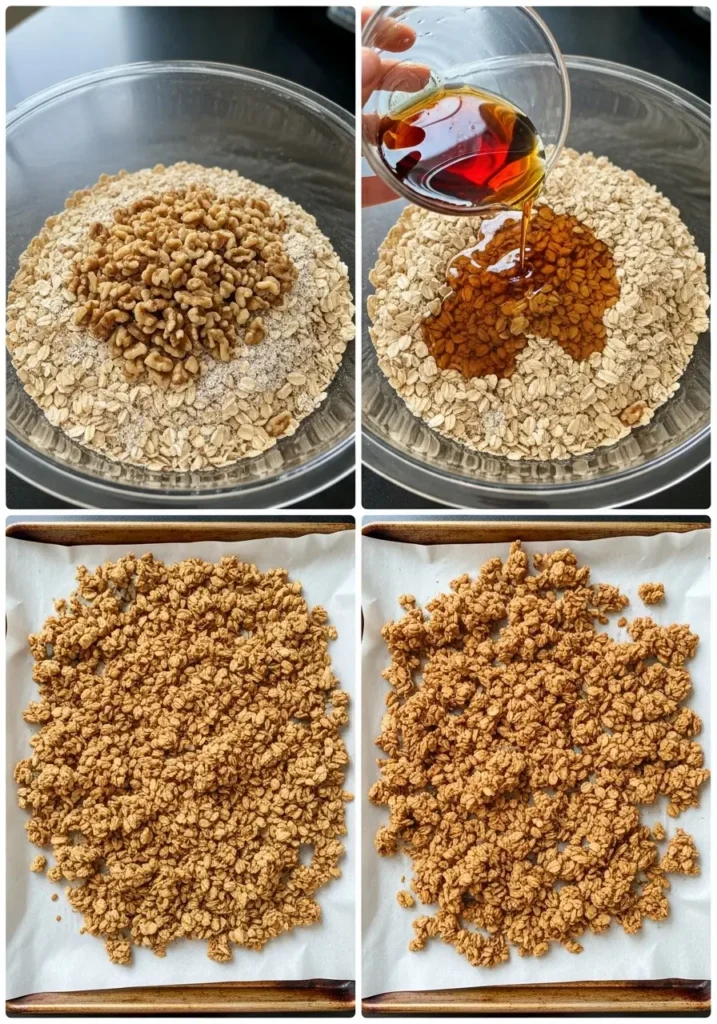
In a large bowl, combine oats, chopped walnuts, seeds, coconut flakes, cinnamon, salt, and nutmeg. Stir everything together until it’s well mixed.
I use my hands for this sometimes because it’s easier to make sure everything’s distributed evenly. Plus it’s kind of therapeutic to just mix stuff with your hands, you know?
Step 3: Mix the Wet Ingredients
In a small bowl or measuring cup, whisk together maple syrup, melted coconut oil, vanilla extract, and maple extract if you’re using it.
The key is—oh wait, I forgot to mention—make sure your coconut oil is actually melted. I tried once when it was only partially melted and it didn’t coat everything evenly. Just microwave it for like 30 seconds.
Step 4: Combine Wet and Dry
Pour the wet mixture over the dry ingredients and stir really well with a big spoon or spatula. You want every single oat and nut coated with the maple mixture. This is what makes it crispy and gives it that amazing flavor.
I usually spend a good 2-3 minutes stirring to make sure everything’s coated. Don’t rush this part.
Step 5: Spread on Baking Sheet
Dump the mixture onto your prepared baking sheet and spread it out in an even layer. Don’t make it too thick or the middle won’t cook properly, but also don’t spread it too thin or it’ll burn.
If you want big clusters (which I do), press the mixture down firmly with the back of your spatula. The more you press, the bigger the clusters will be after baking.
Step 6: Bake and Stir
Bake for 20 minutes, then take it out and stir everything around. This is super important because the edges cook faster than the middle.
After stirring, spread it back out and press it down again if you want clusters. Bake for another 15-20 minutes until it’s golden brown and smells amazing.
Here’s the crucial part—it might still seem slightly soft when you take it out. That’s OKAY. It will crisp up as it cools. I learned this after overcooking multiple batches trying to make it crispy in the oven.
Step 7: Cool Completely
Let the granola cool completely on the baking sheet without stirring it. This is when the clusters form. If you stir it while it’s hot, you’ll break up all the clusters and end up with loose granola (which is still good, but clusters are better).
I usually let mine cool for at least an hour. Sometimes I make it before bed and just leave it on the counter overnight.
Step 8: Add the Dried Fruit
Once the granola is completely cool, break it up into chunks and mix in your dried cranberries or raisins and chocolate chips if you’re using them.
I add the dried fruit after baking because if you bake it with the granola, it gets weirdly hard and chewy in a bad way. Learned that from attempt number two.
My Tips For the Best Maple Walnut Granola :
Don’t Overbake It
This is probably my biggest tip. Granola continues cooking on the hot pan after you remove it from the oven. Take it out when it’s golden but not super dark brown. It’ll finish crisping as it cools.
I set a timer on my phone for both the 20-minute mark and the final baking time because I WILL forget if I don’t. Last week I got distracted by a phone call and ended up with slightly burnt edges. Still edible but not ideal.
Press It Down For Clusters
If you want those big chunky clusters like the expensive store-bought granola, you HAVE to press the mixture down firmly before baking. Don’t be gentle about it. Really press it down.
And resist the urge to stir it too much. I only stir once halfway through and that’s it.
Real Maple Syrup Makes a Difference
I tried making this with pancake syrup once when I ran out of real maple syrup and it was just… wrong. The flavor was off and it didn’t get as crispy. Real maple syrup has a deeper, more complex flavor that fake syrup just can’t match.
It’s more expensive but totally worth it for this recipe.
Store It Properly
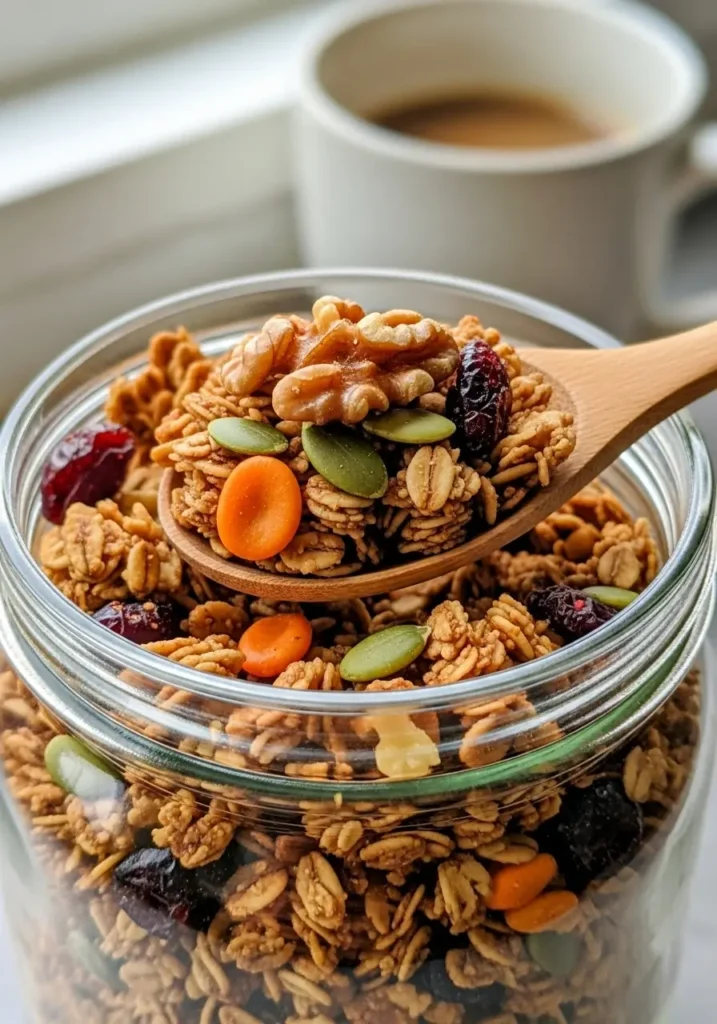
Keep your cooled granola in an airtight container at room temperature. It’ll stay crispy for 2-3 weeks (theoretically—mine never lasts that long because I eat it constantly).
I use a big glass jar with a tight lid. Looks pretty on the counter and keeps everything fresh.
Ways I Eat This Maple Walnut Granola :
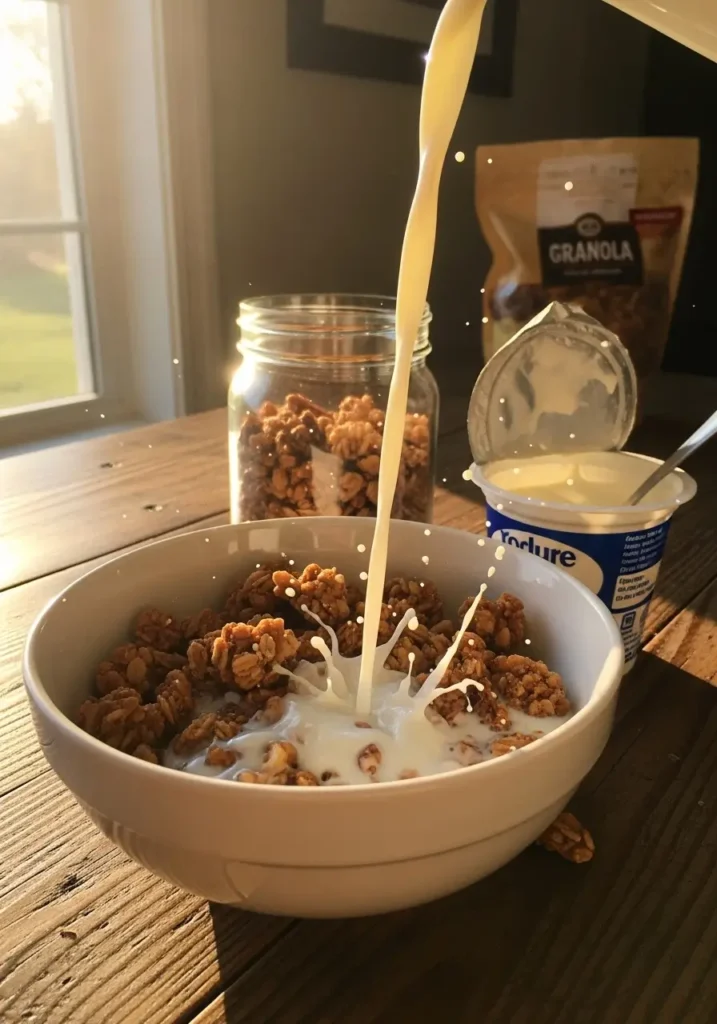
With Milk: Obviously. Like cereal. This is my go-to quick breakfast.
With Yogurt: Greek yogurt topped with this granola and fresh berries is SO good. Feels healthy even though the granola has chocolate chips in it.
Straight From the Jar: Not gonna lie, I snack on this constantly. Sometimes I pour some in a bowl and call it a snack. Sometimes I just grab handfuls while standing at the counter. No judgment.
On Ice Cream: Tried this on vanilla ice cream once and it was incredible. The cold ice cream with the crunchy granola? Perfect contrast.
Gift Packaging: I’ve started making this for holiday gifts. Put it in a cute jar with a ribbon and people act like you’re some kind of domestic goddess. Little do they know it takes like 15 minutes of actual work.
Why This Fall Breakfast is Perfect For Meal Prep :
So one of the best things about this maple walnut granola is that you can make a huge batch on Sunday and have breakfast sorted for the entire week. Or two weeks if you make a double batch.
I usually portion it out into containers so I can just grab one in the morning before work. Pour in some milk or yogurt and boom—breakfast is done. Saves me so much time and money compared to buying breakfast on the way to work.
Plus it’s actually filling. The oats and walnuts have fiber and protein so I’m not starving by 10 AM like I am when I just have toast or something.
Variations I’ve Tried :
Almond Version: Used almonds instead of walnuts once because that’s what I had. Different but really good. Almonds have a sweeter flavor than walnuts.
Extra Coconut: Added more coconut flakes because I’m obsessed with coconut. Turned out amazing. Used like a full cup instead of 1/3 cup.
Pumpkin Spice: Added extra cinnamon, ginger, and nutmeg to make it more pumpkin-spice flavored. Perfect for October and November.
Honey Maple: Used half honey and half maple syrup. Gave it a different sweetness that was really nice.
My Honest Take on Homemade Granola :
Look, making your own granola might seem unnecessary when you can just buy it at the store. But once you try homemade, it’s really hard to go back. It tastes SO much better and you can customize it exactly how you want.
Plus there’s something satisfying about making your own breakfast food from scratch. Makes you feel accomplished before 9 AM, which is always a win.
Is it as convenient as buying it? No. But it’s way cheaper and tastes better and you know exactly what’s in it. No weird preservatives or oils or ingredients you can’t pronounce.
The first batch might not be perfect (mine definitely wasn’t), but by the second or third time you’ll have it down. And then you’ll probably be making it all the time like I do.
If you try this maple walnut granola, let me know! I’m always curious if people make modifications or have tips I haven’t thought of. Happy baking! 🍁🥣
Maple Walnut Granola – Easy Homemade Fall Breakfast
Easy homemade maple walnut granola recipe with crunchy oat clusters, walnuts, pumpkin seeds, and real maple syrup. Perfect make-ahead fall breakfast and meal prep option ready in 45 minutes.
Ingredients
- 3 cups old-fashioned rolled oats
- 1 1/2 cups walnuts, roughly chopped
- 1/2 cup pumpkin seeds or sunflower seeds
- 1/3 cup coconut flakes (optional)
- 1 teaspoon ground cinnamon
- 1/2 teaspoon salt
- 1/4 teaspoon ground nutmeg (optional)
- 1/2 cup pure maple syrup
- 1/4 cup coconut oil, melted
- 1 teaspoon vanilla extract
- 1/4 teaspoon maple extract (optional)
- 1/2 cup dried cranberries or raisins
- 1/3 cup chocolate chips (optional)
Instructions
- Step 1Preheat oven to 300°F (150°C). Line a large baking sheet with parchment paper.
- Step 2In a large bowl, combine oats, chopped walnuts, seeds, coconut flakes, cinnamon, salt, and nutmeg. Stir until well mixed.
- Step 3In a small bowl, whisk together maple syrup, melted coconut oil, vanilla extract, and maple extract if using. Make sure coconut oil is fully melted.
- Step 4Pour wet mixture over dry ingredients and stir thoroughly for 2-3 minutes until every oat and nut is coated with the maple mixture.
- Step 5Pour mixture onto prepared baking sheet and spread in an even layer. For large clusters, press mixture down firmly with back of spatula.
- Step 6Bake for 20 minutes. Remove from oven, stir everything around, spread back out and press down again. Bake for additional 15-20 minutes until golden brown. Granola may seem slightly soft but will crisp up as it cools.
- Step 7Let granola cool completely on baking sheet without stirring for at least 1 hour. This is when clusters form. Do not stir while hot or clusters will break.
- Step 8Once completely cool, break granola into chunks and mix in dried cranberries or raisins and chocolate chips if using. Store in airtight container at room temperature for 2-3 weeks.