
The Best Espresso Coffee Cheesecake Recipe (My Coffee-Loving Family’s Obsession)
I’ll never forget the first time I made this espresso coffee cheesecake. It was my husband’s birthday, and he’d been dropping hints about wanting something “sophisticated” for dessert. You know how it is – sometimes you just want to show off a little in the kitchen, right? Well, let me tell you, this cheesecake absolutely delivered. The rich, velvety texture combined with that bold coffee flavor had everyone at the table asking for the recipe before they’d even finished their first bite.
What started as a birthday treat has become our go-to dessert for special occasions. There’s something about the way the espresso mingles with the cream cheese that just makes everything feel a little more luxurious. And honestly? It’s not nearly as difficult as it looks. I’ve made this cheesecake probably two dozen times now, and I’ve learned all the little tricks that make it foolproof.
Table of Contents
Why You’ll Love This Espresso Coffee Cheesecake
This isn’t just any coffee dessert – it’s a proper espresso cheesecake that delivers serious coffee flavor without being bitter or overwhelming. The secret is using real espresso powder (not instant coffee) and balancing it with just the right amount of sweetness.
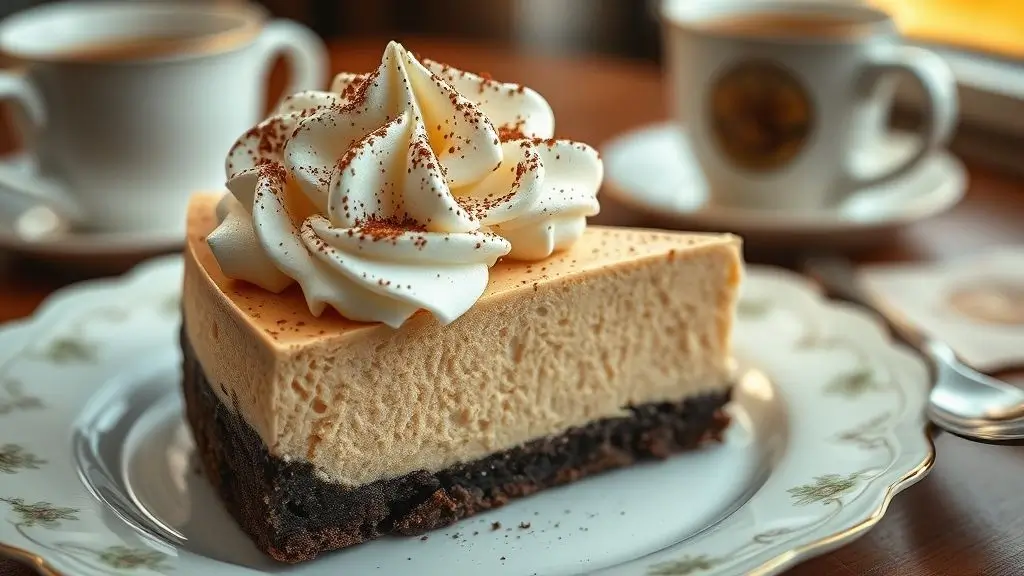
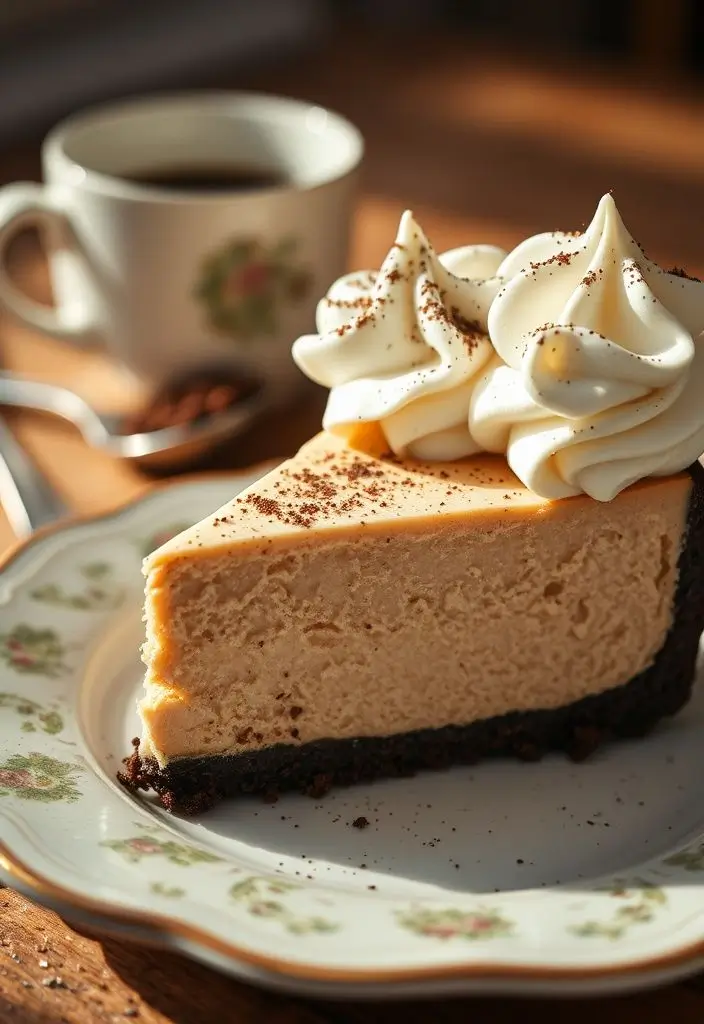
The texture is what really sets this apart from store-bought cheesecakes. It’s incredibly smooth and creamy, almost mousse-like, but with that classic dense cheesecake richness that makes you close your eyes after the first bite. The chocolate cookie crust adds the perfect contrasting crunch, and trust me, it’s so much better than graham crackers with this flavor profile.
I love that this recipe actually improves with time. While you can certainly eat it the day you make it, it’s even better after spending a night in the fridge. The flavors meld together beautifully, and the texture becomes even more luxurious.
What You’ll Need
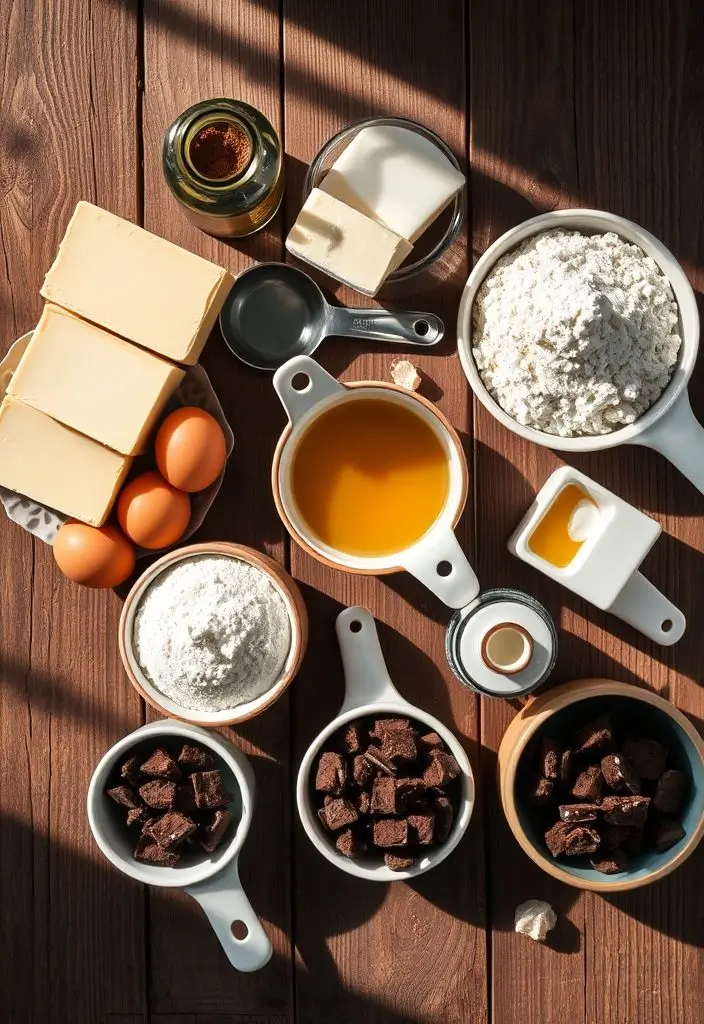
For the Crust:
- 24 chocolate wafer cookies (like Nabisco Famous Chocolate Wafers) – These create the perfect base with their rich chocolate flavor
- 4 tablespoons unsalted butter, melted – Helps bind everything together
- 2 tablespoons granulated sugar – Just a touch to enhance the chocolate
For the Espresso Cheesecake Filling:
- 32 oz cream cheese, room temperature – This is crucial! Cold cream cheese will give you lumps no matter how long you mix
- 1 cup granulated sugar – The perfect amount of sweetness to balance the espresso
- 3 large eggs, room temperature – Room temp eggs incorporate much more easily
- 1 cup sour cream – Adds tanginess and helps create that silky texture
- 3 tablespoons espresso powder – Not instant coffee! Real espresso powder makes all the difference
- 2 tablespoons hot water – To dissolve the espresso powder
- 1 teaspoon vanilla extract – Enhances all the other flavors
- 1/4 teaspoon salt – You’d be surprised how much this brightens everything up
For the Topping (Optional but Recommended):
- 1 cup heavy cream – For homemade whipped cream
- 2 tablespoons powdered sugar – To sweeten the cream
- 1 teaspoon espresso powder – For dusting on top
- Dark chocolate shavings – Because presentation matters!
Let’s Make It
Step 1: Prep Your Pan and Oven
First things first – preheat your oven to 325°F. I learned this the hard way, but always wrap the bottom of your 9-inch springform pan with heavy-duty aluminum foil. We’re going to use a water bath (don’t worry, it’s easier than it sounds), and you definitely don’t want water seeping into your cheesecake.
Step 2: Make the Crust
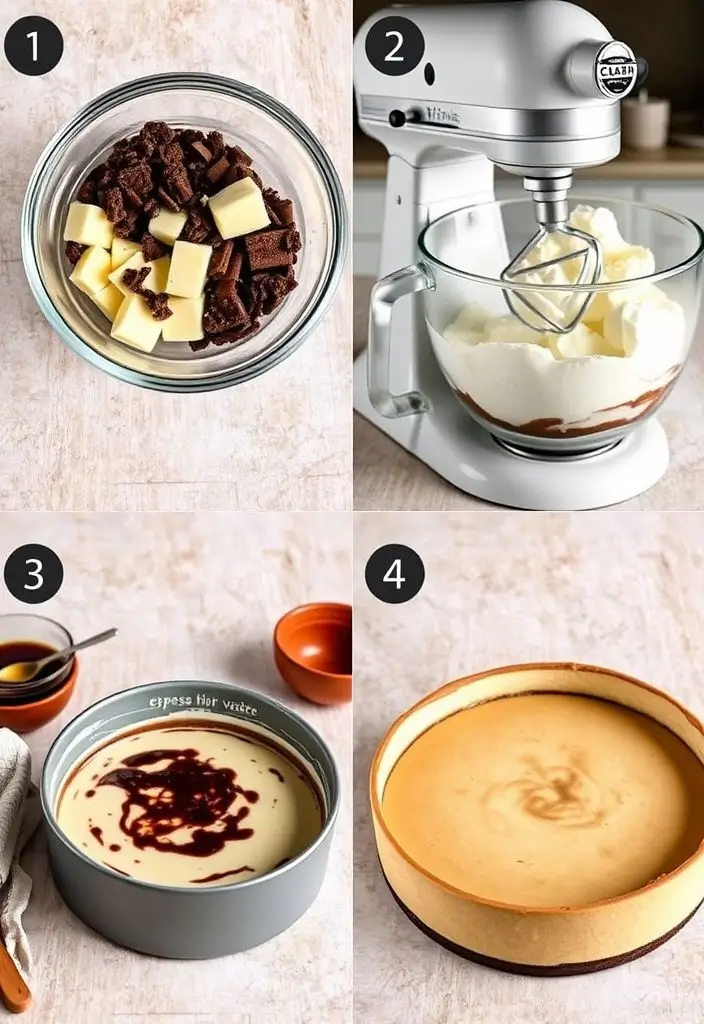
Crush those chocolate wafers until they’re fine crumbs. I use my food processor, but you can also put them in a sealed bag and go at them with a rolling pin – it’s actually pretty therapeutic after a long day! Mix the crumbs with melted butter and sugar until it looks like wet sand.
Press this mixture firmly into the bottom of your prepared pan. I use the bottom of a measuring cup to really pack it down. Pop it in the oven for 10 minutes, then set it aside to cool while you work on the filling.
Step 3: Prepare the Espresso
In a small bowl, dissolve the espresso powder in hot water. Stir it really well – you want it completely smooth with no lumps. Set this aside to cool slightly. This step is so important because it prevents those little specks of undissolved espresso powder that can make your cheesecake look muddy.
Step 4: Make the Filling
Here’s where patience really pays off. In a large bowl, beat the room temperature cream cheese until it’s completely smooth and fluffy. This takes about 3-4 minutes with an electric mixer. Don’t rush this step – any lumps now will stay in your finished cheesecake.
Gradually add the sugar, beating until well combined. Add the eggs one at a time, mixing on low speed just until incorporated. Overbeating at this stage can incorporate too much air, which leads to cracks.
Mix in the sour cream, vanilla, and salt. Finally, add your dissolved espresso mixture and mix until just combined. The batter should be smooth and creamy with a beautiful coffee color.
Step 5: Assemble and Bake
Pour the filling over your cooled crust and smooth the top with a spatula. Place your springform pan in a larger roasting pan and carefully pour hot water into the roasting pan until it reaches about halfway up the sides of the springform pan.
Bake for 55-65 minutes. The center should still have a slight jiggle when you gently shake the pan – it’ll continue cooking as it cools. Turn off the oven and crack the door open, letting the cheesecake cool in the oven for an hour. This gradual cooling prevents cracks.
Step 6: The Waiting Game
Remove from the water bath and let it cool completely at room temperature before refrigerating for at least 4 hours, but preferably overnight. I know it’s torture to wait, but trust me on this one.
Tips from My Kitchen
Room temperature ingredients are everything. I cannot stress this enough. Take your cream cheese and eggs out of the fridge at least 2 hours before you plan to bake. Cold ingredients lead to lumpy filling, and nobody wants that.
Don’t skip the water bath. I used to think this was just fancy chef nonsense, but it really does create the most incredible texture. The gentle, humid heat prevents the top from drying out and cracking.
The toothpick test doesn’t work here. Unlike regular cakes, you want the center to still jiggle slightly when done. It’ll set up perfectly as it cools.
Cracks happen, and that’s okay. If you do get a crack (and I have, many times), just cover it with whipped cream or chocolate shavings. Nobody will ever know, and it’ll still taste amazing.
Serving Suggestions
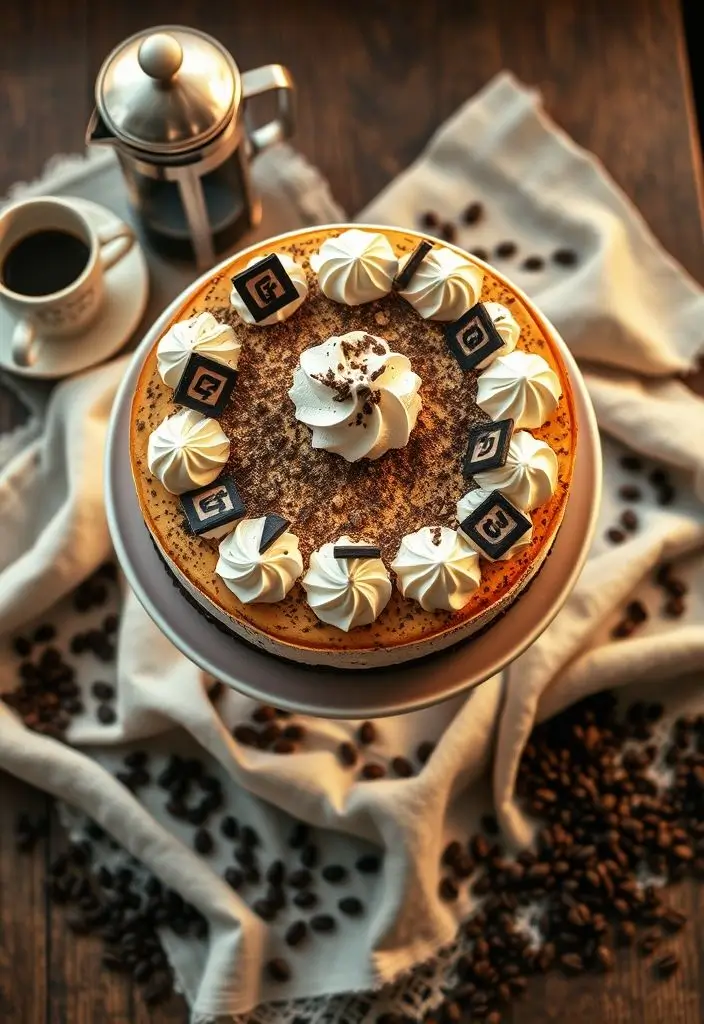
I love serving this espresso coffee cheesecake with a dollop of lightly sweetened whipped cream and a dusting of espresso powder. Sometimes I’ll add some dark chocolate shavings on top – it makes it look like something from a fancy restaurant.
For special occasions, I’ll serve it with a small cup of actual espresso on the side. There’s something so elegant about that pairing, and it really brings out the coffee flavors in the cheesecake.
If you’re feeling adventurous, try it with a drizzle of chocolate ganache or even a small scoop of vanilla ice cream. The temperature contrast is incredible.
Storage and Make-Ahead Tips
This cheesecake actually improves with time, so it’s perfect for making ahead. Store it covered in the refrigerator for up to 5 days. I usually cover it with plastic wrap, making sure the wrap doesn’t touch the surface.
You can also freeze this espresso cheesecake for up to 3 months. Just thaw it overnight in the refrigerator before serving. The texture might be slightly different, but it’s still absolutely delicious.
Variations I’ve Tried
Over the years, I’ve experimented with a few variations of this recipe. Sometimes I’ll add a tablespoon of coffee liqueur to the filling for an extra kick. I’ve also made it with a gingersnap crust instead of chocolate wafers – surprisingly good!
For chocolate lovers, I’ve stirred in some mini chocolate chips or added a layer of chocolate ganache on top. Both versions were hits at family gatherings.
The Final Verdict
This espresso coffee cheesecake has become one of my signature desserts, and for good reason. It’s impressive enough for special occasions but straightforward enough that I don’t stress about making it. The rich coffee flavor combined with that perfect creamy texture makes it a showstopper every single time.
Whether you’re a coffee fanatic like my husband or just someone who appreciates a really good dessert, this cheesecake delivers. It’s the kind of recipe that gets requested again and again, and honestly, I never get tired of making it. There’s something so satisfying about watching people take that first bite and seeing their faces light up.
So grab your springform pan and give this a try. Your kitchen will smell absolutely amazing, and you’ll have a dessert that’s guaranteed to impress. Just remember to start it the day before you plan to serve it – good things really do come to those who wait.