
Okay, so everyone and their mother claims to have the “best” chocolate chip cookie recipe, right? But here’s the thing—I’ve tried like 47 different versions over the years, and they were all… meh. Too flat, too cakey, too whatever. Then I found my grandma’s old recipe card shoved in the back of her recipe box after she passed, and honestly? Game changer.
Look, I’m gonna be honest with you. I messed these up spectacularly the first three times I tried making them. The first batch came out looking like sad, flat pancakes. The second time I forgot the baking soda entirely (don’t ask). Third time I burned them because my neighbor decided that was the perfect moment to tell me about her cat’s digestive issues. Fun times.
But batch number four? Chef’s kiss.
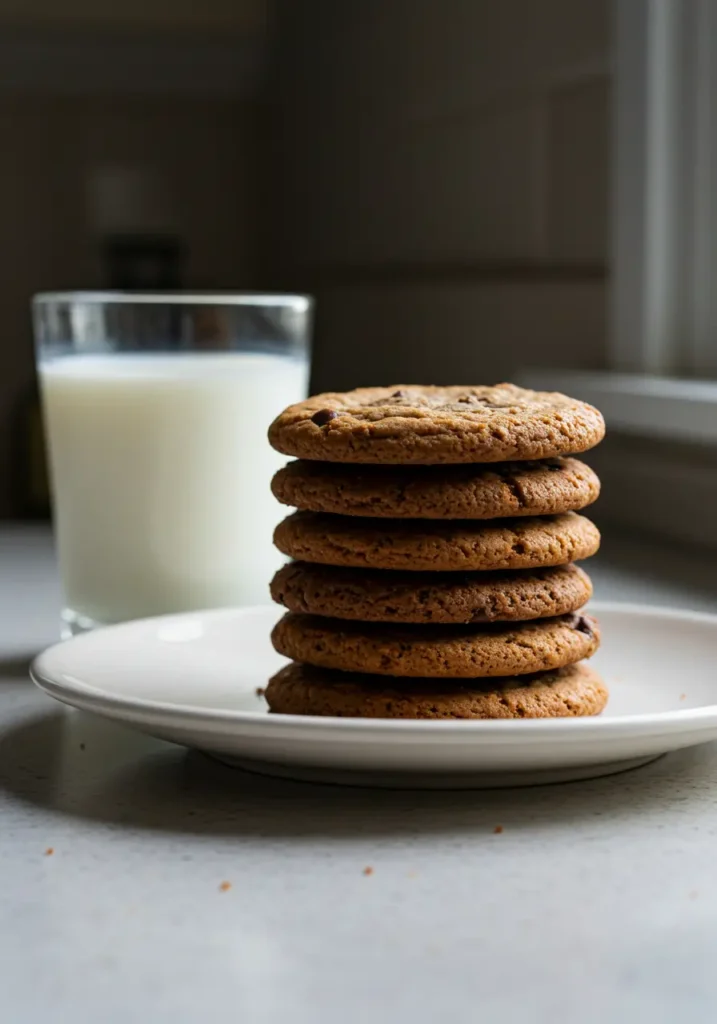
Now I make these every Sunday, and my kids literally fight over the last one. My 12-year-old has declared them “better than store-bought,” which is basically the highest compliment you can get from a teenager who lives on Hot Pockets.
Table of Contents
The Story Behind These Cookies :
My grandma Ruth never wrote anything down properly. Her recipe cards were chaos—half the ingredients missing, random notes in the margins like “add love” and “don’t overbake like Martha does.” Thanks, Grandma. Very helpful.
I think she got this recipe from her sister back in the 1960s… or maybe it was from a neighbor? Honestly, the family stories change depending on who you ask. What I do know is that she made these cookies for every birthday, bake sale, and random Tuesday when she felt like it.
The secret—and I’m not even kidding about this—is the combination of brown butter and an extra egg yolk. Sounds weird, I know. But trust me on this one.
What You’ll Need (And My Shopping Disasters) :

- 2 1/4 cups all-purpose flour (don’t use the fancy stuff, regular works fine)
- 1 teaspoon baking soda
- 1 teaspoon salt (I use whatever’s in my cabinet)
- 1 cup butter, softened (or you can brown it—I’ll explain later)
- 3/4 cup granulated sugar
- 3/4 cup brown sugar (packed, and yes it matters)
- 2 large eggs PLUS 1 extra egg yolk (this is key!)
- 2 teaspoons vanilla extract (real vanilla, not the fake stuff)
- 2 cups chocolate chips (I’m obsessed with the mini ones, but regular works too)
Quick shopping note: Last week I went to three different stores looking for brown sugar because apparently everyone in my neighborhood decided to bake simultaneously. Also, don’t buy those pre-made cookie doughs thinking you’ll save time. Just don’t. They taste like cardboard mixed with sadness.
Oh, and here’s something I learned the hard way—room temperature butter is crucial. I used to try to cheat by microwaving cold butter, but it gets all melty and weird. Just leave it out for like an hour. Set a reminder on your phone because you will forget.
The Method :
Step 1: Get Your Oven Ready
Preheat to 375°F. I know, I know, it seems hot for cookies, but that’s what makes them crispy on the edges and chewy in the middle. Also, line your baking sheets with parchment paper. Don’t skip this unless you enjoy scraping cookie remains off your pans with a chisel.
Step 2: The Brown Butter Magic (Optional But Amazing)
Here’s where things get interesting. You can use regular softened butter, OR you can brown it first. I brown about half of it because I’m extra like that.
Melt 1/2 cup of butter in a small saucepan over medium heat. Swirl it around until it turns golden brown and smells nutty—takes about 5 minutes. It’ll foam up and look scary, but that’s normal. Let it cool for 10 minutes before using.
Actually, you know what? Skip this step if you’re in a hurry. The cookies are still incredible without it.
Step 3: Mix the Dry Stuff
Whisk together flour, baking soda, and salt in a bowl. Set aside. This is the boring part, but don’t skip it unless you want lumpy cookies with random pockets of salt. Been there.
Step 4: The Main Event
In your biggest mixing bowl (and I mean BIGGEST—this makes a lot of cookies), cream together the butter and both sugars. If you used brown butter, make sure it’s cooled first or you’ll scramble your eggs in the next step.
Beat until fluffy, about 3-4 minutes. Your arm will hurt if you’re doing this by hand. Get a mixer if you don’t have one. Your future cookie-making self will thank you.
Step 5: Eggs and Vanilla
Add both eggs plus that extra yolk, one at a time. This is where the magic happens—that extra yolk makes them so much chewier. Then add vanilla and mix until just combined.
Step 6: The Tricky Part
Add the flour mixture gradually. Here’s where people mess up (including past me): don’t overmix! Mix just until you can’t see flour anymore. Overmixing makes tough cookies, and nobody wants that.
Step 7: Chocolate Time
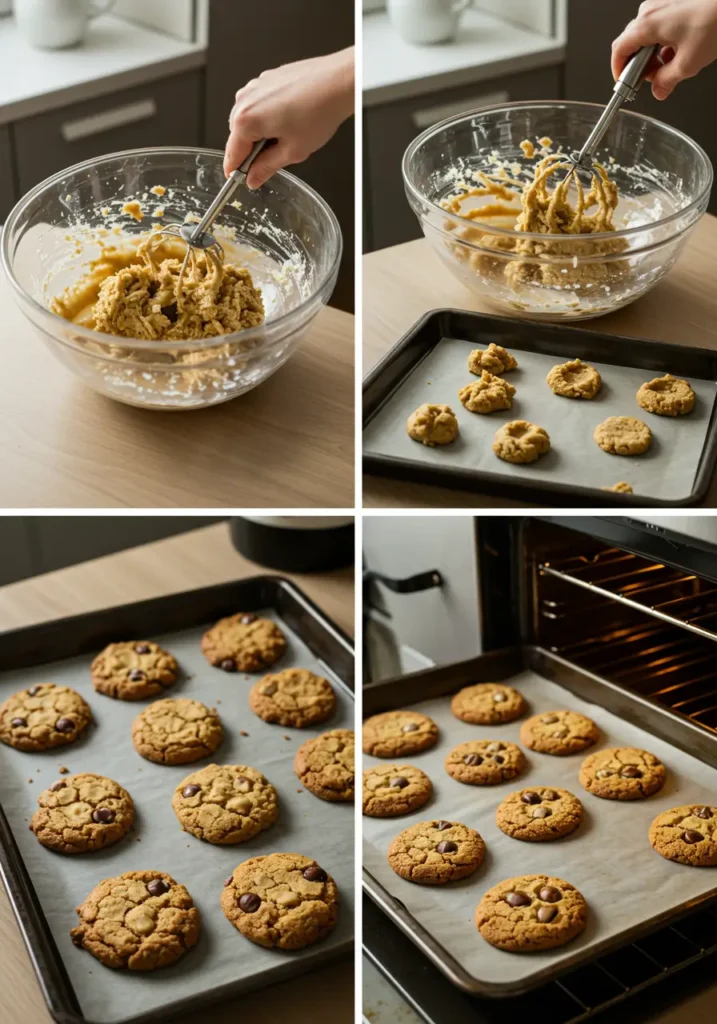
Fold in the chocolate chips by hand. I use way more than the recipe calls for because… why not? Life’s short, add more chocolate.
Step 8: Baking (Don’t Walk Away!)
Drop rounded tablespoons of dough onto your lined baking sheets. Give them space—these babies spread. Bake for 9-11 minutes. They’ll look slightly underdone when you take them out, but they keep cooking on the hot pan.
This is crucial: set a timer for 9 minutes and DO NOT leave the kitchen. I once got distracted by a phone call and came back to cookie charcoal. My kids still bring this up during family dinners.
My Hard-Learned Tips :
Temperature matters more than you think. Room temperature ingredients mix better. Cold eggs straight from the fridge make everything chunky and weird.
Don’t flatten them. I know it’s tempting, but let them spread naturally. They’ll be perfectly thick and chewy.
The toothpick test doesn’t work here. These cookies should look slightly underbaked when you remove them. They’ll finish cooking on the pan.
Storage secrets: Keep them in an airtight container with a slice of bread. Sounds weird, but it keeps them soft. Replace the bread every couple days or you’ll have moldy cookies. Also learned this the hard way.
Actually, here’s something random—I store mine in my grandma’s old cookie tin. It’s dented and the lid doesn’t fit quite right anymore, but somehow the cookies taste better in there. Maybe it’s nostalgia, maybe it’s magic. Who knows?
When Things Go Wrong (Because They Will) :
Too flat? Your butter was probably too warm, or you didn’t use enough flour. Also, old baking soda makes cookies spread too much. When’s the last time you replaced yours? Be honest.
Too thick and cakey? You overmixed the dough or your eggs were too cold. Also, make sure you’re measuring flour correctly—scoop and level, don’t pack it down.
Burned bottoms? Your oven runs hot, or your baking sheets are too dark. I use light-colored aluminum pans now.
They taste like sadness? You probably used fake vanilla or skipped the salt. Salt makes everything taste better, even cookies.
Oh, and if you burn a batch (we’ve all been there), don’t throw them away immediately. Sometimes you can scrape off the burned parts and salvage them. I’ve served “rustic” cookies before and nobody knew the difference.
Variations I’ve Actually Tried :
Add-ins that work: Chopped walnuts, mini marshmallows (trust me), dried cranberries, or a handful of toffee bits. My weird combination? Mini chocolate chips and crushed pretzels. Don’t knock it till you try it.
Add-ins that don’t work: Fresh fruit (makes them soggy), coconut flakes (texture gets weird), and raisins (because why would you ruin perfectly good cookies with raisins?).
Flavor twists: Sometimes I add a teaspoon of cinnamon, or replace half the vanilla with almond extract. Once I added orange zest and it was surprisingly good.
The Real Talk :
These aren’t the prettiest cookies you’ll ever make. They’re not Instagram-perfect with artistic chocolate chip placement. But they taste like childhood and Sunday afternoons and everything good about homemade treats.
My grandma would probably laugh at how complicated I’ve made her simple recipe. She never measured anything precisely, just threw ingredients together by feel. But I need structure, okay? Some of us don’t have natural baking intuition.
The best part? My kids will probably make these with their kids someday, and hopefully they’ll remember standing on kitchen chairs, stealing chocolate chips when they thought I wasn’t looking.
Is it just me, or do homemade cookies make everything better? Bad day at work? Cookies. Kids fighting? Cookies. Tuesday? Definitely cookies.
Final Thoughts :
Look, I’ve given you all my secrets here. The brown butter trick, the extra egg yolk, the don’t-walk-away-from-the-oven advice. If you mess these up after all this, I honestly don’t know what to tell you.
But seriously, try these. Make them for someone you love, or make them just because you deserve good cookies on a random Wednesday. Either way, your kitchen will smell amazing and you’ll have about four dozen reasons to smile.
Let me know how yours turn out! And if you come up with any crazy add-in combinations, I want to hear about them. I’m always looking for new ways to make these even better.
Happy baking! (And may your smoke alarms stay silent and your chocolate chips plentiful.) 🍪
P.S. – I usually double this recipe because they disappear way too fast. Just saying.
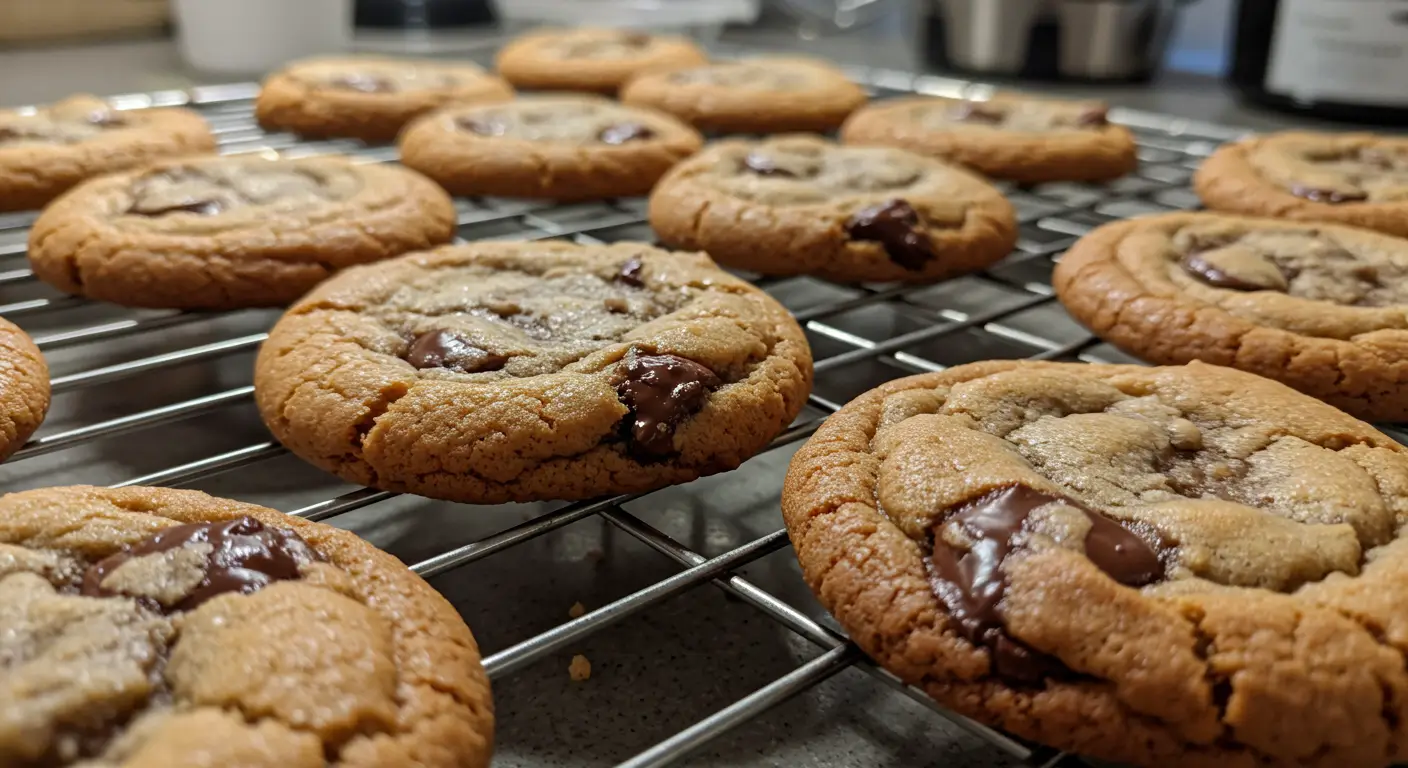
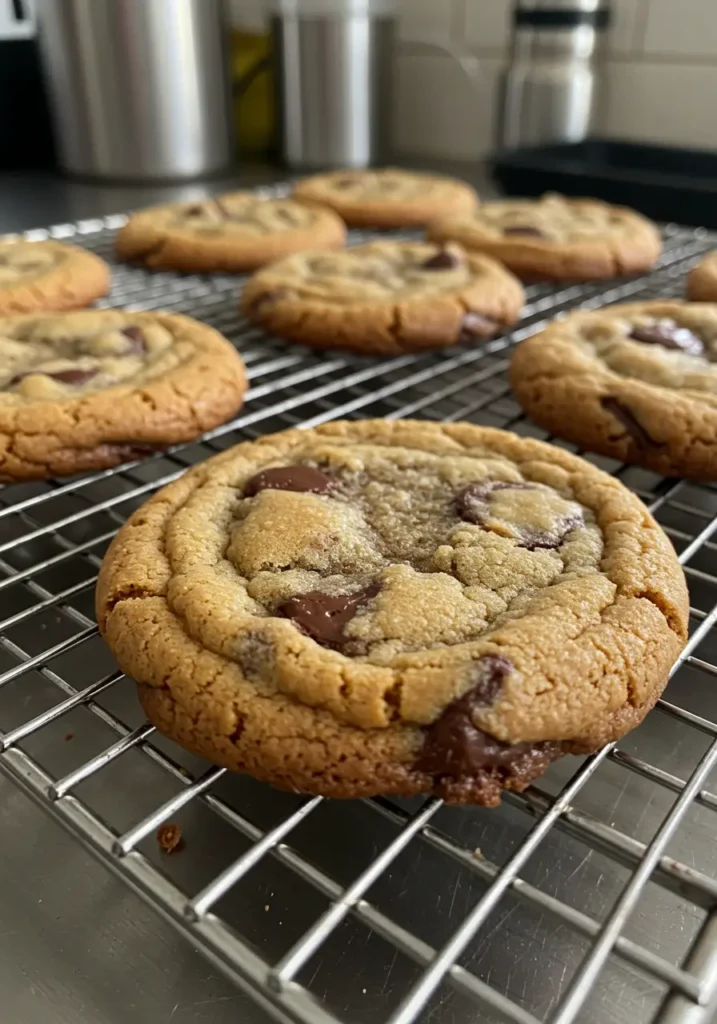
Grandma's Secret Chocolate Chip Cookies
My grandmother's secret chocolate chip cookie recipe featuring brown butter and an extra egg yolk for the perfect chewy texture with crispy edges. These homemade cookies are easy to make and use simple ingredients for incredible results.
Ingredients
- 2 1/4 cups all-purpose flour
- 1 teaspoon baking soda
- 1 teaspoon salt
- 1 cup butter, softened (or half brown butter)
- 3/4 cup granulated sugar
- 3/4 cup brown sugar, packed
- 2 large eggs plus 1 extra egg yolk
- 2 teaspoons vanilla extract
- 2 cups chocolate chips
Instructions
- Step 1Preheat oven to 375°F (190°C). Line baking sheets with parchment paper.
- Step 2Optional: Brown 1/2 cup butter in saucepan over medium heat until golden and nutty, about 5 minutes. Cool for 10 minutes.
- Step 3Whisk together flour, baking soda, and salt in a bowl. Set aside.
- Step 4Cream butter and both sugars in large bowl until fluffy, about 3-4 minutes.
- Step 5Add eggs, extra egg yolk, and vanilla extract. Mix until just combined.
- Step 6Gradually add flour mixture, mixing just until no flour is visible. Don't overmix.
- Step 7Fold in chocolate chips by hand.
- Step 8Drop rounded tablespoons of dough onto prepared baking sheets, spacing them apart.
- Step 9Bake for 9-11 minutes until edges are golden but centers look slightly underbaked.
- Step 10Cool on baking sheet for 5 minutes before transferring to wire rack.