
Look, I need to be honest with you right up front. I’m a crispy cookie person. Always have been. Give me a chocolate chip cookie that practically shatters when you bite into it, and I’m in heaven. So when people started raving about these soft, cake-like Pumpkin Chocolate Chip Cookies, I was… skeptical. Very skeptical.
But then my coworker Sarah brought a batch to our office potluck last October, and I figured I’d try one just to be polite. One bite in, and I had to completely rethink my entire cookie philosophy. These things are incredible. They’re soft but not mushy, chewy but not dense, and somehow the pumpkin makes the chocolate chips taste even more chocolatey.
Now it’s September, and I’ve already made three batches. My family thinks I’ve lost my mind, but honestly? I might have found my new favorite fall obsession.
Table of Contents
My Cookie Crisis and Revelation :
The thing about pumpkin cookies is they can go wrong in so many ways. Too much pumpkin and they’re gummy and weird. Too little and you can’t taste it. Too much flour and they’re dry as cardboard. Not enough and they spread into sad, flat pancakes.
My first attempt at recreating Sarah’s cookies was a disaster. I found some random recipe online, followed it exactly, and ended up with what my husband generously called “pumpkin frisbees.” They were flat, crispy (but not in a good way), and tasted like disappointment with a hint of cinnamon.
I think I made seven different batches before I figured out the secret: it’s all about the moisture balance and not overmixing. Also, brown butter. But we’ll get to that in a minute.
What Makes These Different From Every Other Pumpkin Cookie :
Here’s the thing—most pumpkin cookie recipes I tried either taste like pumpkin pie filling in cookie form (too sweet, too spiced) or they taste like regular cookies with orange food coloring (what’s the point?). These hit that perfect middle ground where you can actually taste the pumpkin, but it’s not overwhelming.
The secret is using just enough pumpkin to add moisture and flavor without making them taste like baby food. And the brown butter? Game changer. It adds this nutty, caramel-y depth that makes the whole cookie more complex without being fancy or weird.
My 13-year-old, who usually only eats chocolate chip cookies if they’re the Pepperidge Farm kind from the bag, asked me to pack these in his lunch. When a teenager voluntarily chooses homemade over store-bought, you know you’ve achieved something special.
Shopping List :
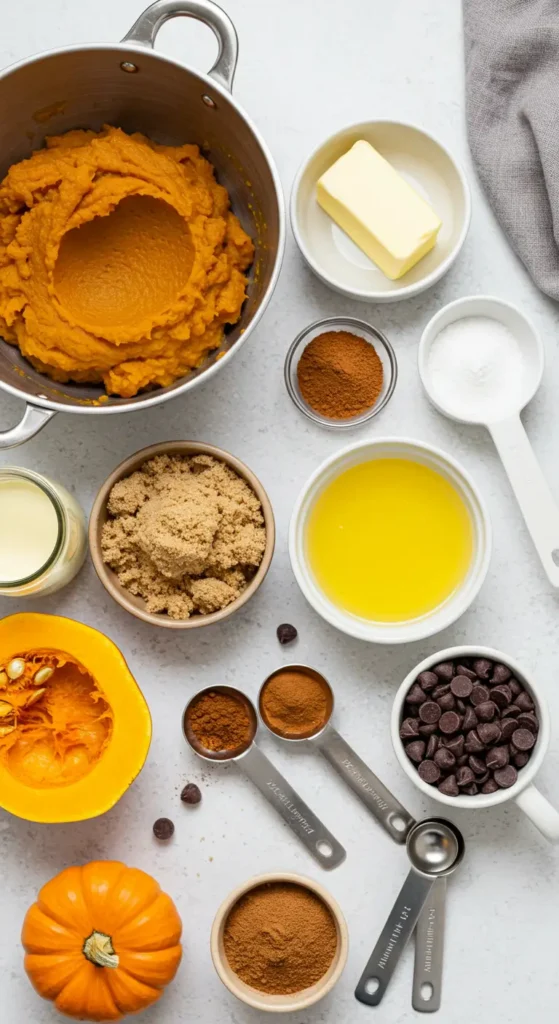
The Cookie Foundation:
- 1/2 cup butter (I use salted because that’s what I always have)
- 1/2 cup pumpkin puree (NOT pumpkin pie filling—learned this mistake once)
- 1/2 cup brown sugar, packed
- 1/4 cup granulated sugar
- 1 large egg
- 1 teaspoon vanilla extract
The Dry Squad:
- 1 1/4 cups all-purpose flour
- 1/2 teaspoon baking soda
- 1/2 teaspoon salt
- 1 teaspoon ground cinnamon
- 1/4 teaspoon ground nutmeg
- 1/8 teaspoon ground ginger
The Good Stuff:
- 3/4 cup semi-sweet chocolate chips (don’t go cheap here—it makes a difference)
- Optional: 1/4 cup mini chocolate chips for extra chocolate distribution
About that brown butter situation: I used to think browning butter was some fancy chef technique that was way too complicated for regular home baking. Wrong again. You literally just cook butter in a pan until it smells nutty and turns golden. Takes about 5 minutes. But it makes these cookies taste like they came from an expensive bakery.
Just don’t walk away from the stove while you’re browning butter. I learned this when I burned a whole stick trying to multitask. The smell of burned butter haunted my kitchen for days.
The Method :
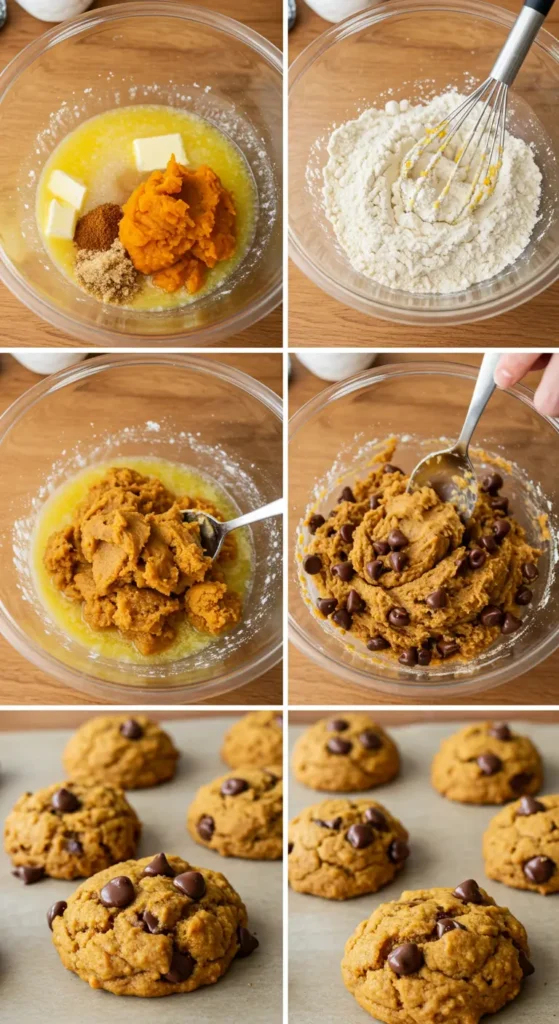
Step 1: Brown That Butter (The Game Changer) In a small saucepan, melt your butter over medium heat. Keep stirring until it turns golden brown and smells nutty—about 5 minutes. You’ll see little brown bits at the bottom, and that’s exactly what you want.
Pour it into a bowl and let it cool for about 10 minutes. This step is crucial—hot butter will cook your egg when you mix everything together.
Step 2: Mix the Wet Stuff Add the pumpkin puree, both sugars, egg, and vanilla to the cooled brown butter. Whisk until everything is smooth and well combined. The mixture should look glossy and smell incredible.
Step 3: Dry Ingredients Dance In a separate bowl, whisk together flour, baking soda, salt, cinnamon, nutmeg, and ginger. Make sure there are no clumps—sifting isn’t necessary, but a good whisk definitely is.
Step 4: The Critical Moment Add the dry ingredients to the wet ingredients and stir just until combined. This is where I messed up for weeks—I kept overmixing because the dough looked lumpy and I thought that was wrong. But lumpy is fine! Overmixed cookies are tough cookies.
Fold in the chocolate chips gently. Don’t go crazy here—you want them distributed but not beaten to death.
Step 5: The Waiting Game (Worth It, I Promise) Here’s where these cookies are different from regular chocolate chip cookies: the dough needs to chill for at least 30 minutes. I know, I know—waiting is the worst part. But this step is what makes them chewy instead of cakey.
Cover the bowl and stick it in the fridge. Use this time to clean your kitchen or start dinner or scroll through your phone guilt-free.
Step 6: Bake and Try Not to Overbake Preheat your oven to 350°F and line baking sheets with parchment paper. Scoop the dough into 2-tablespoon portions (I use a cookie scoop because I’m fancy like that) and space them about 2 inches apart.
Bake for 10-12 minutes. They should look slightly underdone when you take them out—still soft in the center with just barely set edges. They’ll continue cooking on the hot pan.
This is crucial: let them cool on the baking sheet for 5 minutes before transferring to a wire rack. If you try to move them too soon, they’ll fall apart and you’ll be sad.
My Favorite Variations :
The “White Chocolate Situation”: Replace half the chocolate chips with white chocolate chips. The contrast is beautiful and the flavor is amazing—like a pumpkin spice latte in cookie form.
The “Cranberry Autumn”: Add 1/3 cup dried cranberries along with the chocolate chips. The tartness plays really well with the sweet pumpkin. Very New England fall vibes.
The “Spice Market Special”: Add a tiny pinch of cardamom and increase the ginger to 1/4 teaspoon. Makes them taste more complex and sophisticated.
The “Caramel Dreams”: Use caramel chips instead of chocolate chips. I found these at Target once and they were life-changing. Sweet and salty and perfect with pumpkin.
Things That Went Wrong So You Don’t Have To :
Don’t skip the chilling step thinking you can save time. I tried this exactly once and ended up with flat, sad cookies that spread all over the pan and looked like orange pancakes. Not cute.
Make sure your pumpkin puree isn’t too watery. Some brands are thinner than others, and watery pumpkin makes weird-textured cookies. If it looks thin, drain it on paper towels for a few minutes.
Don’t overbake these! They should still look slightly underdone when you take them out. I kept baking them until they were completely set, and they turned out dry and crumbly instead of chewy.
Room temperature ingredients mix better, but if you forgot to take your egg out (like I do about half the time), just run it under warm water for a minute. Works fine.
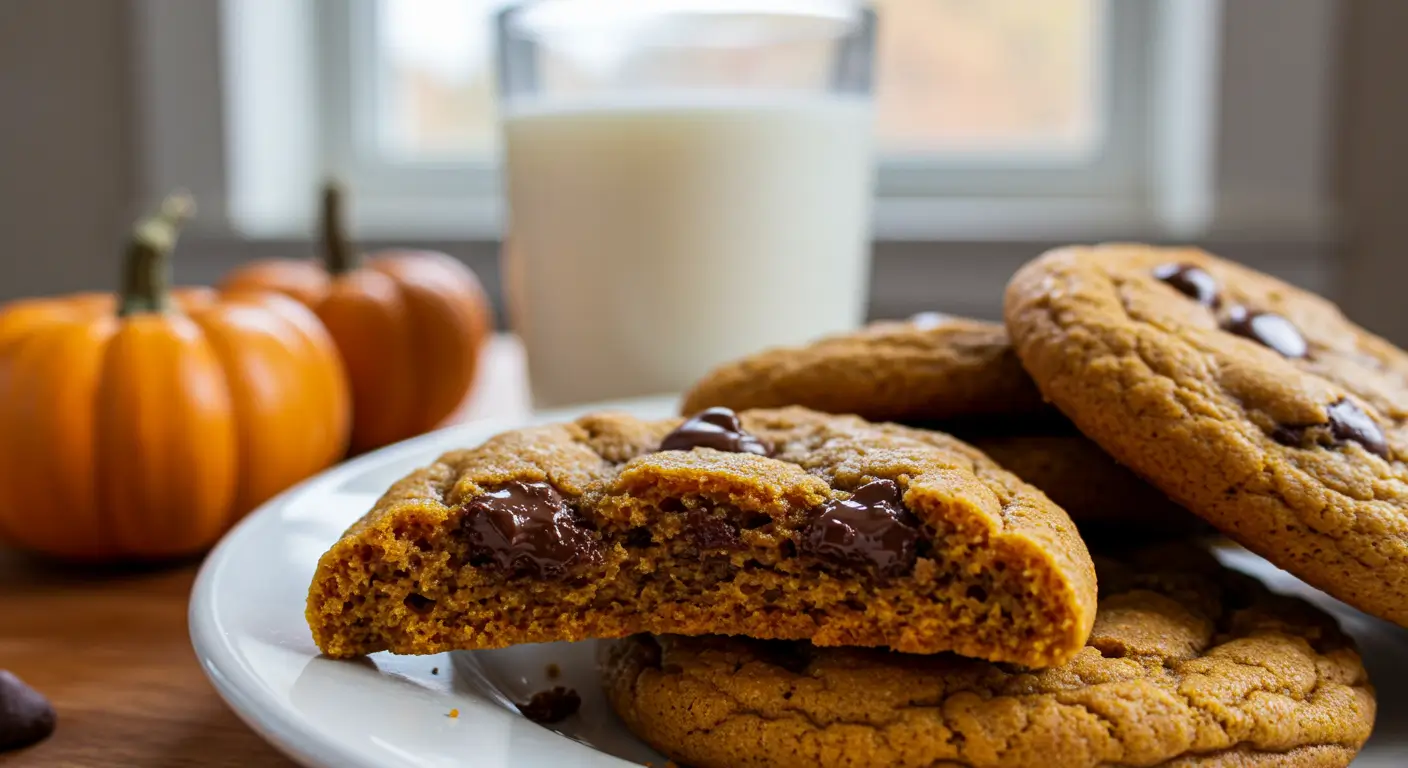
The Texture Talk :
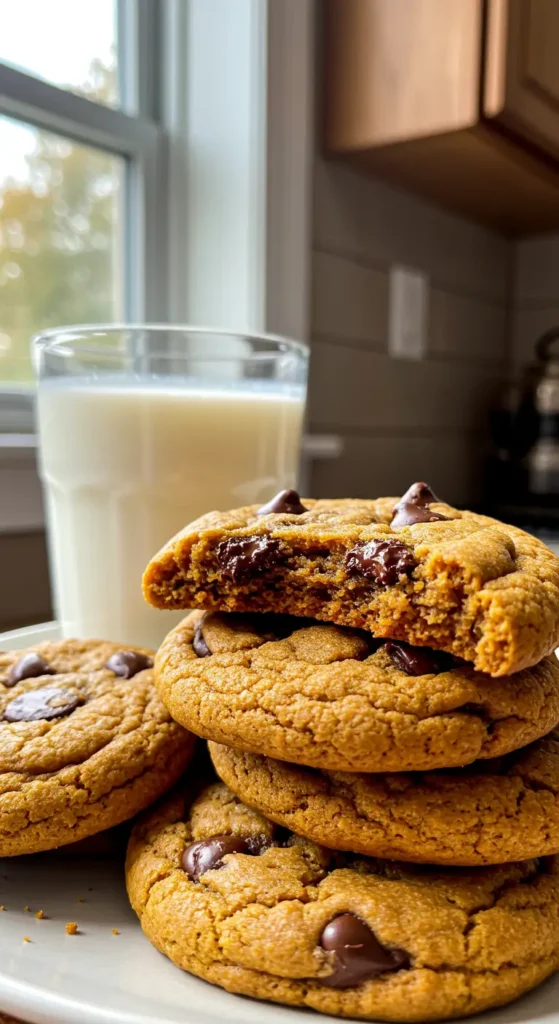
These cookies are what I like to call “perfectly chewy.” They’re soft and tender, but they hold their shape and have a nice chew to them. Not cakey, not crispy—somewhere in that perfect middle ground.
The brown butter adds this incredible depth of flavor, the pumpkin keeps them moist, and the chocolate chips add little pockets of melty goodness. It’s like eating fall, but in the best possible way.
If you prefer your cookies on the softer side, underbake them by a minute or two. If you like them with a bit more structure, add an extra minute to the baking time.
Storage and the Great Cookie Sharing Debate :
These cookies stay soft for about a week when stored in an airtight container. After that, they start to dry out a bit, but you can refresh them by microwaving for 10-15 seconds.
They also freeze beautifully. I usually make a double batch and freeze half the dough in pre-scooped portions. Then I can have fresh cookies whenever I want them—just bake straight from frozen and add an extra minute or two to the time.
Fair warning: these are dangerous to have around. My family of four polished off a dozen cookies in less than 24 hours. I’m thinking about making smaller batches for the sake of everyone’s waistlines.
Why Pumpkin Chocolate Chip Cookies Became My New Fall Tradition :
I never thought I’d be the person who gets excited about seasonal cookies, but here we are. There’s something about these that just screams autumn in the best way. Maybe it’s the warm spices, maybe it’s the pumpkin, or maybe it’s just that they taste like comfort food in cookie form.
My kids request these every weekend from September through November. My husband has started hiding them from himself because he has no self-control when they’re sitting on the counter. And I’ve become that person who brings homemade cookies to every fall gathering.
They’re also perfect for care packages, teacher gifts, or just having around when you need something sweet and comforting. Plus, they make your house smell incredible while they’re baking.
Final Thoughts :
Look, I know there are a million pumpkin cookie recipes out there. But this one is different. It’s been tested by a former crispy-cookie devotee who was completely converted by these chewy, perfectly spiced, chocolate-studded little rounds of autumn happiness.
They’re not complicated, they use ingredients you probably already have (especially if you’re like me and buy pumpkin puree in bulk every September), and they’re virtually foolproof once you know the few key techniques.
The brown butter step might seem like extra work, but it takes five minutes and makes these cookies taste like they came from a fancy bakery. And the chilling time? Perfect excuse to clean up your kitchen or start on dinner.
Try them this weekend. Make the basic version first, then experiment with different add-ins once you’ve got the technique down. And don’t blame me when you find yourself making them every other week until the pumpkin puree runs out.
Welcome to the chewy cookie club. We have milk and absolutely no regrets.
P.S. – Let me know what variations you try! I’m already plotting a version with pecans and maybe some cream cheese chips because apparently I have no chill when it comes to fall baking.
Chewy Pumpkin Chocolate Chip Cookies
Perfectly chewy pumpkin chocolate chip cookies made with brown butter and warm fall spices. These soft, flavorful cookies have the ideal texture and stay fresh for days.
Ingredients
- 1/2 cup butter
- 1/2 cup pumpkin puree
- 1/2 cup brown sugar, packed
- 1/4 cup granulated sugar
- 1 large egg
- 1 teaspoon vanilla extract
- 1 1/4 cups all-purpose flour
- 1/2 teaspoon baking soda
- 1/2 teaspoon salt
- 1 teaspoon ground cinnamon
- 1/4 teaspoon ground nutmeg
- 1/8 teaspoon ground ginger
- 3/4 cup semi-sweet chocolate chips
Instructions
- Step 1Brown butter in a small saucepan over medium heat, stirring constantly until golden brown and nutty-smelling, about 5 minutes. Cool for 10 minutes.
- Step 2In a large bowl, whisk together cooled brown butter, pumpkin puree, brown sugar, granulated sugar, egg, and vanilla until smooth.
- Step 3In a separate bowl, whisk together flour, baking soda, salt, cinnamon, nutmeg, and ginger.
- Step 4Add dry ingredients to wet ingredients and stir just until combined. Do not overmix.
- Step 5Fold in chocolate chips gently.
- Step 6Cover bowl and chill dough for at least 30 minutes (this is crucial for texture).
- Step 7Preheat oven to 350°F (175°C). Line baking sheets with parchment paper.
- Step 8Scoop dough into 2-tablespoon portions and place 2 inches apart on prepared baking sheets.
- Step 9Bake for 10-12 minutes until edges are just set but centers still look slightly underdone.
- Step 10Cool on baking sheet for 5 minutes before transferring to wire rack. Store in airtight container.