
Okay, so I messed this up three times before getting it right. And I’m talking about REALLY messed up – like, my husband took one bite of attempt number two and politely asked if we had any leftover pizza. Ouch.
But here’s the thing… I’m stubborn. My neighbor Sarah keeps bragging about her “famous” Baked Mac and Cheese, and honestly? I was tired of nodding and pretending her dry, flavorless version was amazing. So I went on a mission to create something that would make people forget about whatever boxed nonsense they’ve been eating.
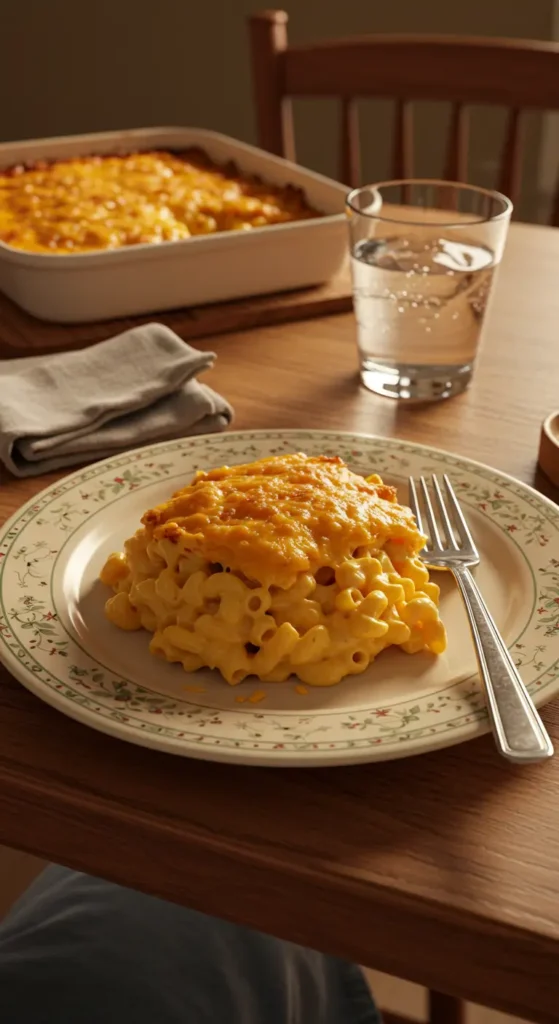
This recipe? It’s not fancy. It won’t win any Instagram contests. But it WILL make your family hover around the kitchen asking “Is it ready yet?” every five minutes. Trust me on this one.
Table of Contents
How I Finally Figured This Out :
Look, I’m gonna be honest – I thought making baked mac and cheese was just dumping noodles and cheese in a pan. Wrong. So very wrong. My first attempt was basically cheese soup with some confused macaroni floating around. The second time I used pre-shredded cheese (don’t judge me, I was lazy) and it turned into this weird, grainy mess that my 8-year-old described as “crunchy but not the good kind.”
The breakthrough came when I stopped trying to be fancy and just focused on what makes mac and cheese actually good: creamy sauce, properly cooked pasta, and cheese that doesn’t fight you. Also, I finally listened to my mom who’s been telling me for years to stop rushing everything. Some things just take time.
What You’ll Need (And What NOT to Buy) :
For the love of all that’s holy, do NOT buy pre-shredded cheese for this. I cannot stress this enough. That stuff is coated with anti-caking agents that make it all weird and clumpy. Grate your own. It takes like three extra minutes and makes all the difference.
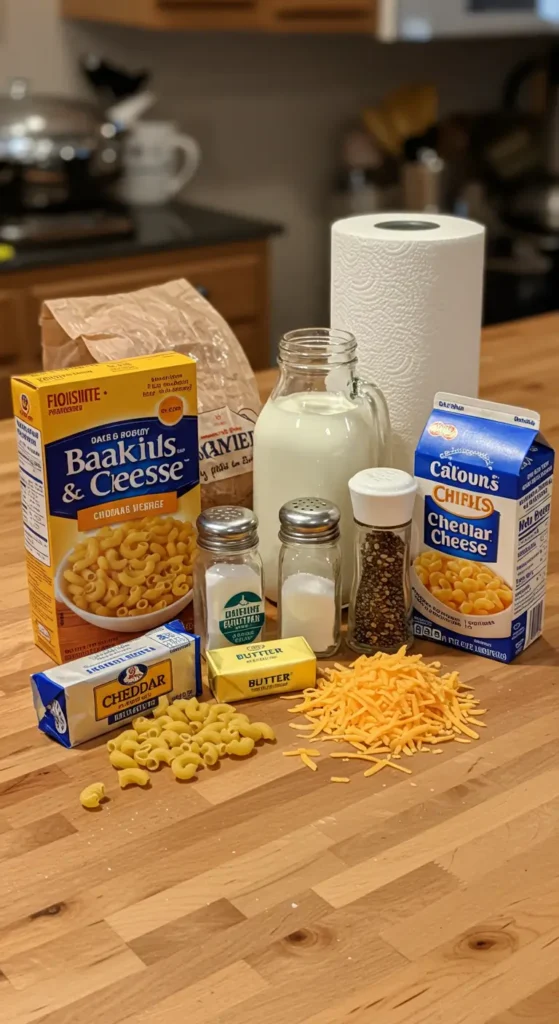
Here’s what actually works:
- 1 pound elbow macaroni (or whatever short pasta you have)
- 4 tablespoons butter
- 1/4 cup all-purpose flour
- 3 cups whole milk (don’t even think about using skim)
- 8 oz sharp cheddar cheese, freshly grated
- 8 oz Gruyère cheese, freshly grated (or more cheddar if you can’t find it)
- 4 oz cream cheese, softened
- 1 teaspoon Dijon mustard (sounds weird, trust the process)
- 1/2 teaspoon garlic powder
- Salt and black pepper to taste
- 1/2 cup panko breadcrumbs
- 2 tablespoons melted butter (for the topping)
- Optional: 1/4 teaspoon paprika (for color and because it’s pretty)
Shopping tip: I always buy a little extra cheese because I inevitably sneak some while cooking. Also, get the good Dijon mustard, not the neon yellow stuff. It makes a difference you can actually taste.
Let’s Get Cooking :
Step 1: The Pasta Foundation
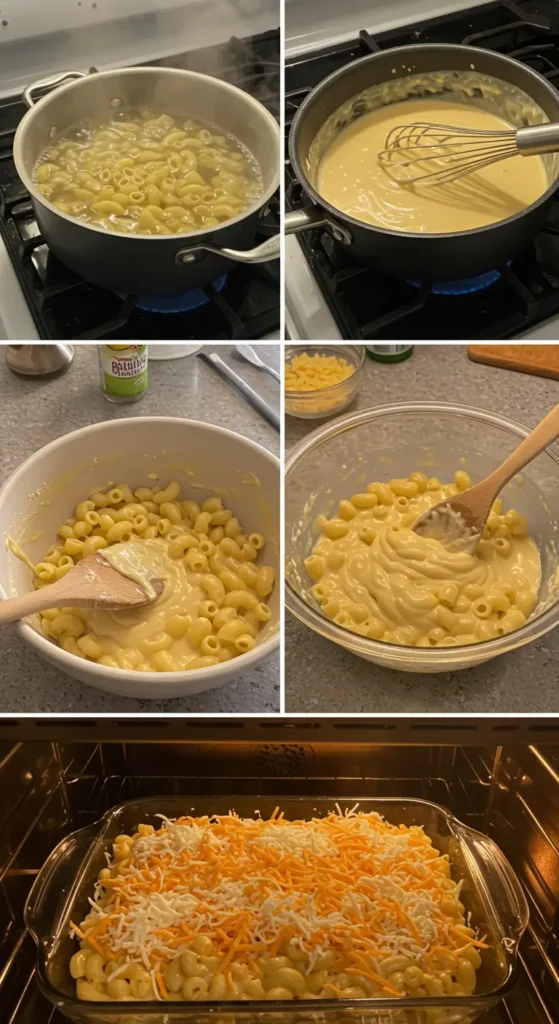
Bring a big pot of salted water to boil. And I mean SALTED – it should taste like the ocean. Cook your macaroni until it’s just shy of al dente. We’re talking like 1-2 minutes less than the box says because it’s going in the oven later.
Pro tip I learned the hard way: Save a cup of that starchy pasta water before draining. You might need it later if your sauce gets too thick. Learned this during attempt number three when my sauce turned into cement.
Step 2: The Magic Sauce (AKA Don’t Panic)
In a large saucepan, melt your 4 tablespoons of butter over medium heat. Once it’s melted and bubbly, whisk in the flour. This is called a roux, and it’s gonna look like paste at first. That’s normal. Keep whisking for about 2 minutes until it smells nutty.
Now here’s where things get real: slowly add your milk, whisking constantly. And I mean CONSTANTLY. If you stop whisking, you’ll get lumps, and nobody wants lumpy mac and cheese. Start with just a splash, whisk like your life depends on it, then gradually add the rest.
The sauce will thicken as it heats up. Once it’s coating the back of a spoon, remove it from heat.
Step 3: Cheese Integration (The Critical Moment)
This is where attempt number one went sideways. Add your cream cheese first and whisk until smooth. Then add the grated cheeses a handful at a time, stirring after each addition. Don’t dump it all in at once like I did – you’ll get a stringy mess.
Stir in the Dijon mustard (I know, I know, but just do it), garlic powder, salt, and pepper. Taste it. Adjust the seasoning. It should be slightly oversalted because the pasta will absorb some of that flavor.
Step 4: Assembly Time
Preheat your oven to 350°F. I always forget this step and then stand around waiting for 15 minutes while it heats up. Don’t be like me.
Mix the drained pasta with your cheese sauce. It should be saucy and loose – almost soupy. If it looks too thick, add some of that pasta water you saved. Pour everything into a greased 9×13 baking dish.
For the topping, mix your panko crumbs with the melted butter and sprinkle over the top. Add paprika if you’re feeling fancy.
Step 5: The Baking Magic
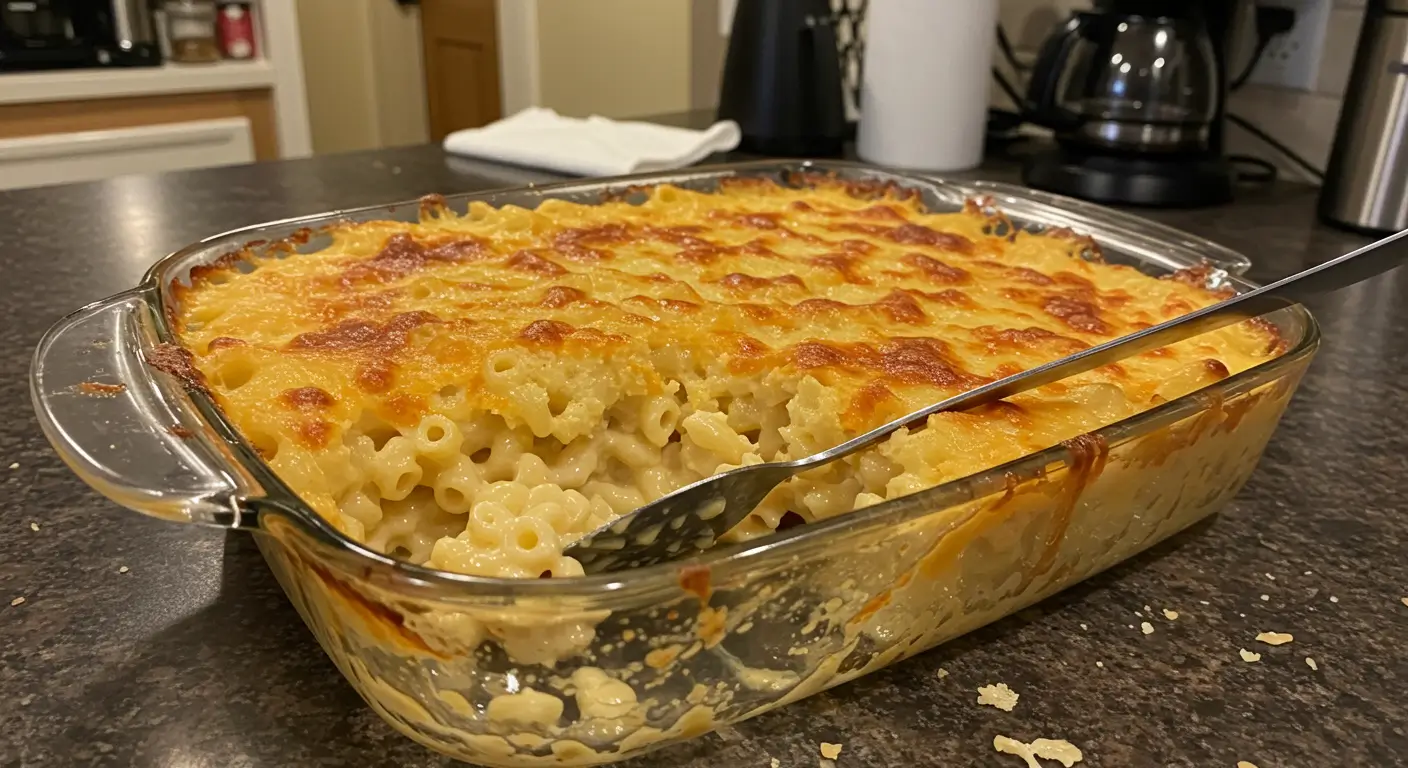
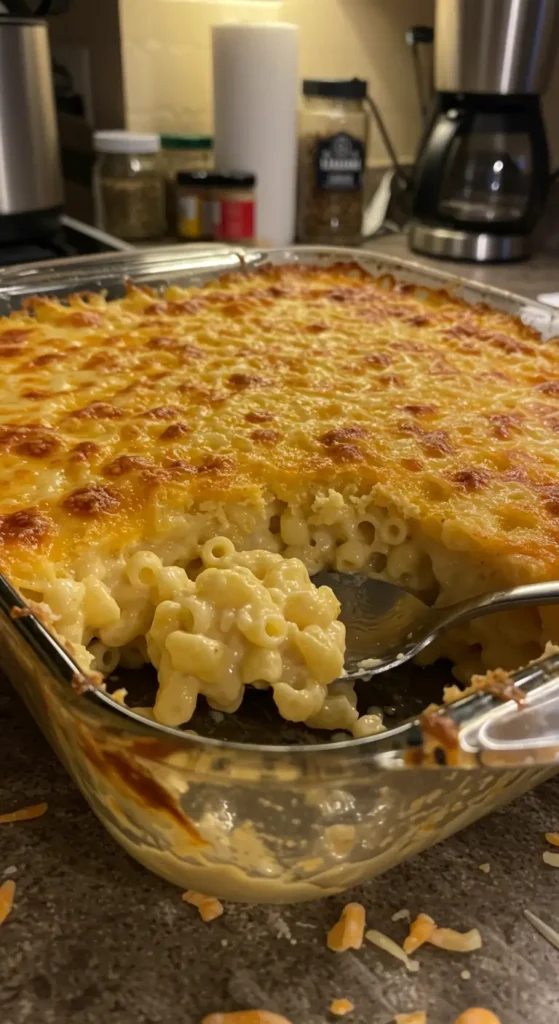
Bake for 25-30 minutes until the top is golden brown and the edges are bubbling. And please, PLEASE resist the urge to keep opening the oven door. I did this constantly during my early attempts and just let all the heat out.
Let it rest for 10 minutes before serving. I know it’s torture, but if you dig in immediately, it’ll be lava hot and won’t hold together properly.
Things I Wish Someone Had Told Me :
Temperature matters. If your milk is too cold when you add it to the roux, the sauce will seize up. Room temperature milk works best.
Don’t overcook the pasta. Seriously. It’s going in the oven, so it needs room to absorb liquid without turning to mush.
Cheese quality is everything. I splurged on good cheese for attempt number four, and wow. The difference was night and day. You don’t need to break the bank, but skip the bargain-basement stuff.
Trust the Dijon. I thought my friend was crazy when she suggested this, but it adds this subtle tang that makes everything taste more complex. You won’t taste “mustard,” but you’ll notice something delicious you can’t quite identify.
When Things Go Wrong (Because They Will) :
If your sauce breaks and looks all grainy: Add a splash of hot milk and whisk aggressively. Sometimes it comes back together.
If it’s too thick: Pasta water is your friend. Add it gradually until you get the consistency you want.
If the top browns too fast: Cover with foil and keep baking until the center is hot and bubbly.
If you burn the bottom (been there): Just scrape off what you can and pretend it never happened. The rest will still be delicious.
My Kids’ Verdict :
My 8-year-old, who literally refused to eat anything that wasn’t chicken nuggets for six months, asked for seconds. My teenager actually looked up from his phone to say it was “actually pretty good.” From him, that’s basically a Michelin star.
Even my husband, who’s usually brutally honest about my cooking experiments, went back for thirds and asked if I could make it again next week. Win.
The Bottom Line :
This isn’t the fastest mac and cheese you’ll ever make. It’s not the healthiest either. But it’s the kind that makes people ask for your recipe, and honestly? That feels pretty great.
The secret isn’t really a secret at all – it’s just taking the time to do each step right. Don’t rush the sauce, don’t cheap out on the cheese, and don’t be afraid to taste and adjust as you go.
Now I’m craving this again. Thanks a lot, brain. Guess I know what’s for dinner tomorrow.
Happy cooking! (And may your smoke alarms stay quiet) 😊