
Okay, so here’s the thing—I’ve been making birthday cakes for my kids for like eight years now, and I’m gonna be honest with you. Those Pinterest-perfect, towering masterpieces? Yeah, they’re beautiful and all, but who has time for that on a Tuesday night when you suddenly remember tomorrow is little Emma’s birthday party?
Last month, I tried making one of those fancy three-layer cakes I saw online. Disaster. Complete disaster. The middle layer slid right off because I didn’t let it cool enough (rookie mistake), and I ended up with what looked like a cake avalanche. My 6-year-old took one look at it and said, “Mom, did the cake have an accident?”
That’s when I decided to embrace the small cake life. And you know what? Best decision ever.
Table of Contents
Why Small Cakes Are Actually Perfect :
Look, I’m not just saying this to make myself feel better about my Pinterest failures. Small birthday cakes are genuinely amazing for so many reasons. First off, they’re way less intimidating to make. When you’re looking at a recipe that needs six eggs and three cups of flour, it feels like committing to a relationship. But a small cake? That’s like a fun first date with baking.
My neighbor Sarah—you know the one who somehow makes everything look effortless—she swears by small cakes too. “Less waste, less stress, and honestly? The kids get just as excited,” she told me while we were both frantically trying to scrape frosting off our kitchen counters last weekend.
And here’s something I discovered by accident: small cakes actually taste better. I think it’s because you’re not dealing with massive amounts of batter that might not cook evenly. Plus, you can make multiple flavors without going completely insane.
My Go-To Small Birthday Cake Recipe :
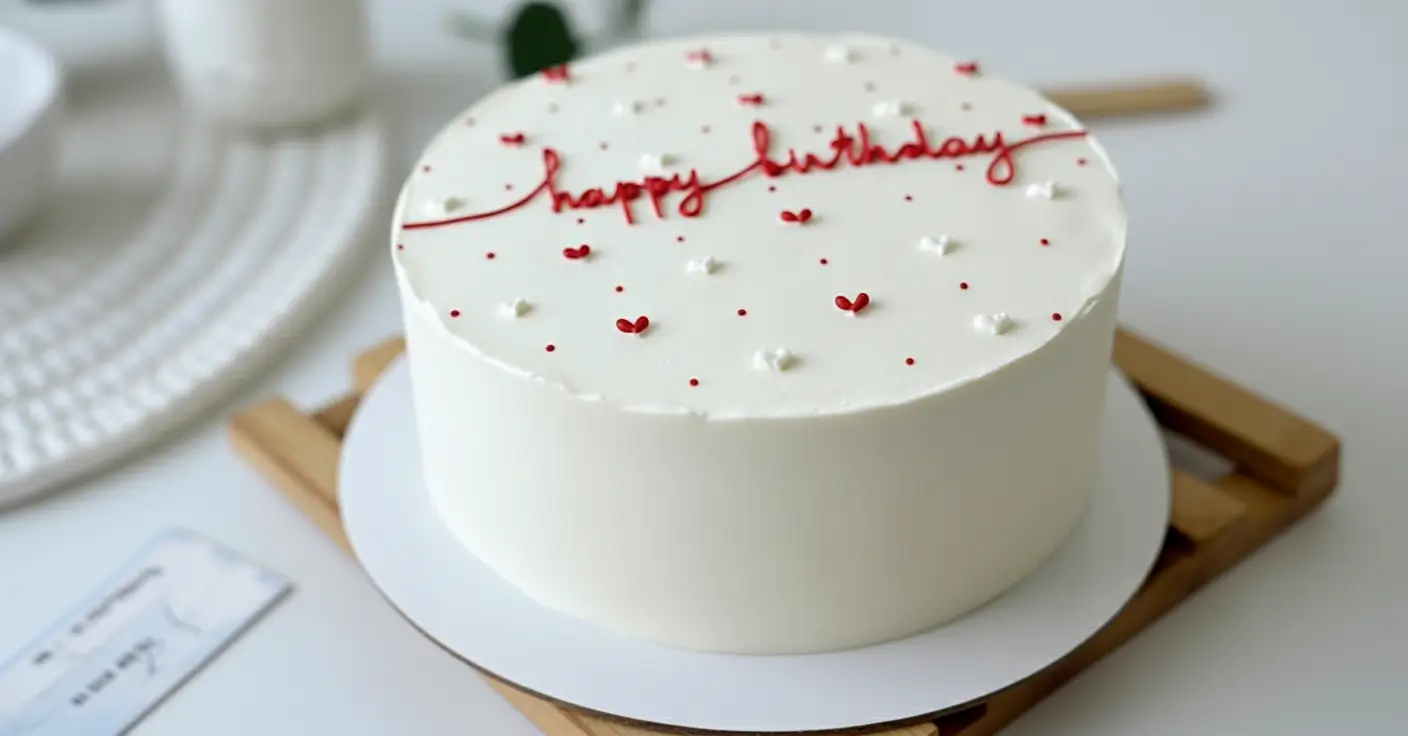
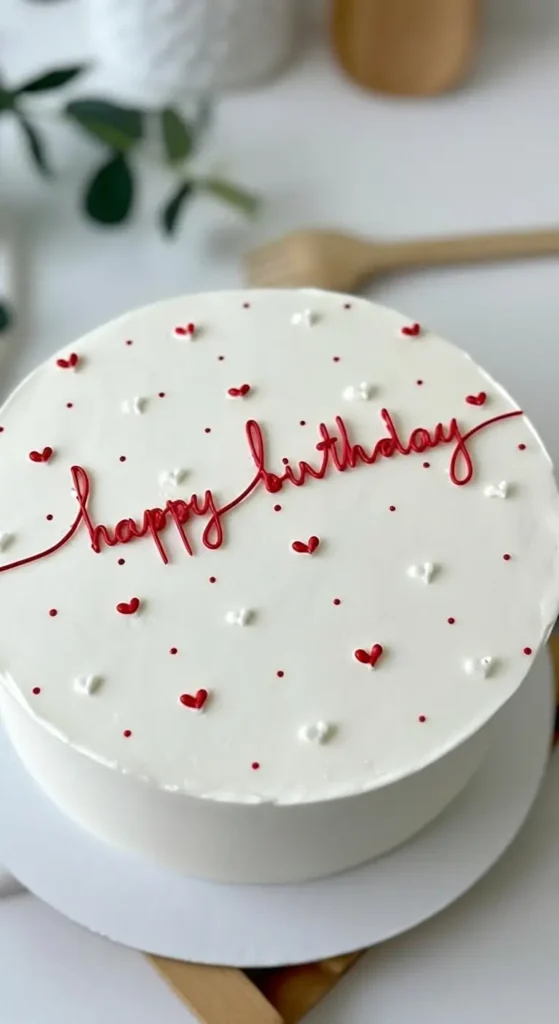
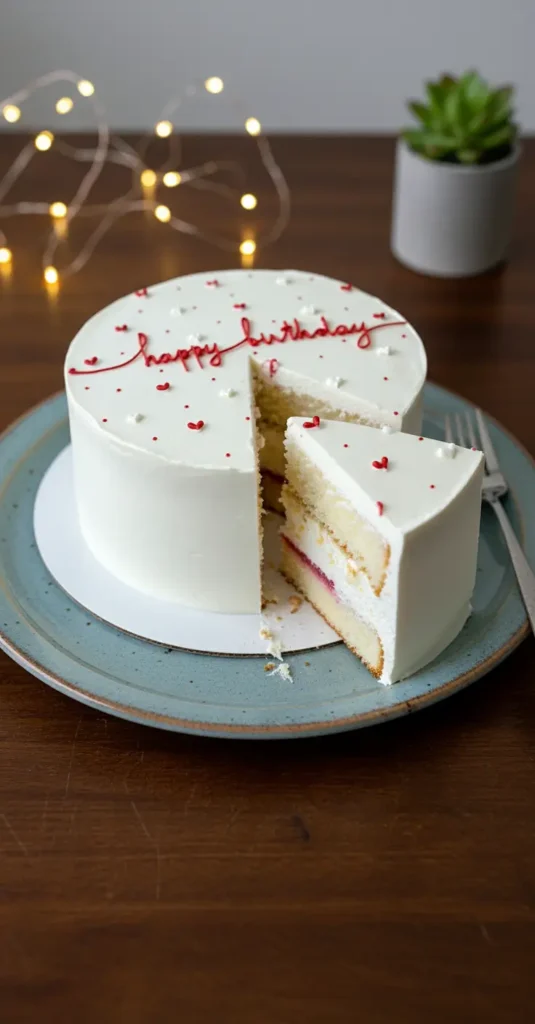
This recipe has saved my sanity more times than I can count. It makes one 6-inch round cake, perfect for 4-6 people, or you can double it for two layers. I’ve made this probably thirty times in the past year (yes, we have a lot of birthdays in our friend group).
What You’ll Need:
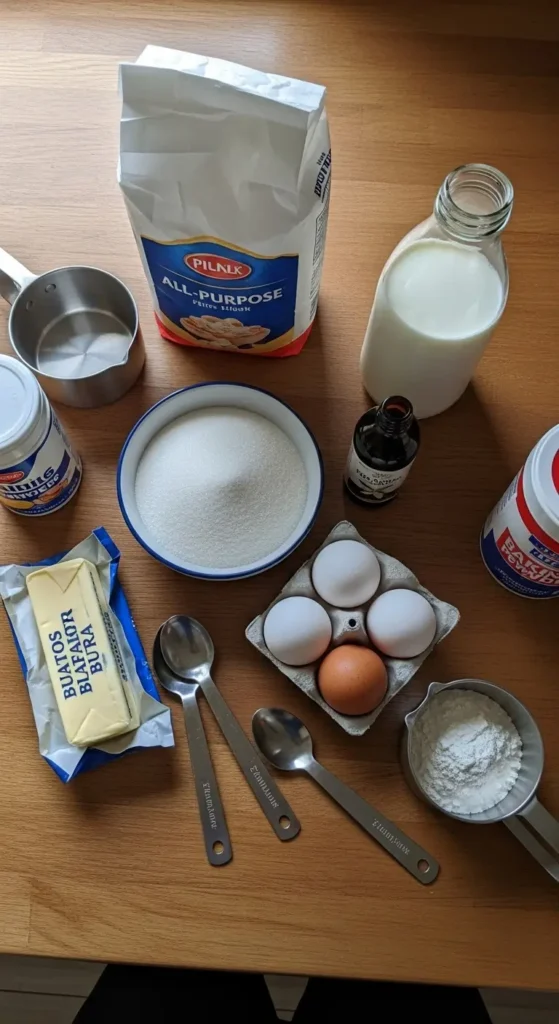
- 1 1/3 cups all-purpose flour (don’t sift it, life’s too short)
- 1 cup granulated sugar
- 1/3 cup unsalted butter, softened (or just zap it in the microwave for 10 seconds if you forgot to take it out)
- 1 1/2 teaspoons baking powder
- 1/2 teaspoon salt
- 2/3 cup milk (whole milk works best, but I’ve used 2% when that’s all I had)
- 1 large egg
- 1 teaspoon vanilla extract (the real stuff, not the fake vanilla—trust me on this one)
Now, here’s where it gets fun. You can add:
- 1/4 cup cocoa powder for chocolate (reduce flour by 1/4 cup)
- Lemon zest for citrus lovers
- 1/2 teaspoon almond extract instead of vanilla (my secret weapon)
- A handful of sprinkles mixed into the batter because why not?
The Process (Don’t Panic):
- Preheat your oven to 350°F. I always forget this step and then stand around tapping my foot for 10 minutes waiting for the oven to heat up. Don’t be like me.
- Grease your 6-inch pan. I use butter and then dust it with flour. Some people use cooking spray, but I’ve had cakes stick with spray, so butter it is. If you don’t have a 6-inch pan, an 8-inch works too—just watch the baking time.
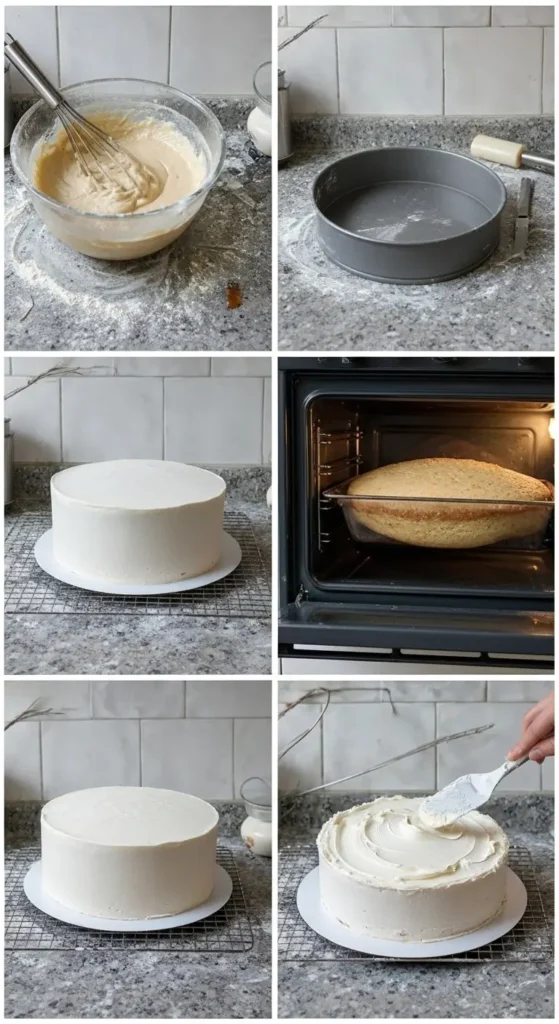
- Mix all the dry ingredients in a bowl. Flour, sugar, baking powder, salt. Whisk them together. This is therapeutic, I promise.
- In another bowl, cream the butter until it’s fluffy. This takes about 3-4 minutes with an electric mixer. If you don’t have one, you can do it by hand, but your arm will hate you.
- Add the egg, milk, and vanilla to the butter. Mix it until combined. It might look a little weird and lumpy at this point. That’s normal. My first few attempts, I thought I’d ruined everything when it looked chunky.
- Slowly add the dry ingredients. Here’s the key—and I cannot stress this enough—mix until JUST combined. Don’t overmix! I learned this the hard way when I made what I now call “birthday hockey pucks.”
- Pour into your prepared pan and smooth the top with a spatula.
- Bake for 25-30 minutes. Start checking at 20 minutes with a toothpick. When it comes out clean or with just a few moist crumbs, you’re done.
Actually, you know what? Let me share something that completely changed my cake game. I used to always overbake because I was paranoid about undercooked cake. But slightly underbaked is infinitely better than dry cake. The cake will continue cooking a bit as it cools in the pan.
Frosting That Won’t Make You Cry :
Buttercream can be intimidating, but this version is basically foolproof. I’ve made it while simultaneously helping with homework and referee-ing sibling arguments, so you know it’s simple.
Simple Vanilla Buttercream:
- 1/2 cup butter, softened
- 2-3 cups powdered sugar (start with 2, add more if needed)
- 2-4 tablespoons milk or cream
- 1 teaspoon vanilla
- Pinch of salt (seriously, don’t skip this)
Beat the butter until fluffy, then gradually add powdered sugar. Add milk one tablespoon at a time until you get the consistency you want. Taste as you go—this is the fun part.
For chocolate frosting, add 1/4 cup cocoa powder. For strawberry, add a few tablespoons of strawberry jam. Last week, my 4-year-old insisted on “purple frosting,” so I added a tiny bit of food coloring. Sometimes you gotta pick your battles.
Creative Ideas That Actually Work :
Here’s where I get a little excited because I’ve tried SO many variations of this basic recipe:
The “Fancy” Version: Add lemon zest to the cake and make cream cheese frosting instead of buttercream. Sounds complicated but it’s just cream cheese, butter, powdered sugar, and vanilla. Tastes like you went to culinary school.
Chocolate Lovers: Make the chocolate version and add mini chocolate chips to the batter. Top with chocolate frosting and more mini chips. My chocolate-obsessed nephew asks for this specifically every year.
Birthday Cake Flavor: This sounds weird, but add extra vanilla extract and rainbow sprinkles to the batter. It literally tastes like birthday cake. I don’t know why this works, but it does.
Funfetti Supreme: Regular cake with sprinkles in the batter AND vanilla frosting with more sprinkles on top. It’s excessive and perfect.
Oh, and here’s a pro tip I wish someone had told me years ago: you can make this cake in cupcake form too. Same recipe, just divide between 8-10 cupcake liners and bake for 18-22 minutes. Sometimes individual cupcakes are actually better than trying to slice a cake for a group of excited kids wielding plastic forks.
Things I’ve Learned :
Room temperature ingredients matter. I used to ignore this because who plans ahead? But cold eggs and milk don’t mix well with butter. If you’re like me and forget to take things out ahead of time, put eggs in warm water for 5 minutes and microwave milk for 20 seconds.
Don’t open the oven door too early. I know you want to check on it, but resist the urge until at least 20 minutes have passed. I’ve collapsed more cakes than I care to admit by being impatient.
Cool completely before frosting. I repeat: COMPLETELY. Warm cake + frosting = melty disaster. I usually make the cake the night before parties now because I have zero patience.
Taste your frosting. This seems obvious, but I can’t tell you how many times I’ve made frosting that was too sweet or not sweet enough. Adjust as you go. More powdered sugar for sweeter, more milk for thinner, more butter for richer.
Keep it simple. The most successful cakes I’ve made have been the simplest ones. Kids don’t care if your frosting roses look perfect. They care that it tastes good and has enough sprinkles.
When Things Go Wrong :
Let’s be real—baking isn’t always Instagram-worthy. I’ve had cakes that stuck to the pan (grease that sucker properly), frosting that was too thin (more powdered sugar), and decorations that looked like a craft explosion.
But here’s what I’ve learned: kids don’t care. Adults don’t care as much as you think they do. Last month, I made a cake where the frosting looked like it was applied by a toddler having a sugar crash. Everyone still asked for seconds.
If your cake comes out of the pan in pieces, call it a “rustic” cake and serve it in bowls with ice cream. If your frosting is too thin, call it a glaze. If it’s too thick, warm it up slightly and call it fudge frosting.
The Real Secret :
You know what makes a birthday cake special? It’s not perfect piping or fancy decorations. It’s the fact that you made it with love for someone you care about. My kids don’t remember the Pinterest fails or the lopsided layers. They remember that Mom made them a special cake.
My 8-year-old still talks about the “best cake ever” I made him last year. Want to know what made it so special? I let him help measure ingredients and lick the spoon. The cake itself was pretty standard, but the memory was perfect.
So there you have it—my not-so-secret guide to small birthday cakes that actually work. They’re simple, forgiving, and way more achievable than those three-layer monsters you see online. Plus, there’s something really satisfying about making a cake that’s just the right size.
Try this recipe, make it your own, and don’t stress about perfection. The birthday person will be happy just knowing you cared enough to make something special. And if all else fails, there’s always ice cream to cover up any imperfections!
Happy baking! (And may your smoke alarms stay quiet) 🎂